> ## Documentation Index
> Fetch the complete documentation index at: https://docs.portkey.ai/docs/llms.txt
> Use this file to discover all available pages before exploring further.
# HoneyHive
> Integrate HoneyHive observability with Portkey's AI gateway for comprehensive LLM monitoring and advanced routing capabilities
HoneyHive is a comprehensive AI observability platform that helps you monitor, evaluate, and improve your LLM applications. When combined with Portkey, you get powerful observability features alongside Portkey's advanced AI gateway capabilities.
This integration allows you to:
* Automatically trace all LLM requests through Portkey's gateway
* Use Portkey's 250+ LLM providers with HoneyHive observability
* Implement advanced features like caching, fallbacks, and load balancing
* Maintain detailed traces and analytics in both platforms
## Quick Start Integration
HoneyHive automatically traces requests to popular LLM providers, making the integration with Portkey seamless. Simply initialize HoneyHive and point your LLM clients to Portkey's gateway.
### Installation
```bash theme={"system"}
pip install portkey-ai honeyhive openai
```
### Basic Setup
```python theme={"system"}
from openai import OpenAI
from honeyhive import HoneyHiveTracer, trace
# Initialize HoneyHive tracer at the beginning of your application
HoneyHiveTracer.init(
api_key='YOUR_HONEYHIVE_API_KEY',
project='your-project-name',
source='production', # Optional: dev, staging, production
session_name='Portkey Integration' # Optional
)
# Create OpenAI client pointing to Portkey
client = OpenAI(
api_key="YOUR_PORTKEY_API_KEY",
base_url="https://api.portkey.ai/v1"
)
# Make requests - automatically traced by HoneyHive
response = client.chat.completions.create(
model="@openai-provider-slug/gpt-4o-mini",
messages=[{"role": "user", "content": "Hello, world!"}]
)
print(response.choices[0].message.content)
```
HoneyHive automatically traces all requests to popular LLM providers, so you get observability data without additional configuration.
## Using Portkey Features with HoneyHive
### 1. Trace Functions with @trace Decorator
Use HoneyHive's `@trace` decorator to monitor specific functions:
```python theme={"system"}
@trace
def call_openai():
client = OpenAI(
api_key="YOUR_PORTKEY_API_KEY",
base_url="https://api.portkey.ai/v1"
)
completion = client.chat.completions.create(
model="@openai-provider-slug/gpt-4o-mini",
messages=[{"role": "user", "content": "What is the meaning of life?"}]
)
return completion.choices[0].message.content
# Call the traced function
result = call_openai()
```
### 2. Multiple Providers
Switch between 250+ LLM providers while maintaining HoneyHive observability:
```python theme={"system"}
@trace
def call_openai():
client = OpenAI(
api_key="YOUR_PORTKEY_API_KEY",
base_url="https://api.portkey.ai/v1"
)
return client.chat.completions.create(
model="@openai-provider-slug/gpt-4o-mini",
messages=[{"role": "user", "content": "Hello!"}]
)
```
```python theme={"system"}
@trace
def call_anthropic():
client = OpenAI(
api_key="YOUR_PORTKEY_API_KEY",
base_url="https://api.portkey.ai/v1"
)
return client.chat.completions.create(
model="@anthropic-provider-slug/claude-3-sonnet-20240229",
messages=[{"role": "user", "content": "Hello!"}]
)
```
### 3. Advanced Routing with Configs
Use Portkey's config system for advanced features while tracking in HoneyHive:
```python theme={"system"}
@trace
def advanced_llm_call():
# Reference a saved config from Portkey dashboard
client = OpenAI(
api_key="YOUR_PORTKEY_API_KEY",
base_url="https://api.portkey.ai/v1"
)
return client.chat.completions.create(
model="@config-slug/model-name", # Your saved config ID
messages=[{"role": "user", "content": "Analyze this data..."}]
)
```
Example config for fallback between providers:
```json theme={"system"}
{
"strategy": {
"mode": "fallback"
},
"targets": [
{
"provider": "openai",
"api_key": "YOUR_OPENAI_KEY",
"override_params": {"model": "gpt-4o"}
},
{
"provider": "anthropic",
"api_key": "YOUR_ANTHROPIC_KEY",
"override_params": {"model": "claude-3-opus-20240229"}
}
]
}
```
### 4. Caching for Cost Optimization
Enable caching to reduce costs while maintaining full observability:
```python theme={"system"}
@trace
def cached_llm_call():
client = OpenAI(
api_key="YOUR_PORTKEY_API_KEY",
base_url="https://api.portkey.ai/v1"
)
return client.chat.completions.create(
model="@cache-config-slug/gpt-4o-mini",
messages=[{"role": "user", "content": "What is machine learning?"}]
)
```
### 5. Custom Metadata and Tracing
Add custom metadata visible in both HoneyHive and Portkey:
```python theme={"system"}
@trace
def contextualized_llm_call(user_id, query):
client = OpenAI(
api_key="YOUR_PORTKEY_API_KEY",
base_url="https://api.portkey.ai/v1"
)
return client.chat.completions.create(
model="@openai-provider-slug/gpt-4o-mini",
messages=[{"role": "user", "content": query}],
# Metadata can be passed directly in the request
user=user_id
)
```
Automatically switch to backup targets if the primary target fails.
Route requests to different targets based on specified conditions.
Distribute requests across multiple targets based on defined weights.
Enable caching of responses to improve performance and reduce costs.
Automatic retry handling with exponential backoff for failed requests
Set and manage budget limits across teams and departments. Control costs with granular budget limits and usage tracking.
## Observability Features
With this integration, you get:
### In HoneyHive:
* Automatic request/response tracing
* Function-level performance metrics
* Session-based analytics
* Custom event tracking
* Error monitoring and debugging
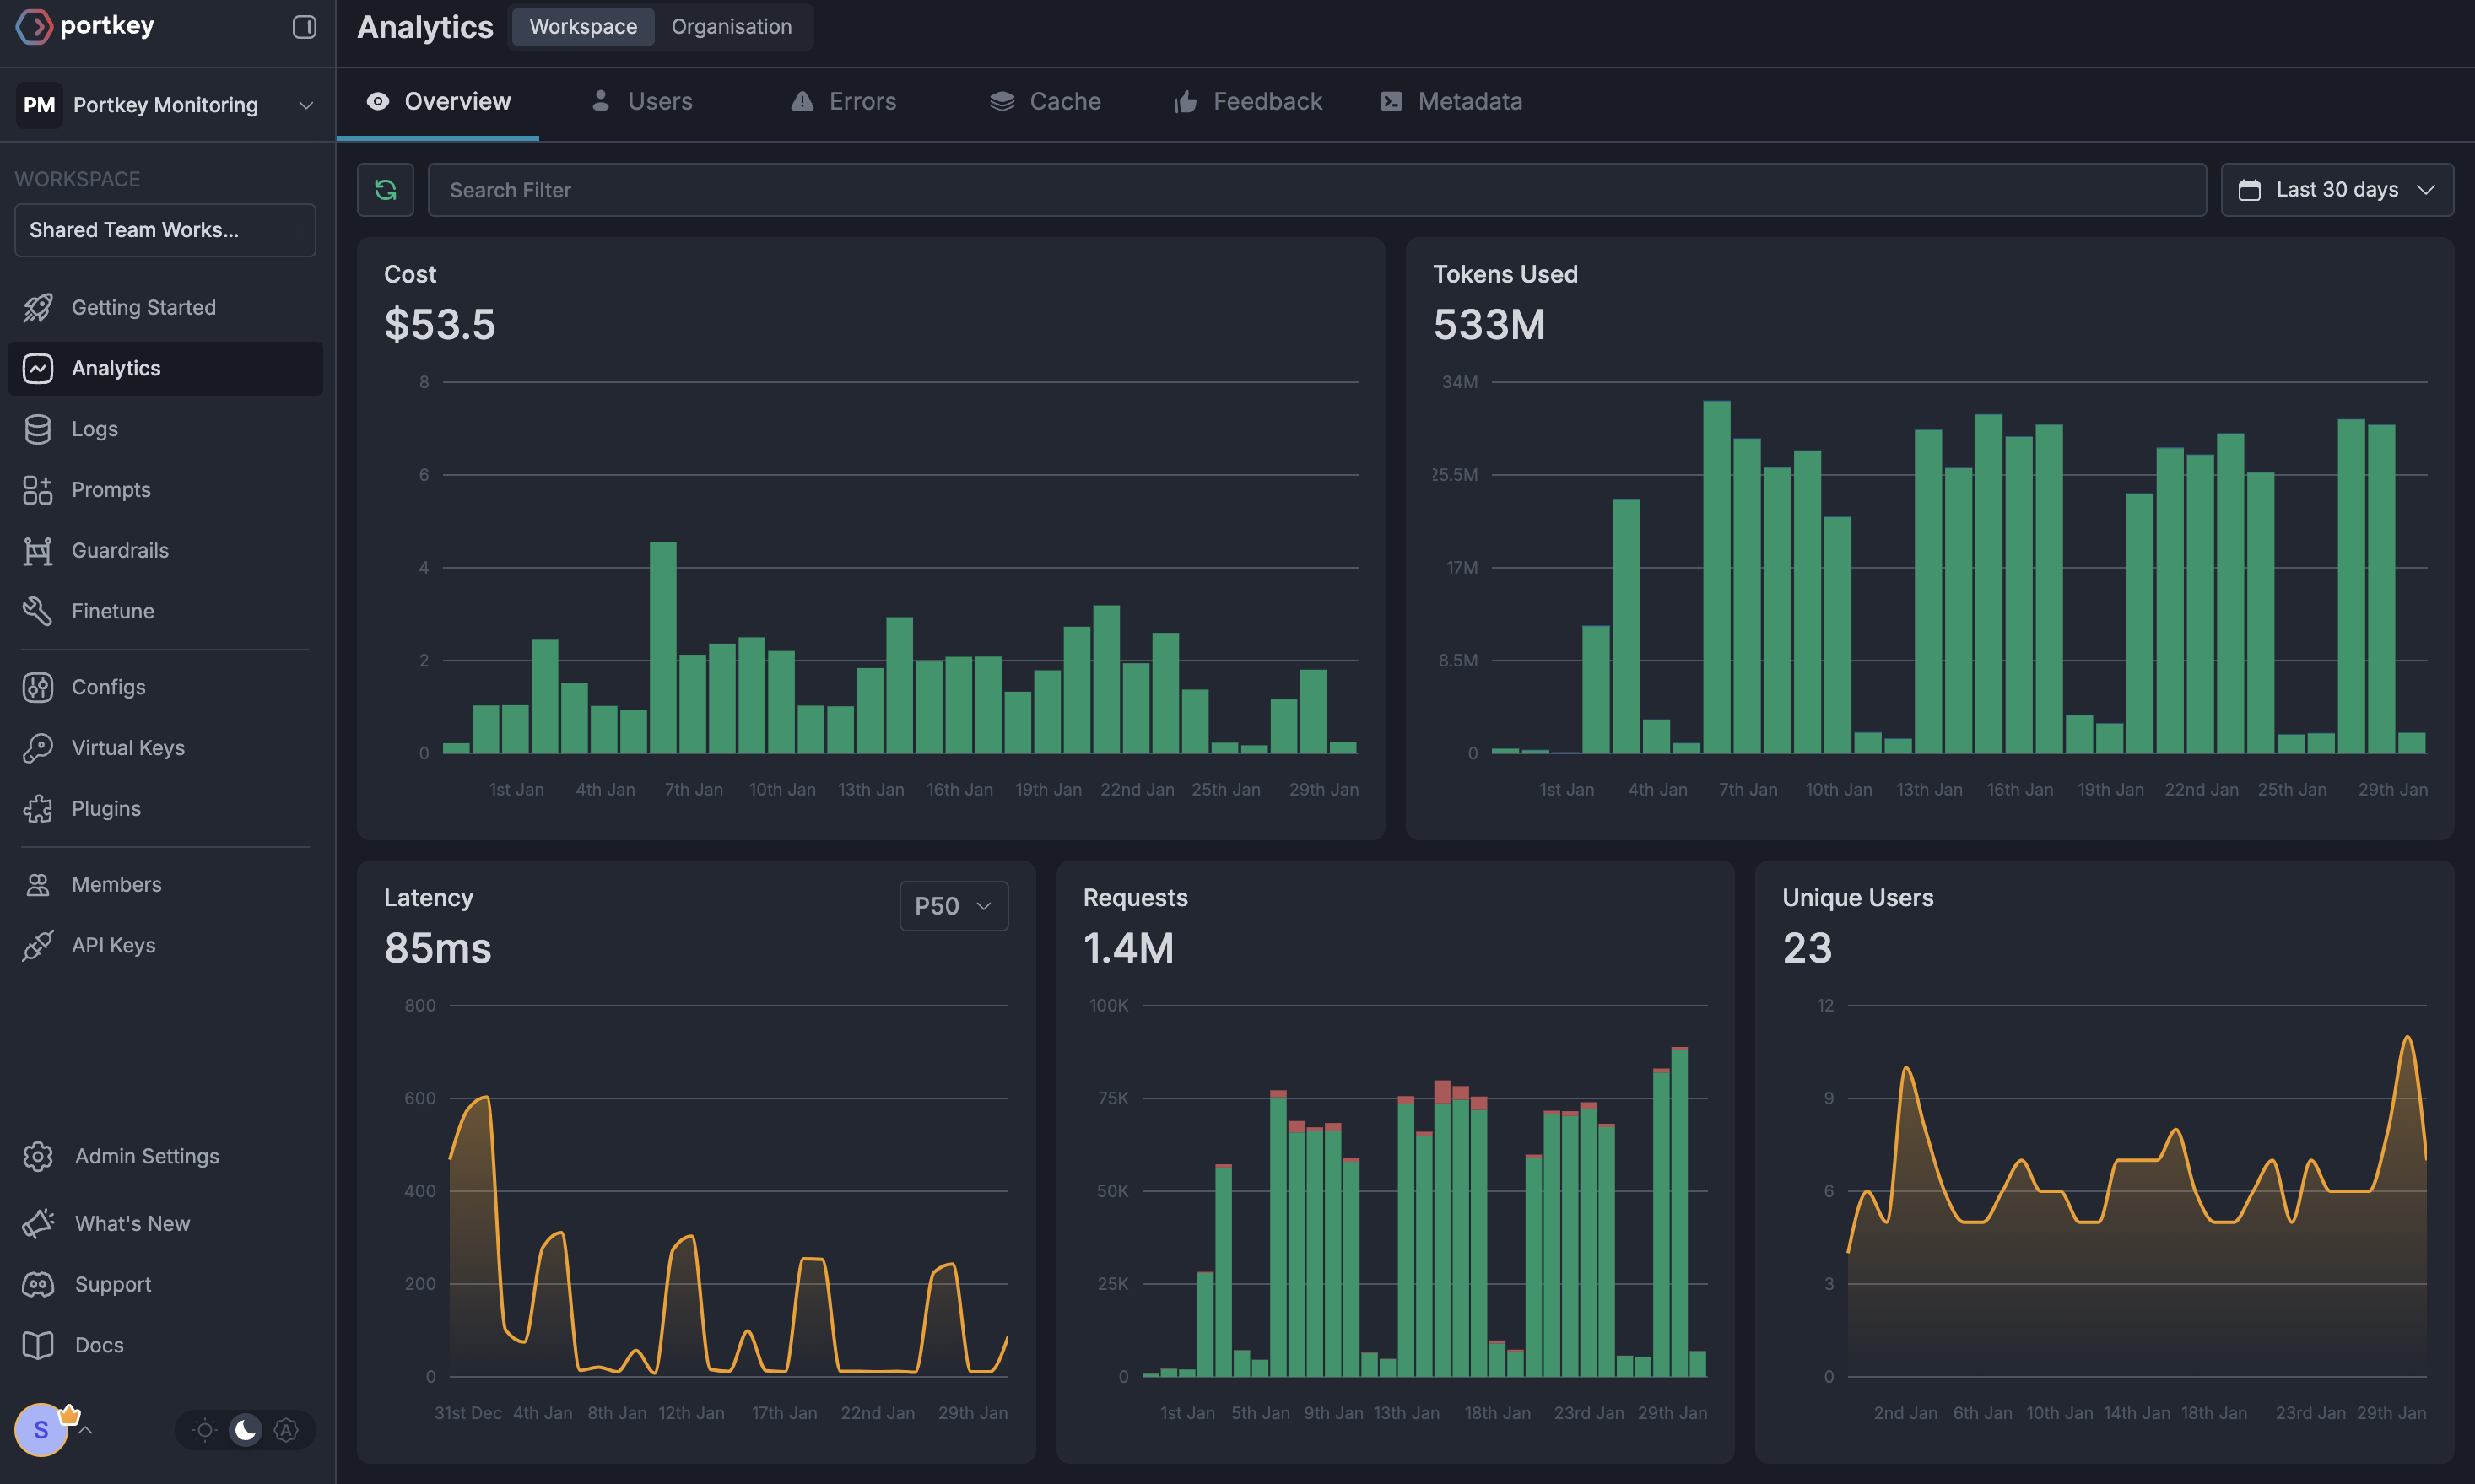
### In Portkey:
* Request logs with provider details
* Advanced analytics across providers
* Cost tracking and budgets
* Performance metrics
* Custom dashboards
* Token usage analytics
 ## Migration Guide
If you're already using HoneyHive with OpenAI, migrating to use Portkey is simple:
```python Before theme={"system"}
from openai import OpenAI
from honeyhive import HoneyHiveTracer, trace
HoneyHiveTracer.init(
api_key='YOUR_HONEYHIVE_API_KEY',
project='my-project'
)
@trace
def call_openai():
client = OpenAI(api_key="YOUR_OPENAI_KEY")
return client.chat.completions.create(
model="gpt-4",
messages=[{"role": "user", "content": "Hello!"}]
)
```
```python After theme={"system"}
from openai import OpenAI
from honeyhive import HoneyHiveTracer, trace
HoneyHiveTracer.init(
api_key='YOUR_HONEYHIVE_API_KEY',
project='my-project'
)
@trace
def call_openai():
client = OpenAI(
api_key="YOUR_PORTKEY_API_KEY",
base_url="https://api.portkey.ai/v1"
)
return client.chat.completions.create(
model="@openai-provider-slug/gpt-4",
messages=[{"role": "user", "content": "Hello!"}]
)
```
## Resources
* [HoneyHive Documentation](https://docs.honeyhive.ai)
* [Portkey AI Gateway Guide](/product/ai-gateway)
* [Portkey Python SDK Reference](/api-reference/sdk)
For enterprise support and custom features, contact our [enterprise team](https://calendly.com/portkey-ai).
## Migration Guide
If you're already using HoneyHive with OpenAI, migrating to use Portkey is simple:
```python Before theme={"system"}
from openai import OpenAI
from honeyhive import HoneyHiveTracer, trace
HoneyHiveTracer.init(
api_key='YOUR_HONEYHIVE_API_KEY',
project='my-project'
)
@trace
def call_openai():
client = OpenAI(api_key="YOUR_OPENAI_KEY")
return client.chat.completions.create(
model="gpt-4",
messages=[{"role": "user", "content": "Hello!"}]
)
```
```python After theme={"system"}
from openai import OpenAI
from honeyhive import HoneyHiveTracer, trace
HoneyHiveTracer.init(
api_key='YOUR_HONEYHIVE_API_KEY',
project='my-project'
)
@trace
def call_openai():
client = OpenAI(
api_key="YOUR_PORTKEY_API_KEY",
base_url="https://api.portkey.ai/v1"
)
return client.chat.completions.create(
model="@openai-provider-slug/gpt-4",
messages=[{"role": "user", "content": "Hello!"}]
)
```
## Resources
* [HoneyHive Documentation](https://docs.honeyhive.ai)
* [Portkey AI Gateway Guide](/product/ai-gateway)
* [Portkey Python SDK Reference](/api-reference/sdk)
For enterprise support and custom features, contact our [enterprise team](https://calendly.com/portkey-ai).