> ## Documentation Index
> Fetch the complete documentation index at: https://docs.portkey.ai/docs/llms.txt
> Use this file to discover all available pages before exploring further.
# Anyscale
> Integrate Anyscale endpoints with Portkey seamlessly and make your OSS models production-ready
Portkey's suite of features - AI gateway, observability, prompt management, and continuous fine-tuning are all enabled for the OSS models (Llama2, Mistral, Zephyr, and more) available on Anyscale endpoints.
Provider Slug. `anyscale`
## Portkey SDK Integration with Anyscale
### 1. Install the Portkey SDK
```sh theme={"system"}
npm install --save portkey-ai
```
```sh theme={"system"}
pip install portkey-ai
```
### 2. Initialize Portkey with Anyscale Virtual Key
To use Anyscale with Portkey, [get your Anyscale API key from here](https://console.anyscale.com/v2/api-keys), then add it to Portkey to create the virtual key.
```js theme={"system"}
import Portkey from 'portkey-ai'
const portkey = new Portkey({
apiKey: "PORTKEY_API_KEY", // defaults to process.env["PORTKEY_API_KEY"]
virtualKey: "ANYSCALE_VIRTUAL_KEY" // Your Anyscale Virtual Key
})
```
```python theme={"system"}
from portkey_ai import Portkey
portkey = Portkey(
api_key="PORTKEY_API_KEY", # Replace with your Portkey API key
virtual_key="ANYSCALE_VIRTUAL_KEY" # Replace with your virtual key for Anyscale
)
```
### **3. Invoke Chat Completions with Anyscale**
```js theme={"system"}
const chatCompletion = await portkey.chat.completions.create({
messages: [{ role: 'user', content: 'Say this is a test' }],
model: 'mistralai/Mistral-7B-Instruct-v0.1',
});
console.log(chatCompletion.choices);
```
```python theme={"system"}
completion = portkey.chat.completions.create(
messages= [{ "role": 'user', "content": 'Say this is a test' }],
model= 'mistralai/Mistral-7B-Instruct-v0.1'
)
print(completion.choices)
```
### Directly Using Portkey's REST API
Alternatively, you can also directly call Anyscale models through Portkey's REST API - it works exactly the same as OpenAI API, with 2 differences:
1. You send your requests to Portkey's complete Gateway URL `https://api.portkey.ai/v1/chat/completions`
2. You have to add Portkey specific headers.
1. `x-portkey-api-key` for sending your Portkey API Key
2. `x-portkey-virtual-key` for sending your provider's virtual key (Alternatively, if you are not using Virtual keys, you can send your Auth header for your provider, and pass the `x-portkey-provider` header along with it)
```sh theme={"system"}
curl https://api.portkey.ai/v1/chat/completions \
-H "Content-Type: application/json" \
-H "Authorization: Bearer $ANYSCALE_API_KEY" \
-H "x-portkey-api-key: $PORTKEY_API_KEY" \
-H "x-portkey-provider: anyscale" \
-d '{
"model": "mistralai/Mistral-7B-Instruct-v0.1",
"messages": [{"role": "user","content": "Hello!"}]
}'
```
[List of all possible Portkey headers](/api-reference/portkey-sdk-client#parameters).
## Using the OpenAI Python or Node SDKs for Anyscale
You can also use the `baseURL` param in the standard OpenAI SDKs and make calls to Portkey + Anyscale directly from there. Like the Rest API example, you are only required to change the `baseURL` and add `defaultHeaders` to your instance. You can use the Portkey SDK to make it simpler:
```js theme={"system"}
import OpenAI from 'openai'; // We're using the v4 SDK
import { PORTKEY_GATEWAY_URL, createHeaders } from 'portkey-ai'
const anyscale = new OpenAI({
apiKey: 'ANYSCALE_API_KEY',
baseURL: PORTKEY_GATEWAY_URL,
defaultHeaders: createHeaders({
provider: "anyscale",
apiKey: "PORTKEY_API_KEY" // defaults to process.env["PORTKEY_API_KEY"]
})
});
async function main() {
const chatCompletion = await anyscale.chat.completions.create({
messages: [{ role: 'user', content: 'Say this is a test' }],
model: 'mistralai/Mistral-7B-Instruct-v0.1',
});
console.log(chatCompletion.choices);
}
main();
```
```python theme={"system"}
from openai import OpenAI
from portkey_ai import PORTKEY_GATEWAY_URL, createHeaders
anyscale = OpenAI(
api_key="ANYSCALE_API_KEY", # defaults to os.environ.get("OPENAI_API_KEY")
base_url=PORTKEY_GATEWAY_URL,
default_headers=createHeaders(
provider="anyscale",
api_key="PORTKEY_API_KEY" # defaults to os.environ.get("PORTKEY_API_KEY")
)
)
chat_complete = anyscale.chat.completions.create(
model="mistralai/Mistral-7B-Instruct-v0.1",
messages=[{"role": "user", "content": "Say this is a test"}],
)
print(chat_complete.choices[0].message.content)
```
This request will be automatically logged by Portkey. You can view this in your logs dashboard. Portkey logs the tokens utilized, execution time, and cost for each request. Additionally, you can delve into the details to review the precise request and response data.
## Managing Anyscale Prompts
You can manage all prompts for Anyscale's OSS models in the [Prompt Library](/product/prompt-library). All the current models of Anyscale are supported.
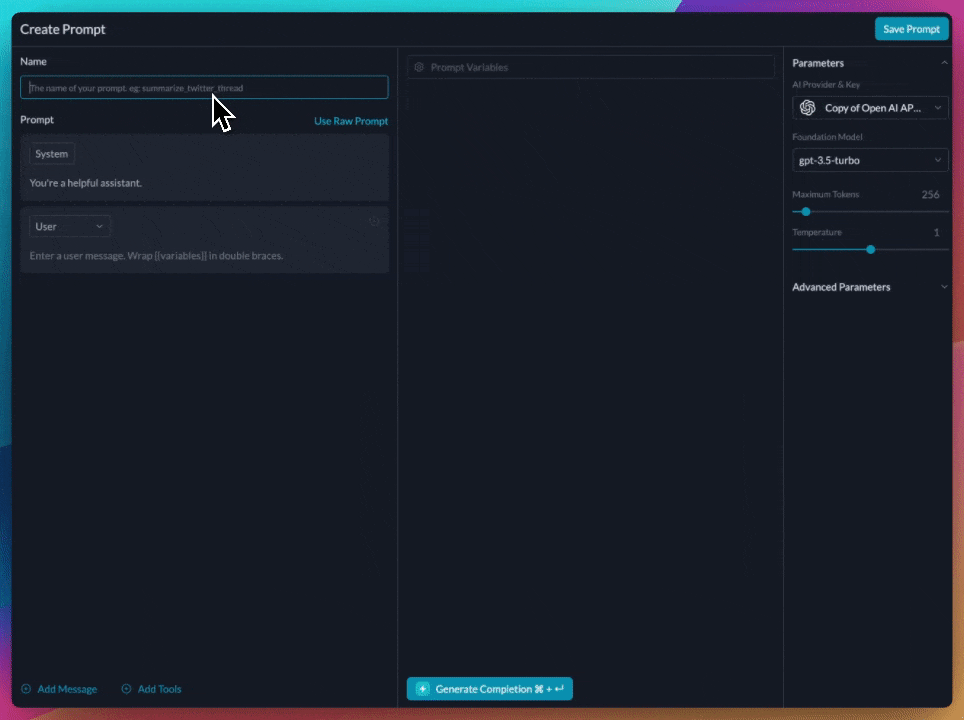
### Creating Prompts
Use the Portkey prompt playground to set variables and try out various model params to get the right output.
 ### Using Prompts
Deploy the prompts using the Portkey SDK or REST API
```js theme={"system"}
import Portkey from 'portkey-ai'
const portkey = new Portkey({
apiKey: "PORTKEY_API_KEY", // defaults to process.env["PORTKEY_API_KEY"]
})
// Make the prompt creation call with the variables
const promptCompletion = await portkey.prompts.completions.create({
promptID: "YOUR_PROMPT_ID",
variables: {
//Required variables for prompt
}
})
```
We can also override the hyperparameters:
```js theme={"system"}
const promptCompletion = await portkey.prompts.completions.create({
promptID: "YOUR_PROMPT_ID",
variables: {
//Required variables for prompt
},
max_tokens: 250,
presence_penalty: 0.2
})
```
```python theme={"system"}
from portkey_ai import Portkey
client = Portkey(
api_key="PORTKEY_API_KEY", # defaults to os.environ.get("PORTKEY_API_KEY")
)
prompt_completion = client.prompts.completions.create(
prompt_id="YOUR_PROMPT_ID",
variables={
#Required variables for prompt
}
)
print(prompt_completion.data)
```
We can also override the hyperparameters:
```python theme={"system"}
prompt_completion = client.prompts.completions.create(
prompt_id="YOUR_PROMPT_ID",
variables={
#Required variables for prompt
},
max_tokens=250,
presence_penalty=0.2
)
print(prompt_completion.data)
```
```sh theme={"system"}
curl -X POST "https://api.portkey.ai/v1/prompts/9218b4e6-52db-41a4-b963-4ee6505ed758/completions" \
-H "Content-Type: application/json" \
-H "x-portkey-api-key: $PORTKEY_API_KEY" \
-d '{
"variables": {
"title": "The impact of AI on middle school teachers",
"num_sections": "5"
},
"max_tokens": 250, # Optional
"presence_penalty": 0.2 # Optional
}'
```
Observe how this streamlines your code readability and simplifies prompt updates via the UI without altering the codebase.
***
## Advanced Use Cases
### Streaming Responses
Portkey supports streaming responses using Server Sent Events (SSE).
```js theme={"system"}
import OpenAI from 'openai';
import { PORTKEY_GATEWAY_URL, createHeaders } from 'portkey-ai'
const anyscale = new OpenAI({
baseURL: PORTKEY_GATEWAY_URL,
defaultHeaders: createHeaders({
mode: "anyscale",
apiKey: "PORTKEY_API_KEY" // defaults to process.env["PORTKEY_API_KEY"]
})
});
async function main() {
const stream = await anyscale.chat.completions.create({
model: 'mistralai/Mistral-7B-Instruct-v0.1',
messages: [{ role: 'user', content: 'Say this is a test' }],
stream: true,
});
for await (const chunk of stream) {
process.stdout.write(chunk.choices[0]?.delta?.content || '');
}
}
main();
```
```python theme={"system"}
from openai import OpenAI
from portkey_ai import PORTKEY_GATEWAY_URL, createHeaders
anyscale = OpenAI(
api_key="ANYSCALE-API-KEY", # defaults to os.environ.get("OPENAI_API_KEY")
base_url=PORTKEY_GATEWAY_URL,
default_headers=createHeaders(
provider="anyscale",
api_key="PORTKEY-API-KEY" # defaults to os.environ.get("PORTKEY_API_KEY")
)
)
chat_complete = anyscale.chat.completions.create(
model="mistralai/Mistral-7B-Instruct-v0.1",
messages=[{"role": "user", "content": "Say this is a test"}],
stream=True
)
for chunk in chat_complete:
print(chunk.choices[0].delta.content, end="", flush=True)
```
### Fine-tuning
Please refer to our fine-tuning guides to take advantage of Portkey's advanced [continuous fine-tuning](/product/autonomous-fine-tuning) capabilities.
### Using Prompts
Deploy the prompts using the Portkey SDK or REST API
```js theme={"system"}
import Portkey from 'portkey-ai'
const portkey = new Portkey({
apiKey: "PORTKEY_API_KEY", // defaults to process.env["PORTKEY_API_KEY"]
})
// Make the prompt creation call with the variables
const promptCompletion = await portkey.prompts.completions.create({
promptID: "YOUR_PROMPT_ID",
variables: {
//Required variables for prompt
}
})
```
We can also override the hyperparameters:
```js theme={"system"}
const promptCompletion = await portkey.prompts.completions.create({
promptID: "YOUR_PROMPT_ID",
variables: {
//Required variables for prompt
},
max_tokens: 250,
presence_penalty: 0.2
})
```
```python theme={"system"}
from portkey_ai import Portkey
client = Portkey(
api_key="PORTKEY_API_KEY", # defaults to os.environ.get("PORTKEY_API_KEY")
)
prompt_completion = client.prompts.completions.create(
prompt_id="YOUR_PROMPT_ID",
variables={
#Required variables for prompt
}
)
print(prompt_completion.data)
```
We can also override the hyperparameters:
```python theme={"system"}
prompt_completion = client.prompts.completions.create(
prompt_id="YOUR_PROMPT_ID",
variables={
#Required variables for prompt
},
max_tokens=250,
presence_penalty=0.2
)
print(prompt_completion.data)
```
```sh theme={"system"}
curl -X POST "https://api.portkey.ai/v1/prompts/9218b4e6-52db-41a4-b963-4ee6505ed758/completions" \
-H "Content-Type: application/json" \
-H "x-portkey-api-key: $PORTKEY_API_KEY" \
-d '{
"variables": {
"title": "The impact of AI on middle school teachers",
"num_sections": "5"
},
"max_tokens": 250, # Optional
"presence_penalty": 0.2 # Optional
}'
```
Observe how this streamlines your code readability and simplifies prompt updates via the UI without altering the codebase.
***
## Advanced Use Cases
### Streaming Responses
Portkey supports streaming responses using Server Sent Events (SSE).
```js theme={"system"}
import OpenAI from 'openai';
import { PORTKEY_GATEWAY_URL, createHeaders } from 'portkey-ai'
const anyscale = new OpenAI({
baseURL: PORTKEY_GATEWAY_URL,
defaultHeaders: createHeaders({
mode: "anyscale",
apiKey: "PORTKEY_API_KEY" // defaults to process.env["PORTKEY_API_KEY"]
})
});
async function main() {
const stream = await anyscale.chat.completions.create({
model: 'mistralai/Mistral-7B-Instruct-v0.1',
messages: [{ role: 'user', content: 'Say this is a test' }],
stream: true,
});
for await (const chunk of stream) {
process.stdout.write(chunk.choices[0]?.delta?.content || '');
}
}
main();
```
```python theme={"system"}
from openai import OpenAI
from portkey_ai import PORTKEY_GATEWAY_URL, createHeaders
anyscale = OpenAI(
api_key="ANYSCALE-API-KEY", # defaults to os.environ.get("OPENAI_API_KEY")
base_url=PORTKEY_GATEWAY_URL,
default_headers=createHeaders(
provider="anyscale",
api_key="PORTKEY-API-KEY" # defaults to os.environ.get("PORTKEY_API_KEY")
)
)
chat_complete = anyscale.chat.completions.create(
model="mistralai/Mistral-7B-Instruct-v0.1",
messages=[{"role": "user", "content": "Say this is a test"}],
stream=True
)
for chunk in chat_complete:
print(chunk.choices[0].delta.content, end="", flush=True)
```
### Fine-tuning
Please refer to our fine-tuning guides to take advantage of Portkey's advanced [continuous fine-tuning](/product/autonomous-fine-tuning) capabilities.
 ### Portkey Features
Portkey supports the complete host of it's functionality via the OpenAI SDK so you don't need to migrate away from it.
Please find more information in the relevant sections:
1. [Add metadata to your requests](/product/observability/metadata)
2. [Add gateway configs to the client or a single request](/product/ai-gateway/configs)
3. [Trace Anyscale requests](/product/observability/traces)
4. [Setup a fallback to Azure OpenAI](/product/ai-gateway/fallbacks)
### Portkey Features
Portkey supports the complete host of it's functionality via the OpenAI SDK so you don't need to migrate away from it.
Please find more information in the relevant sections:
1. [Add metadata to your requests](/product/observability/metadata)
2. [Add gateway configs to the client or a single request](/product/ai-gateway/configs)
3. [Trace Anyscale requests](/product/observability/traces)
4. [Setup a fallback to Azure OpenAI](/product/ai-gateway/fallbacks)