Modify the API key permissions and turn on the toggle for Agent Gateway to enable Agent Gateway for your API key. Create or edit a key on the API Keys page, and enable the
agents.invoke scope when you will invoke agents with that key. For how Portkey API keys and scopes work, see API keys, authentication, and authorization.1
Fetch your server URL
Make use of one of the following agent servers and configure it as the
upstream agent server. This is used to fetch the agent card and authenticate
requests.
Simple A2A Agent with tools and header based authentication
Host your own agent
You can host your own A2A Agent server following the instructions in the
Agent Server
SDK
documentation.
2
Add agent to registry
1
Configure the agent
Access the Agent
Registry and
configure the agent server URL.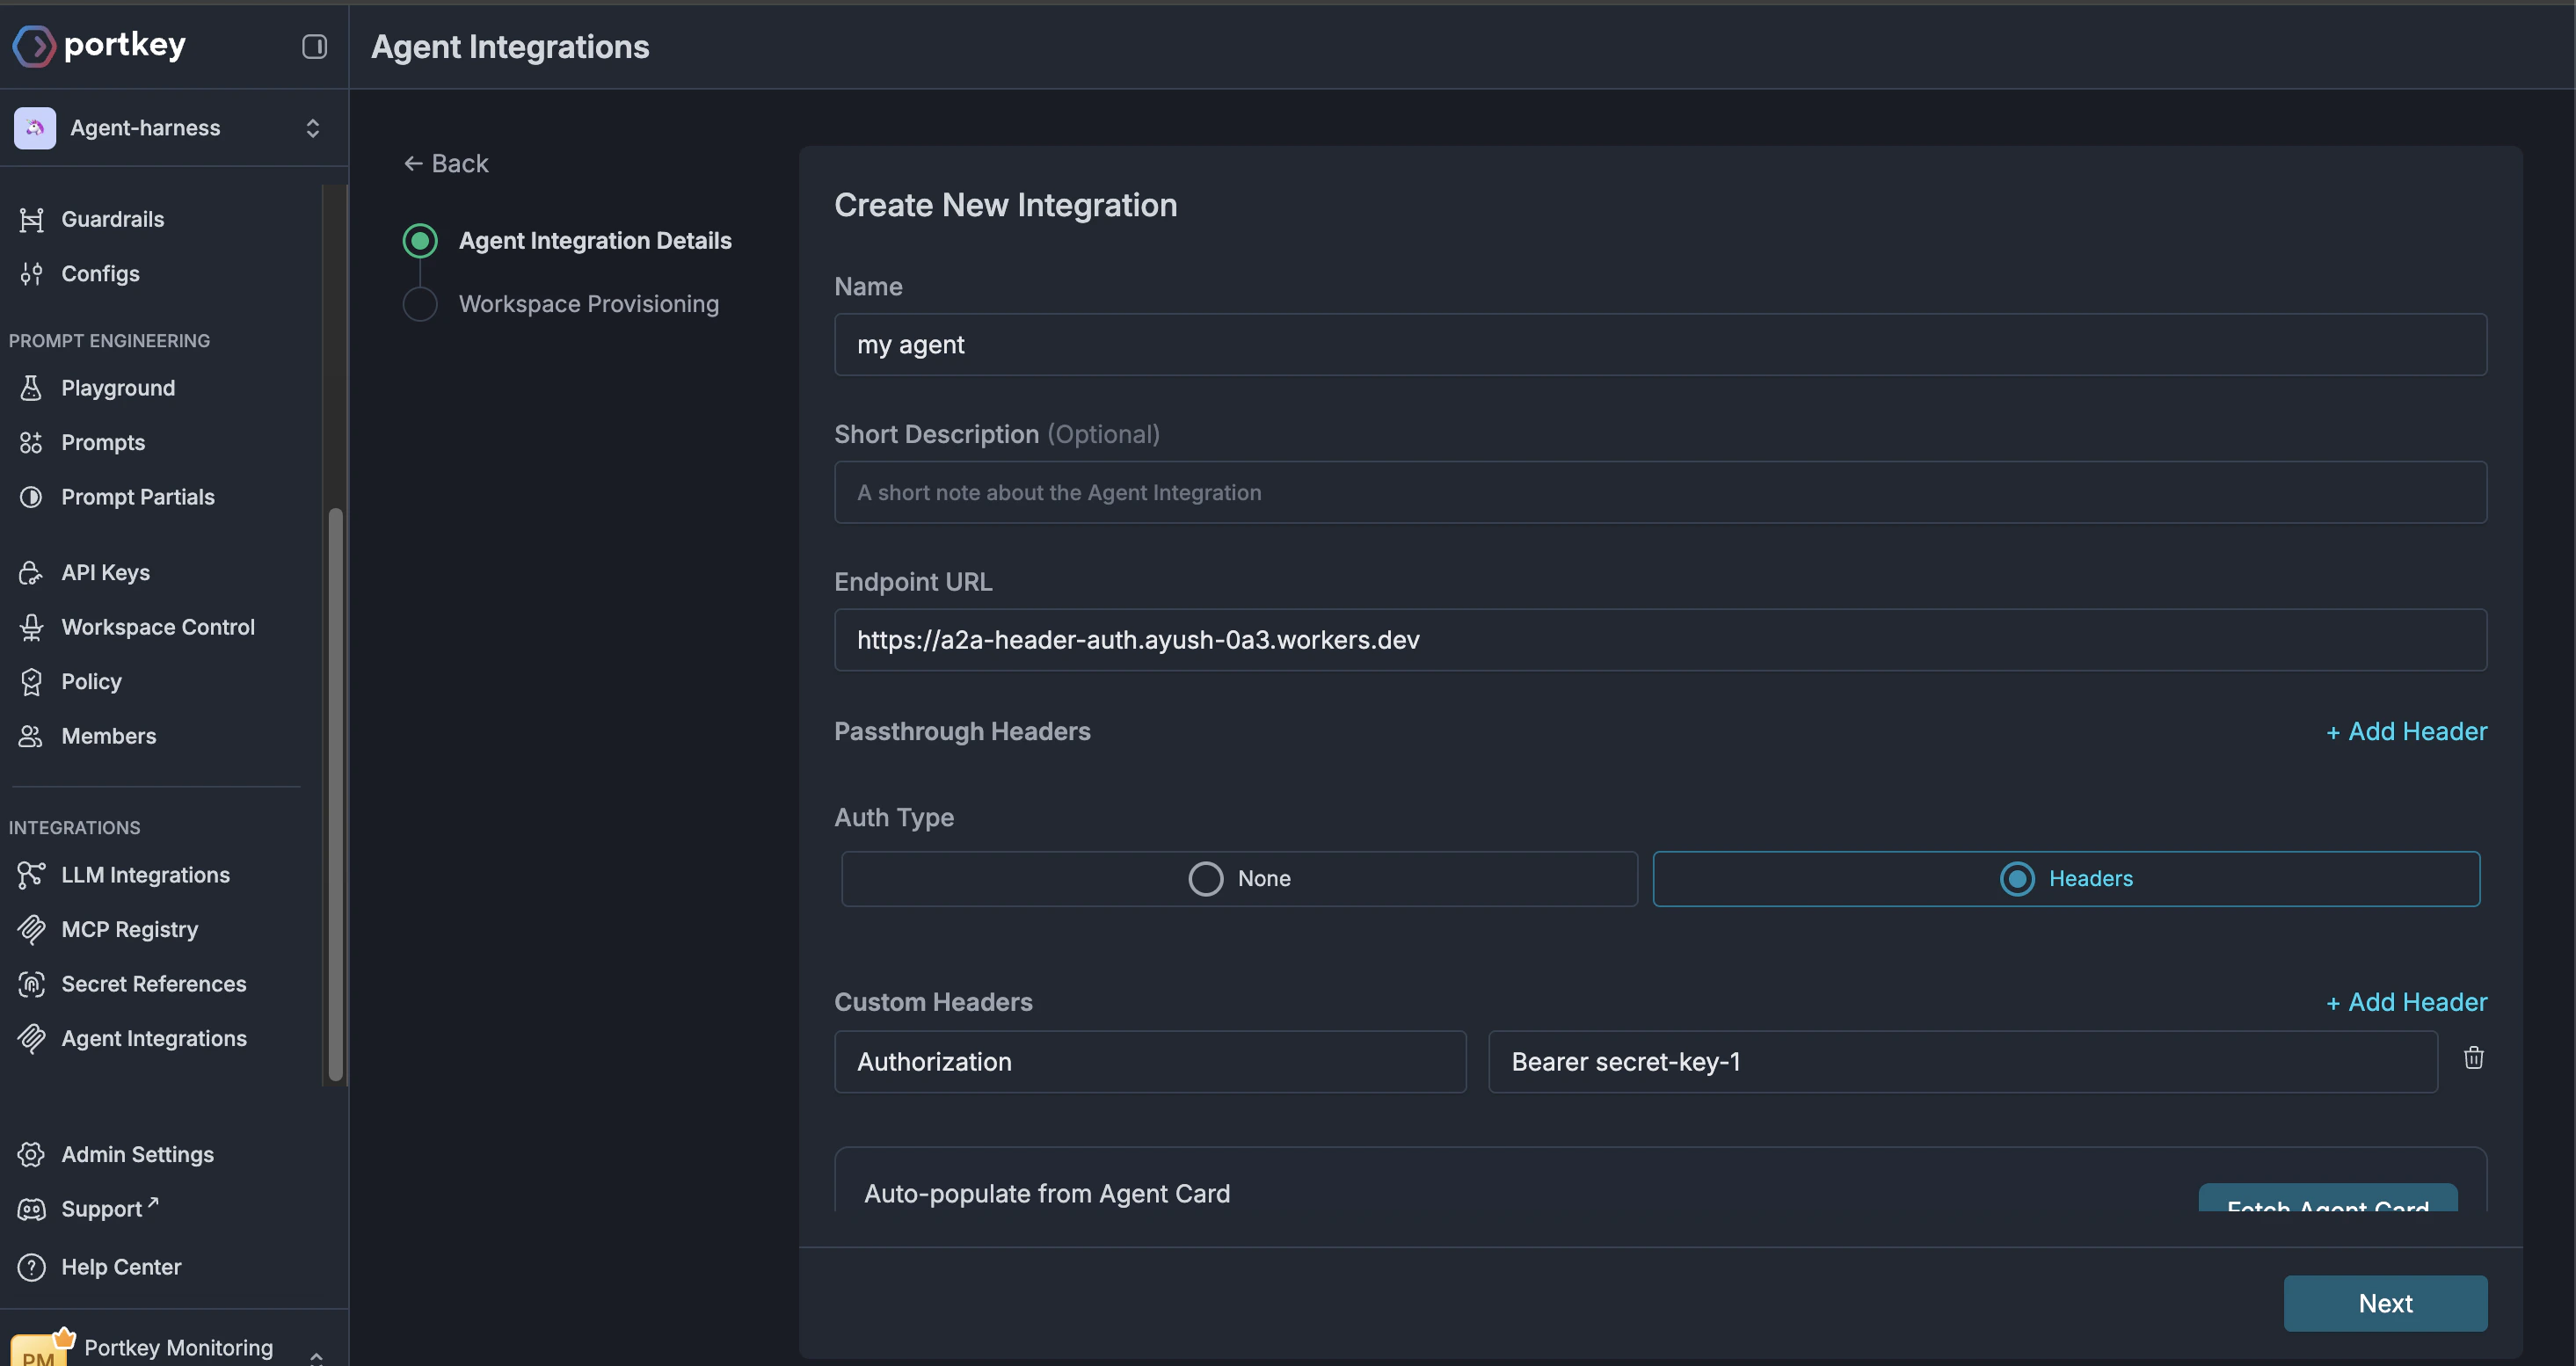
2
Fetch agent card and validate
Validate transport and authentication schemes by clicking the 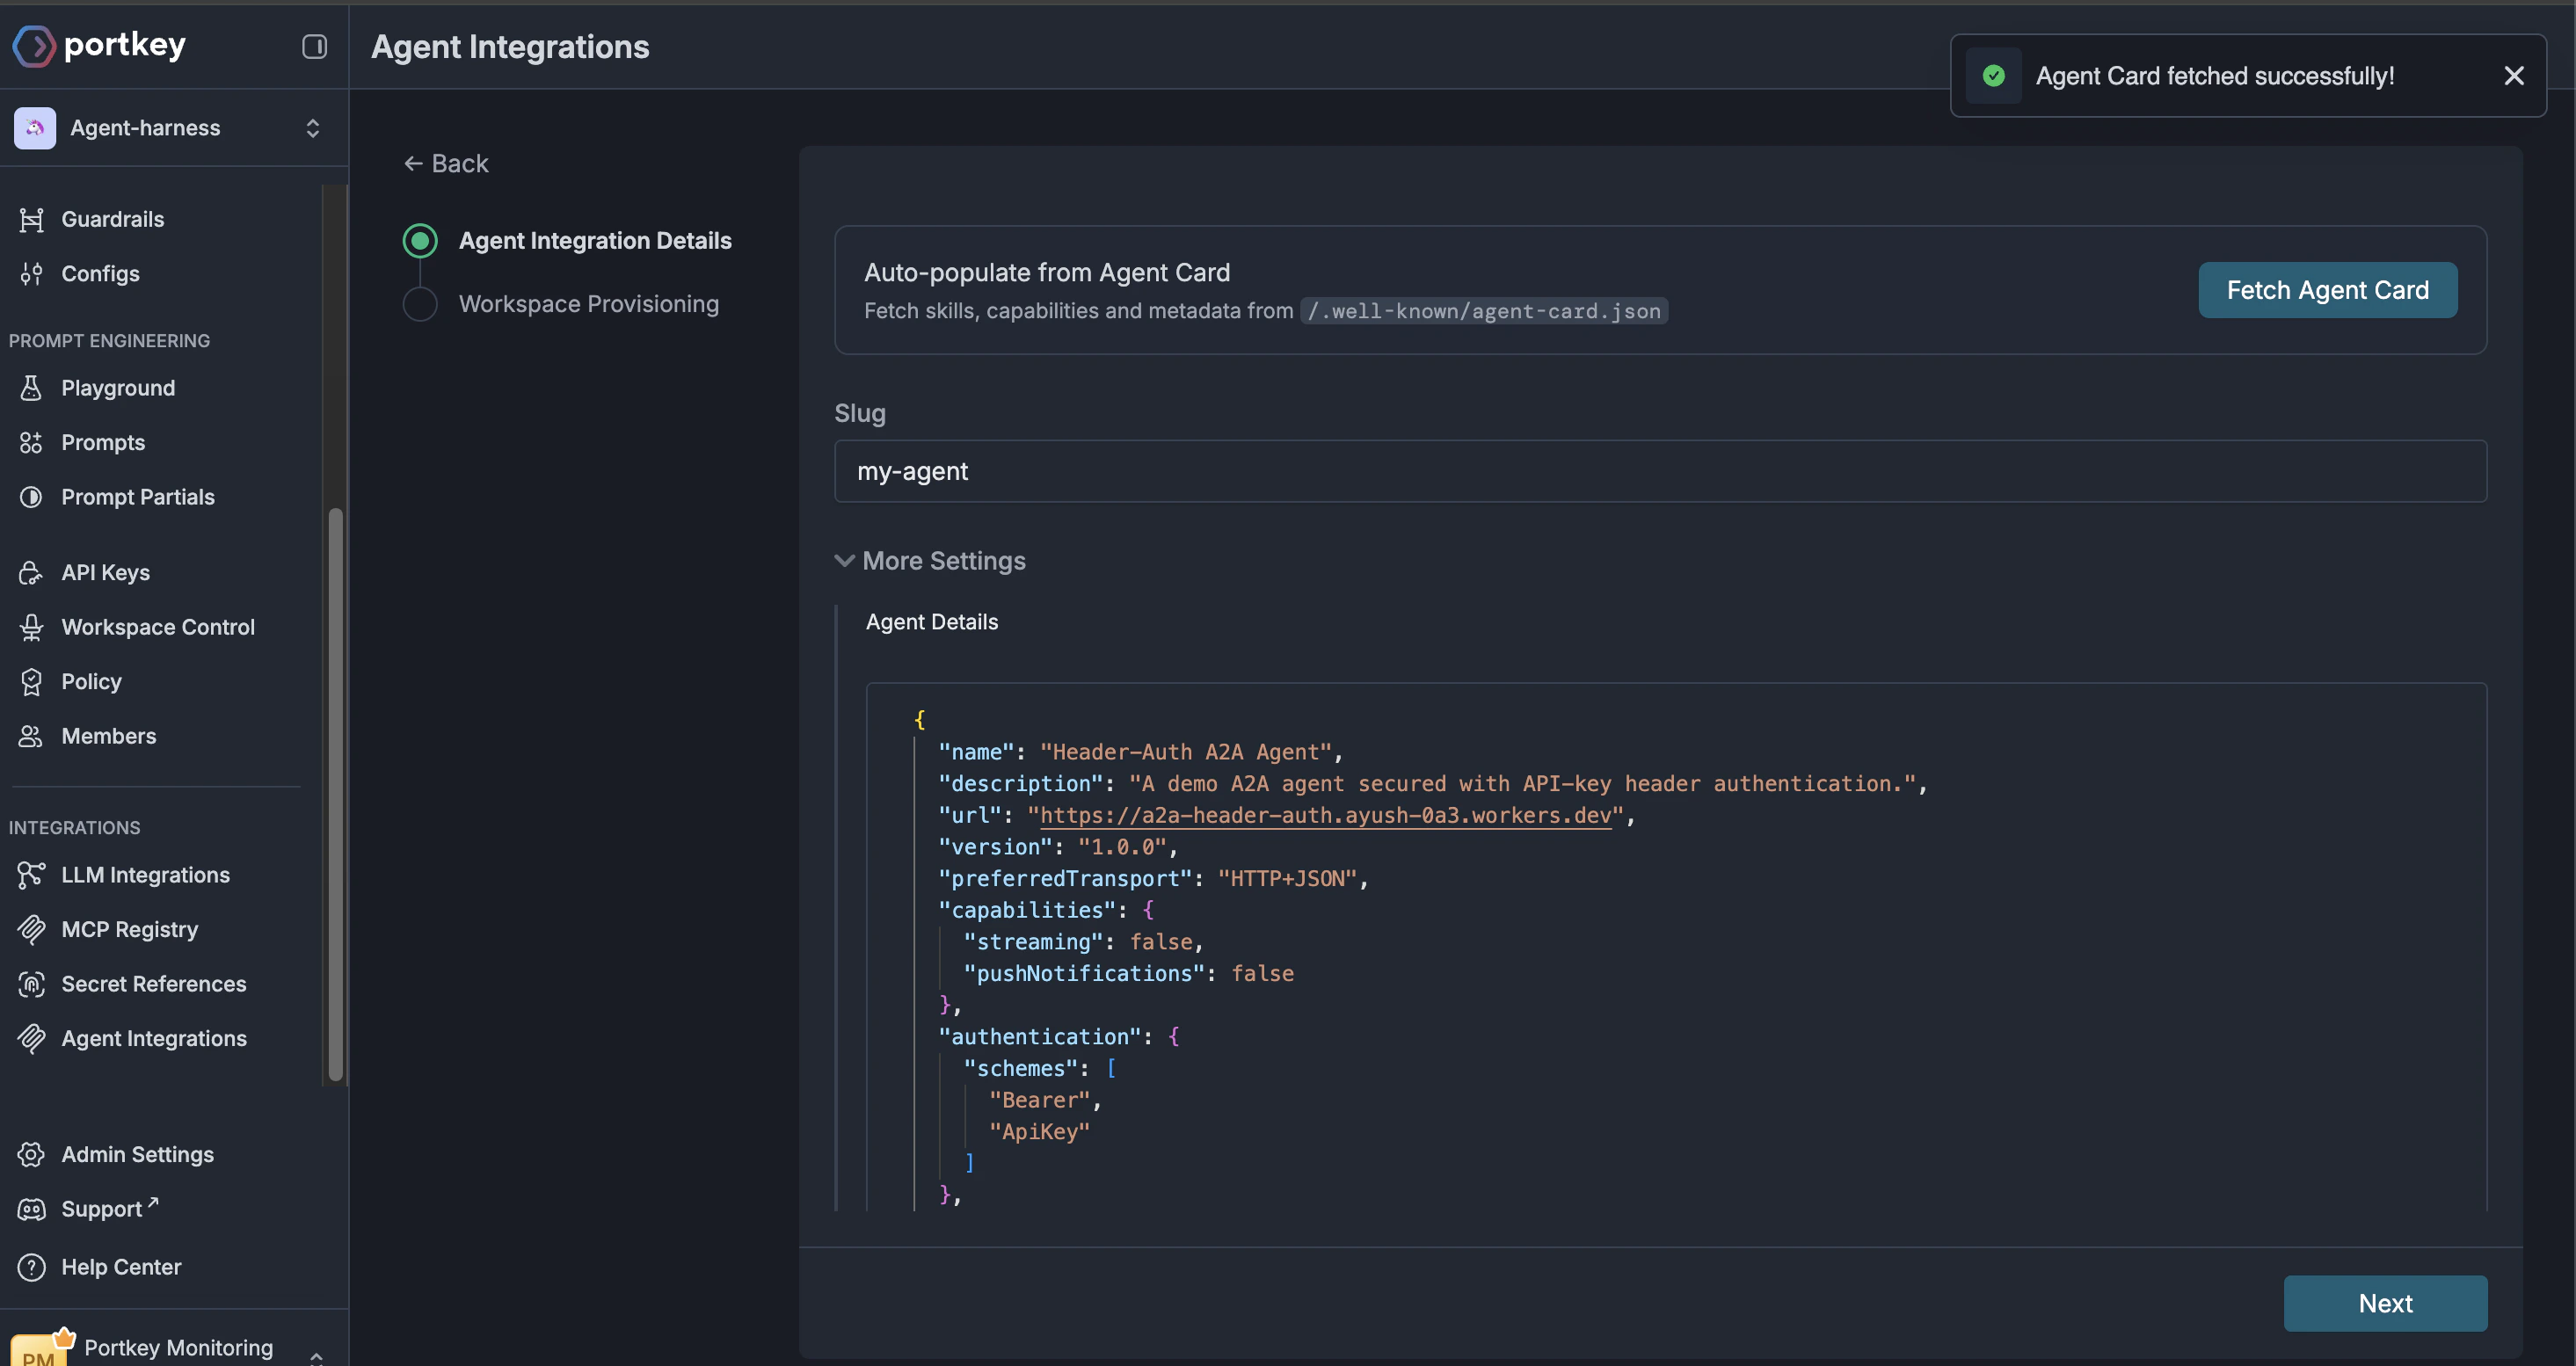
Fetch Agent Card button. The upstream URL must be a public http/https endpoint (Backend v1.16.1+ applies SSRF protections and rejects private IPs, metadata hosts, and URLs with # fragments).3
Provision workspaces

3
Verify your integration
1
Grab your Portkey API key
Head over to the API Keys page and
create a new API key. Make sure the 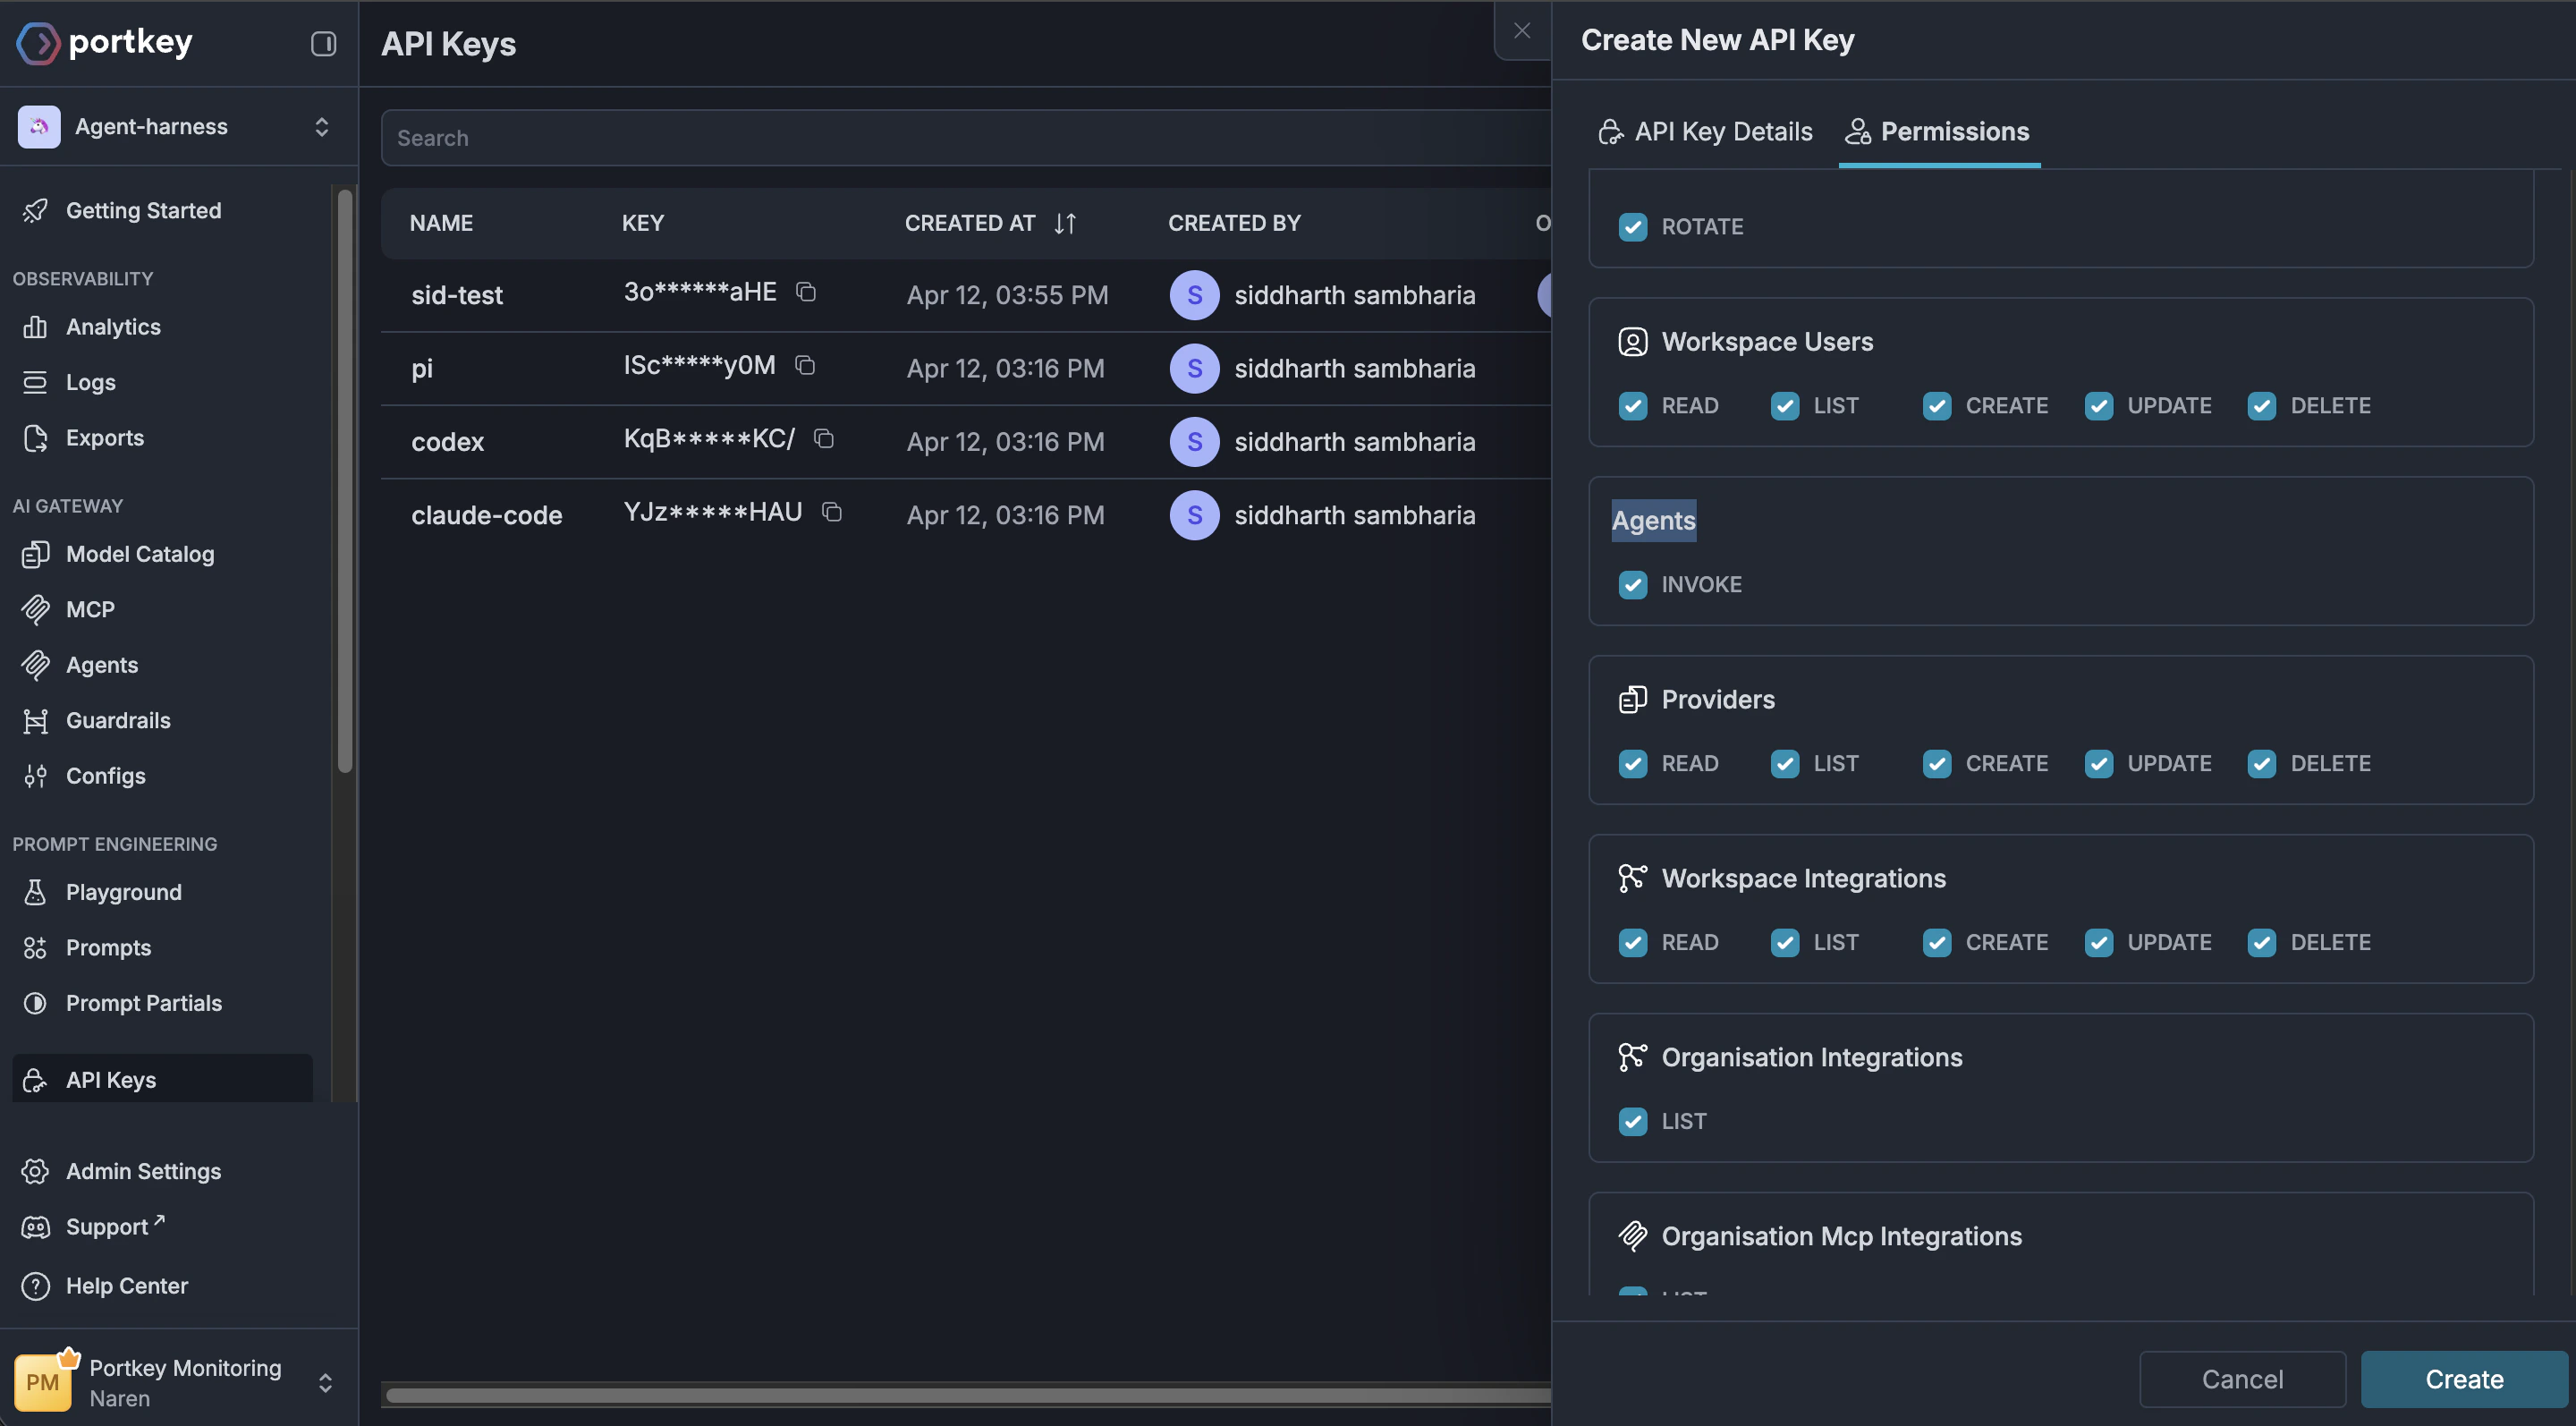
agents.invoke scope is enabled for
your API key.2
Fetch the agent server URL from the agents tab
Open the Agents tab and fetch the
corresponding agent server URL. This is the URL you will use to connect
your agent to the Portkey Agent Gateway instead of the agent server URL.
It looks something like this (you can replace the agent slug with your
server’s slug):
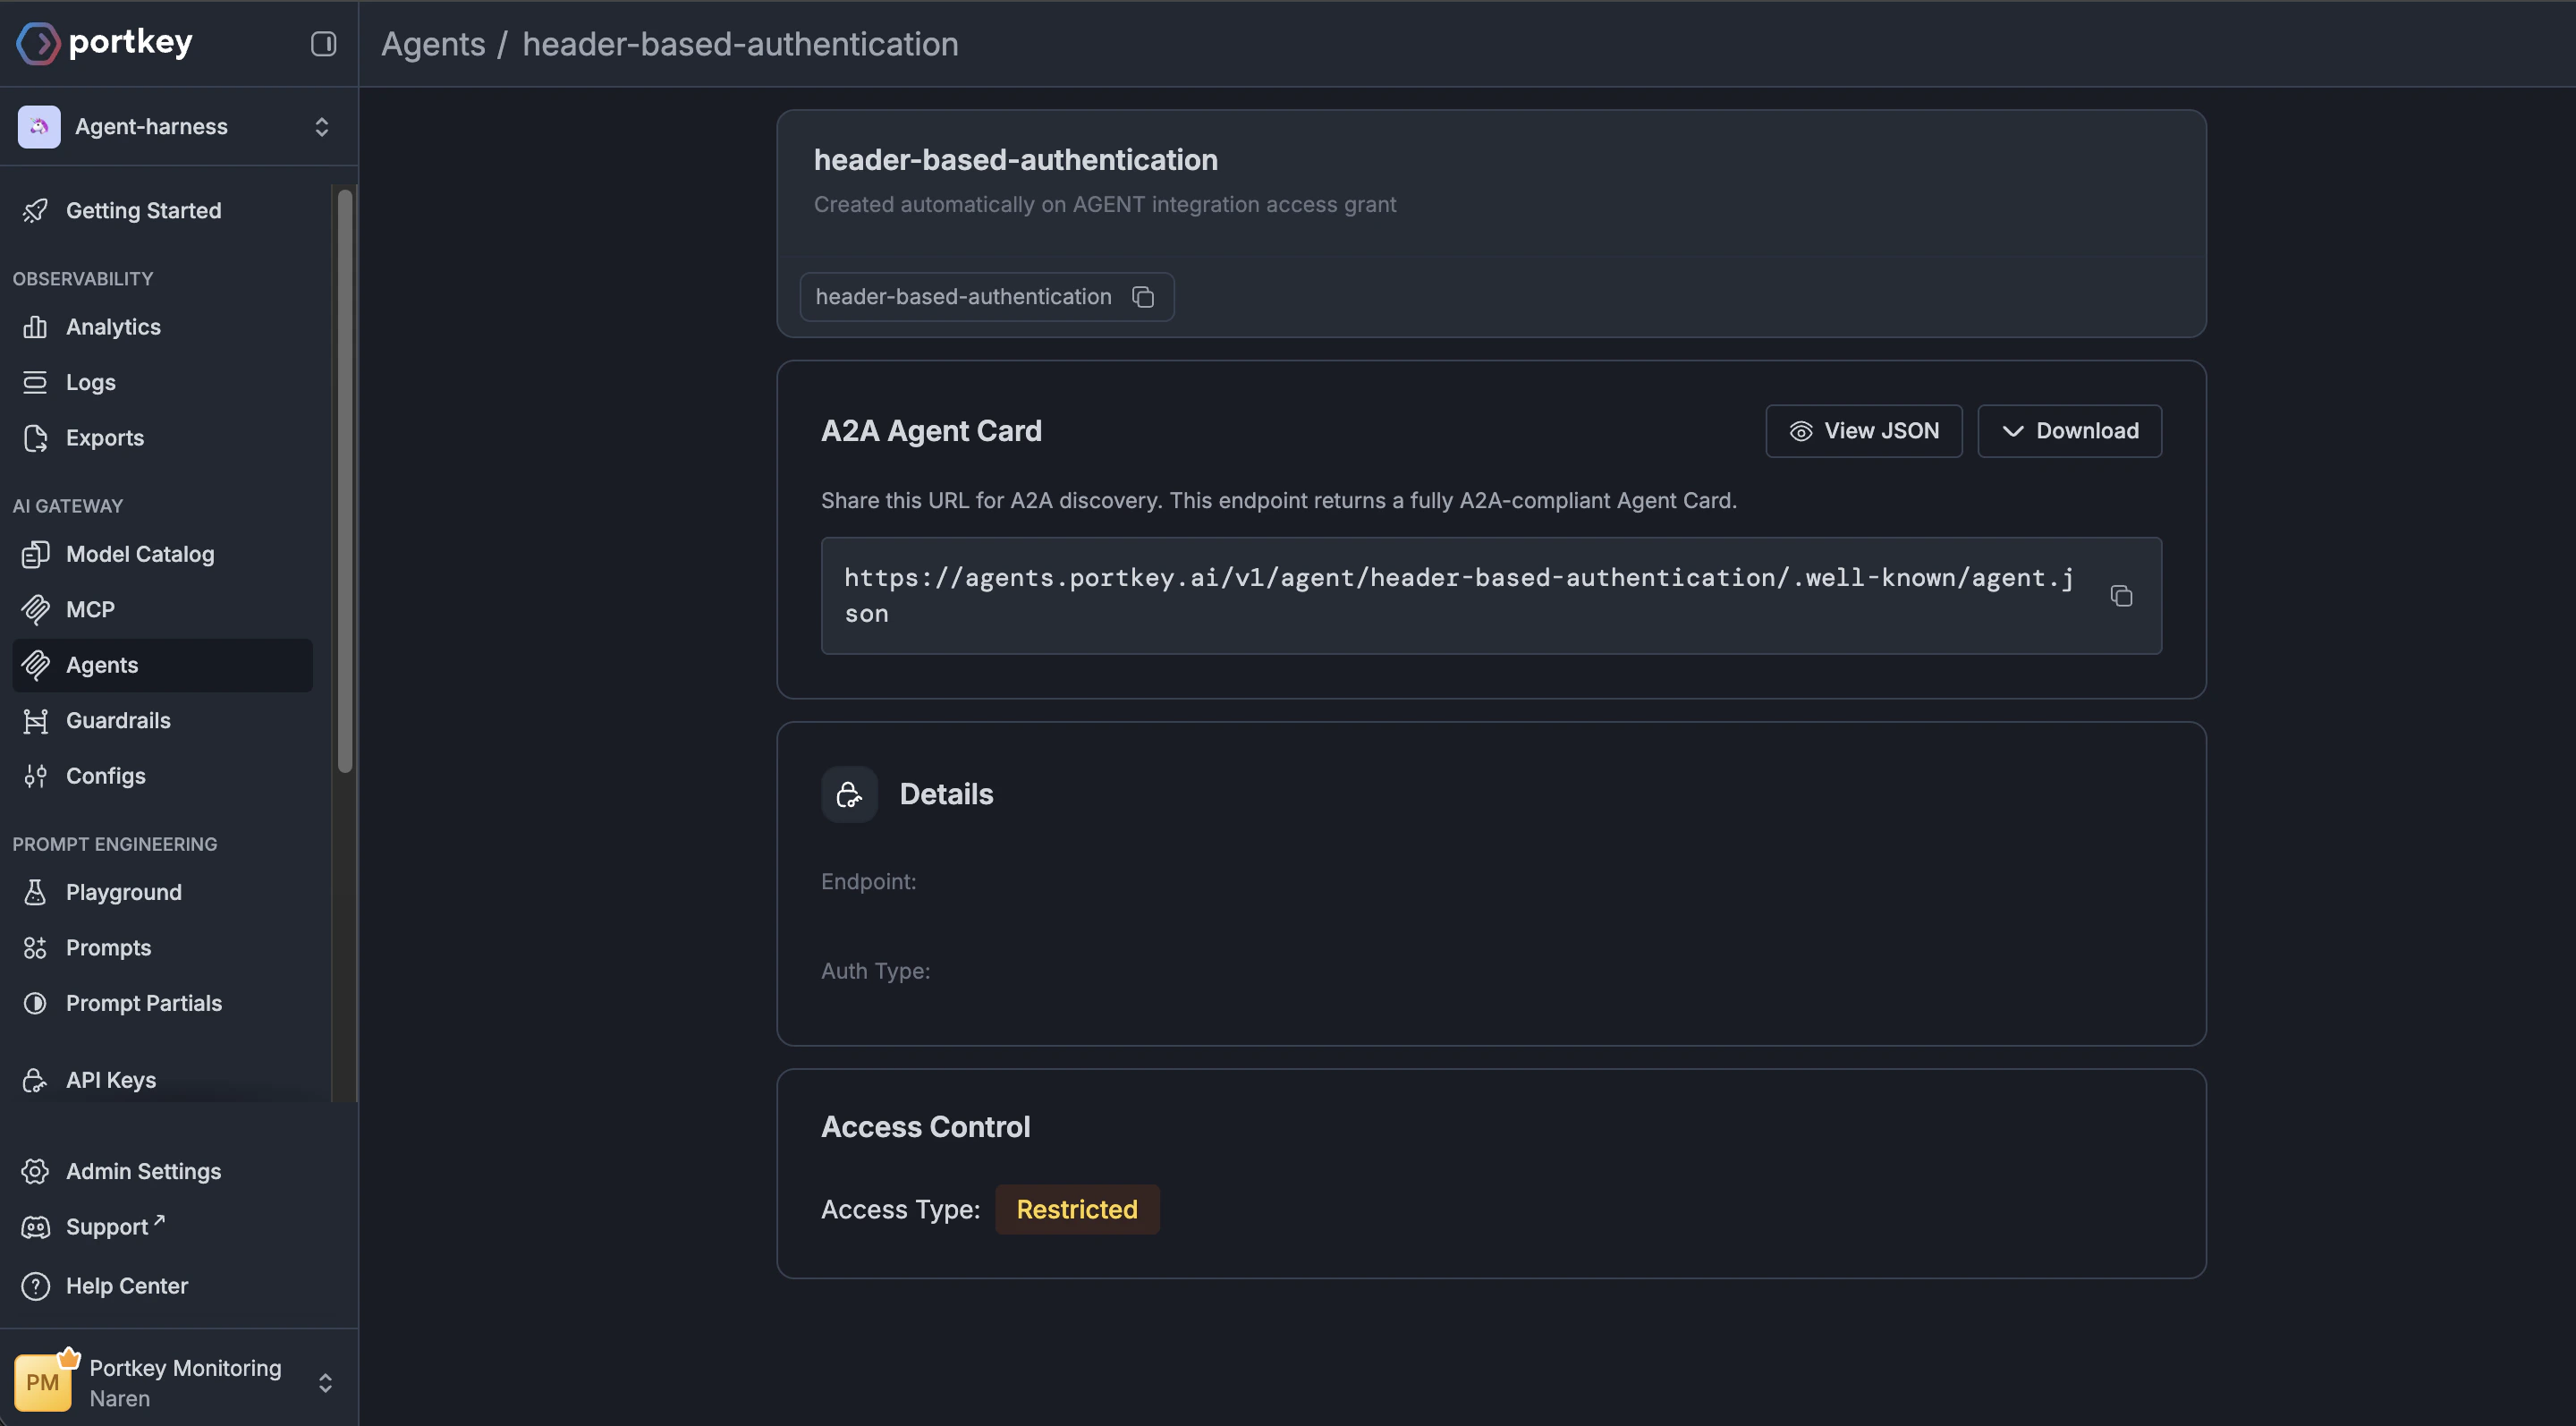
https://agents.portkey.ai/v1/agent/header-based-authenticationInterface with your agent
You can simply replace your agent server URL with the one you fetched from the agents tab and test out the integration. Alternatively, make use of one of the code snippets below!Further reading
Agent Registry
Manage your agent integrations and control access to agents and their skills.
Agent Servers
Learn how virtual agent servers work and how to host your own.
Advanced code snippets and examples
Explore additional examples for fetching agent cards and invoking agents.
API Keys
Configure API keys and scopes to securely invoke your agents.