Upgrading from Virtual Keys
The Model Catalog upgrades the Virtual Key experience by introducing a centralized, organization-level management layer, offering advantages like:- Centralized provider and model management - no more duplicate configs across workspaces.
- Fine-grained control: budgets, rate limits, and model allow-lists at both org and workspace level.
- Inline usage: just pass
model="@provider/model_slug"
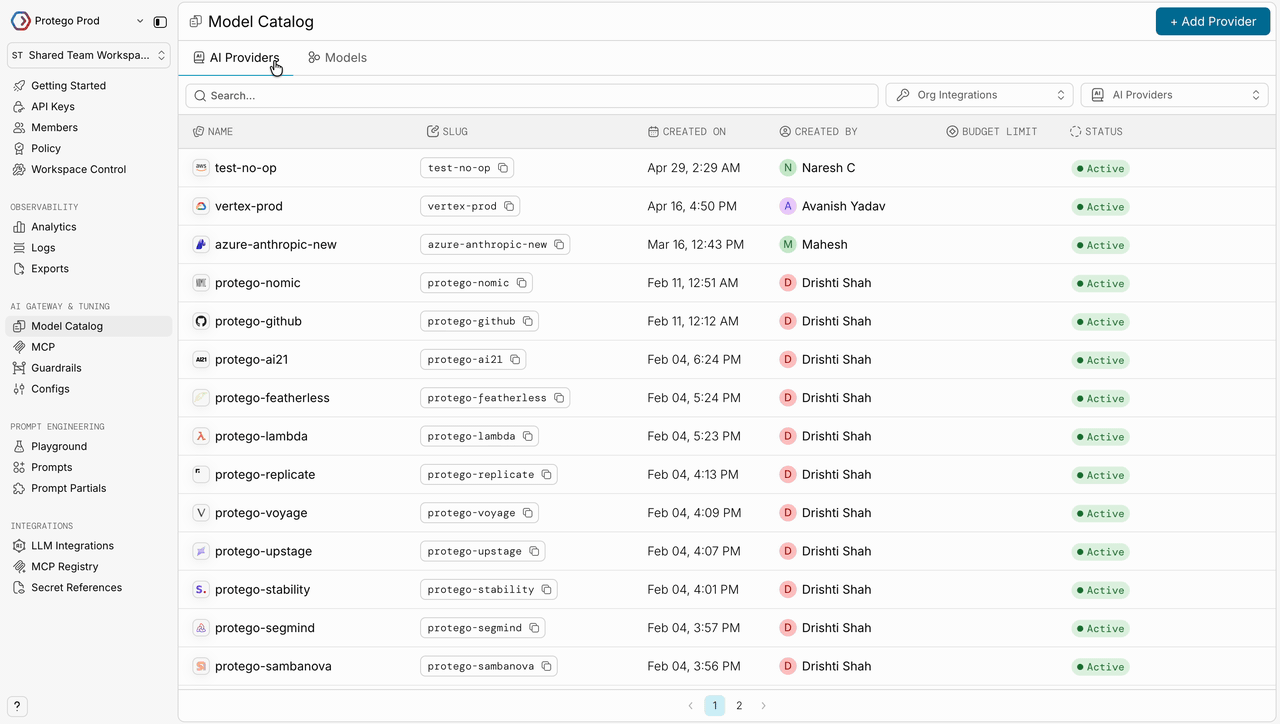
AI Providers
AI Providers are what you use in your code. Each provider has:
- ✅ A unique slug (e.g.,
@openai-prod) - ✅ Securely stored credentials
- ✅ Budget and rate limits
- ✅ Access to specific models
@provider-slug/model-name in your code.Models
The Models section is a gallery of all AI models available in your workspace. Each Model entry includes:
- ✅ Model slug (
@openai-prod/gpt-4o) - ✅ Ready-to-use code snippets
- ✅ Input/output token limits
- ✅ Pricing information (where available)
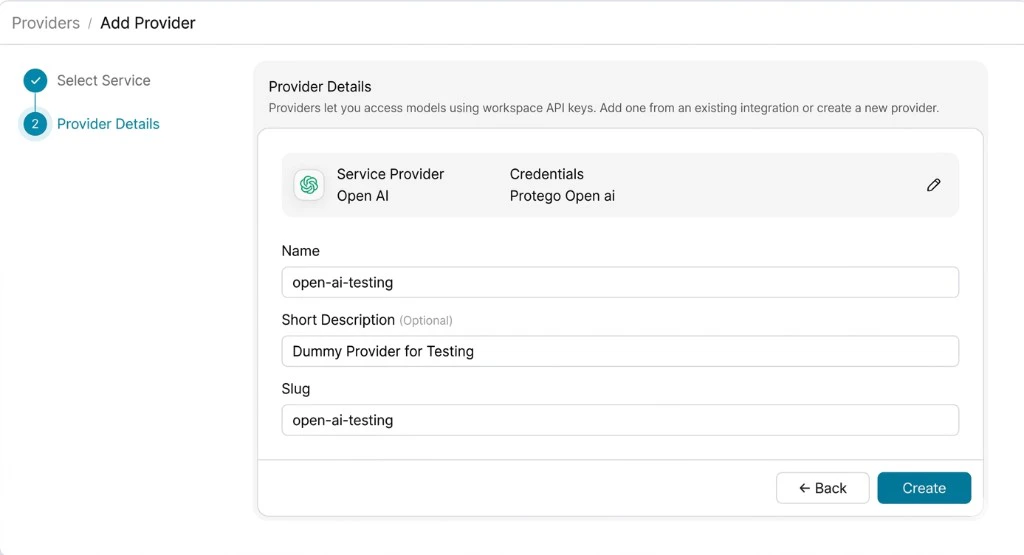
Adding an AI Provider
Add providers via UI (follow the steps below) or API.Go to AI Providers → Add Provider
Navigate to the Model Catalog in your Portkey dashboard.
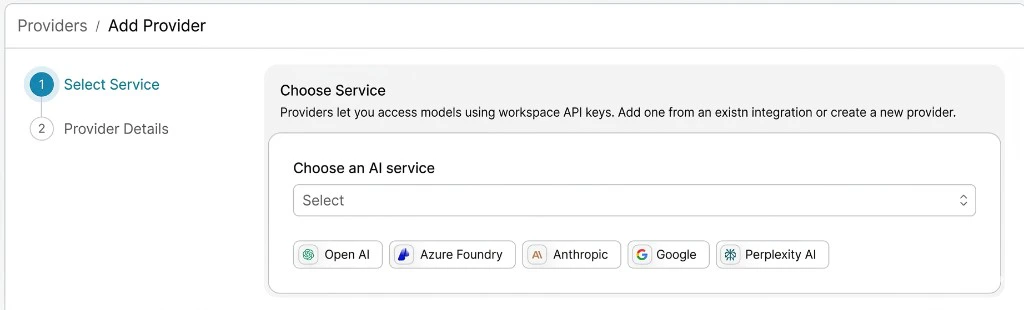
Choose or Create Credentials
If credentials already exist: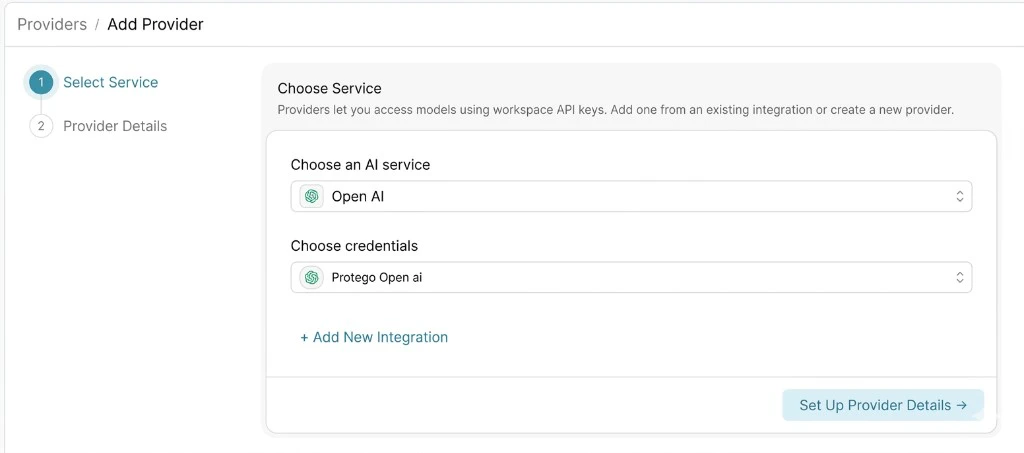
- Select from the dropdown (if your org admin set them up)
- Skip to step 4 - no API keys needed!
- Choose “Create new credentials”
- Enter your API keys here
Creating new credentials here automatically creates a workspace-linked integration. To share credentials across multiple workspaces, create them in the Integrations page (org admin only).
Using Provider Models
Once you have AI Providers set up, use their models in your applications. There are three methods - we recommend the model prefix format for clarity. In Portkey, model strings follow this format:@provider_slug/model_name

@openai-prod/gpt-4o, @anthropic/claude-3-sonnet, @bedrock-us/claude-3-sonnet-v1
2. Using the provider header
Specify the provider separately using the provider parameter. Remember to add the @ before your provider slug.
3. Specify provider in the config
Portkey’s configs are simple JSON structures that help you define routing logic for LLM requests. Learn more here.
There are three ways to specify providers in configs:
Method 1: Model in override_params (Recommended)
Specify provider and model together in override_params. Works great with multi-provider strategies:
@ symbol):
virtual_key field still works:
Ordering:config(if provided) defines base;override_paramsmerges on top (last write wins for scalars, deep merge for objects likemetadata).
Integrations
At the heart of Model Catalog is a simple concept: your AI provider credentials need to be stored securely, governed carefully and managed centrally. In Portkey, these stored credentials are called Integrations. Think of an Integration as a secure vault for your API keys - whether it’s your OpenAI API key, AWS Bedrock credentials, or Azure OpenAI configuration.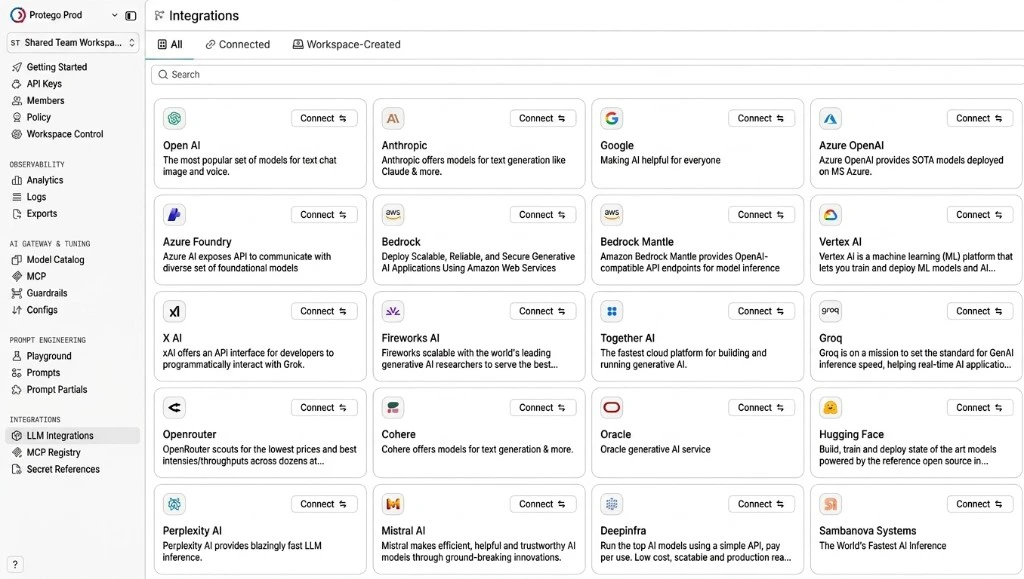
@openai-devfor development with strict rate limits@openai-stagingfor testing with moderate budgets@openai-prodfor production with higher limits
Integrations
Learn how to create and manage AI service credentials across your organization
Managing Access and Controls
Each Integration in Portkey acts as a control point where you can configure:Budget Limits
Set spending controls at the Integration level to prevent unexpected costs. You can configure:- Cost-based limits: Maximum spend in USD (e.g., $1000/month)
- Token-based limits: Maximum tokens consumed (e.g., 10M tokens/week)
- Periodic resets: Weekly or monthly budget refreshes

Budget Management
Set up cost controls and spending limits for your AI usage
Rate Limits
Control request rates to manage load and prevent abuse:- Requests per minute/hour/day: Set appropriate throughput limits
- Concurrent request limits: Control parallel processing
- Burst protection: Prevent sudden spikes in usage
Rate Limiting
Configure request rate controls to ensure fair usage and prevent abuse
Workspace Provisioning
Control which workspaces in your organization can access specific AI Providers:- Selective access: Choose which teams can use production vs development providers
- Environment isolation: Keep staging and production resources separate
- Department-level control: Give finance different access than engineering
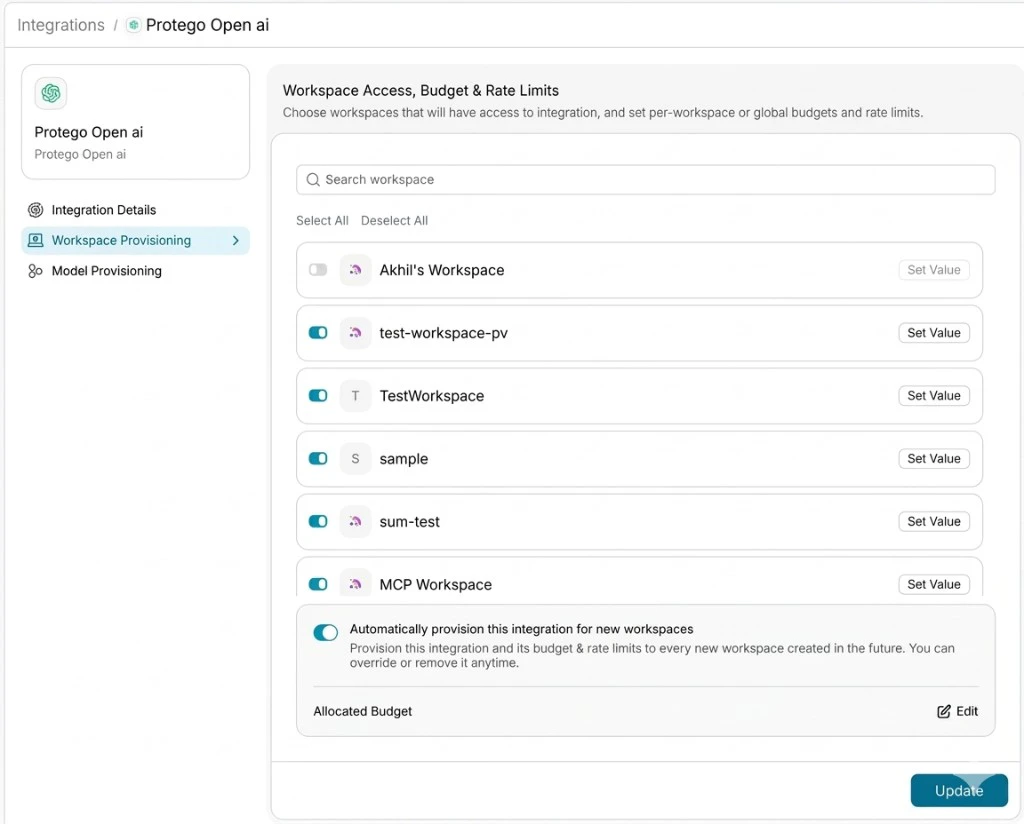
Workspace Provisioning
Manage workspace access to AI providers and models
Model Provisioning
Fine-tune which models are available through each Integration:- Model allowlists: Only expose specific models (e.g., only GPT-4 for production)
- Model denylists: Block access to expensive or experimental models
- Custom model addition: Add your fine-tuned or self-hosted models

Model Provisioning
Configure which models are available through each integration
Advanced Model Management
Custom Models
The Model Catalog isn’t limited to standard provider models. You can add:- Fine-tuned models: Your custom OpenAI or Anthropic fine-tunes
- Self-hosted models: Models running on your infrastructure
- Private models: Internal models not publicly available
Custom Models
Add and manage your fine-tuned, self-hosted, or private models
Overriding Model Details (Custom Pricing)
Override default model pricing for:- Negotiated rates: If you have enterprise agreements with providers
- Internal chargebacks: Set custom rates for internal cost allocation
- Free tier models: Mark certain models as free for specific teams
Custom Pricing
Configure custom pricing for models with special rates