Azure Active Directory (Azure AD)
Reference Setting up Azure Entra for SCIM provisioning consists of the following steps:- New Entra Application & SCIM Provisioning
- Application Roles
- SCIM Attribute Mapping Update
New Entra Application
First, create a new Azure Entra application to set up SCIM provisioning with Portkey.-
Navigate to the Entra Applications Page and click
Create your own application.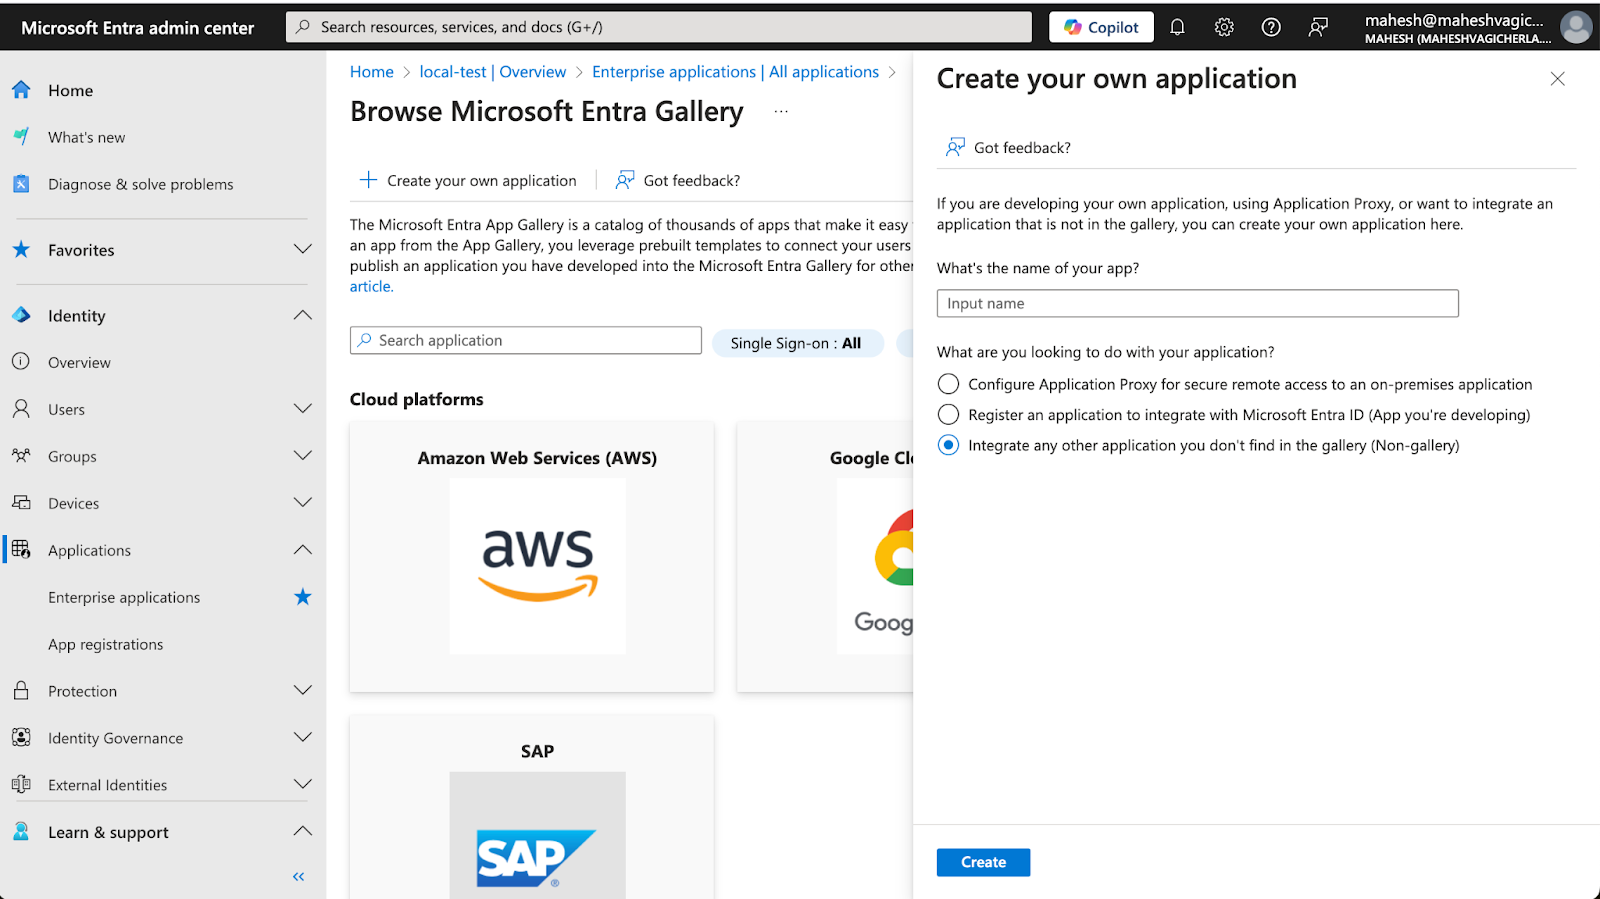
- Complete the required fields to create a new application.
- Once the application is created, navigate to the application’s Provisioning page under the Manage section.
-
Click
New Configurationto go to the provisioning settings page.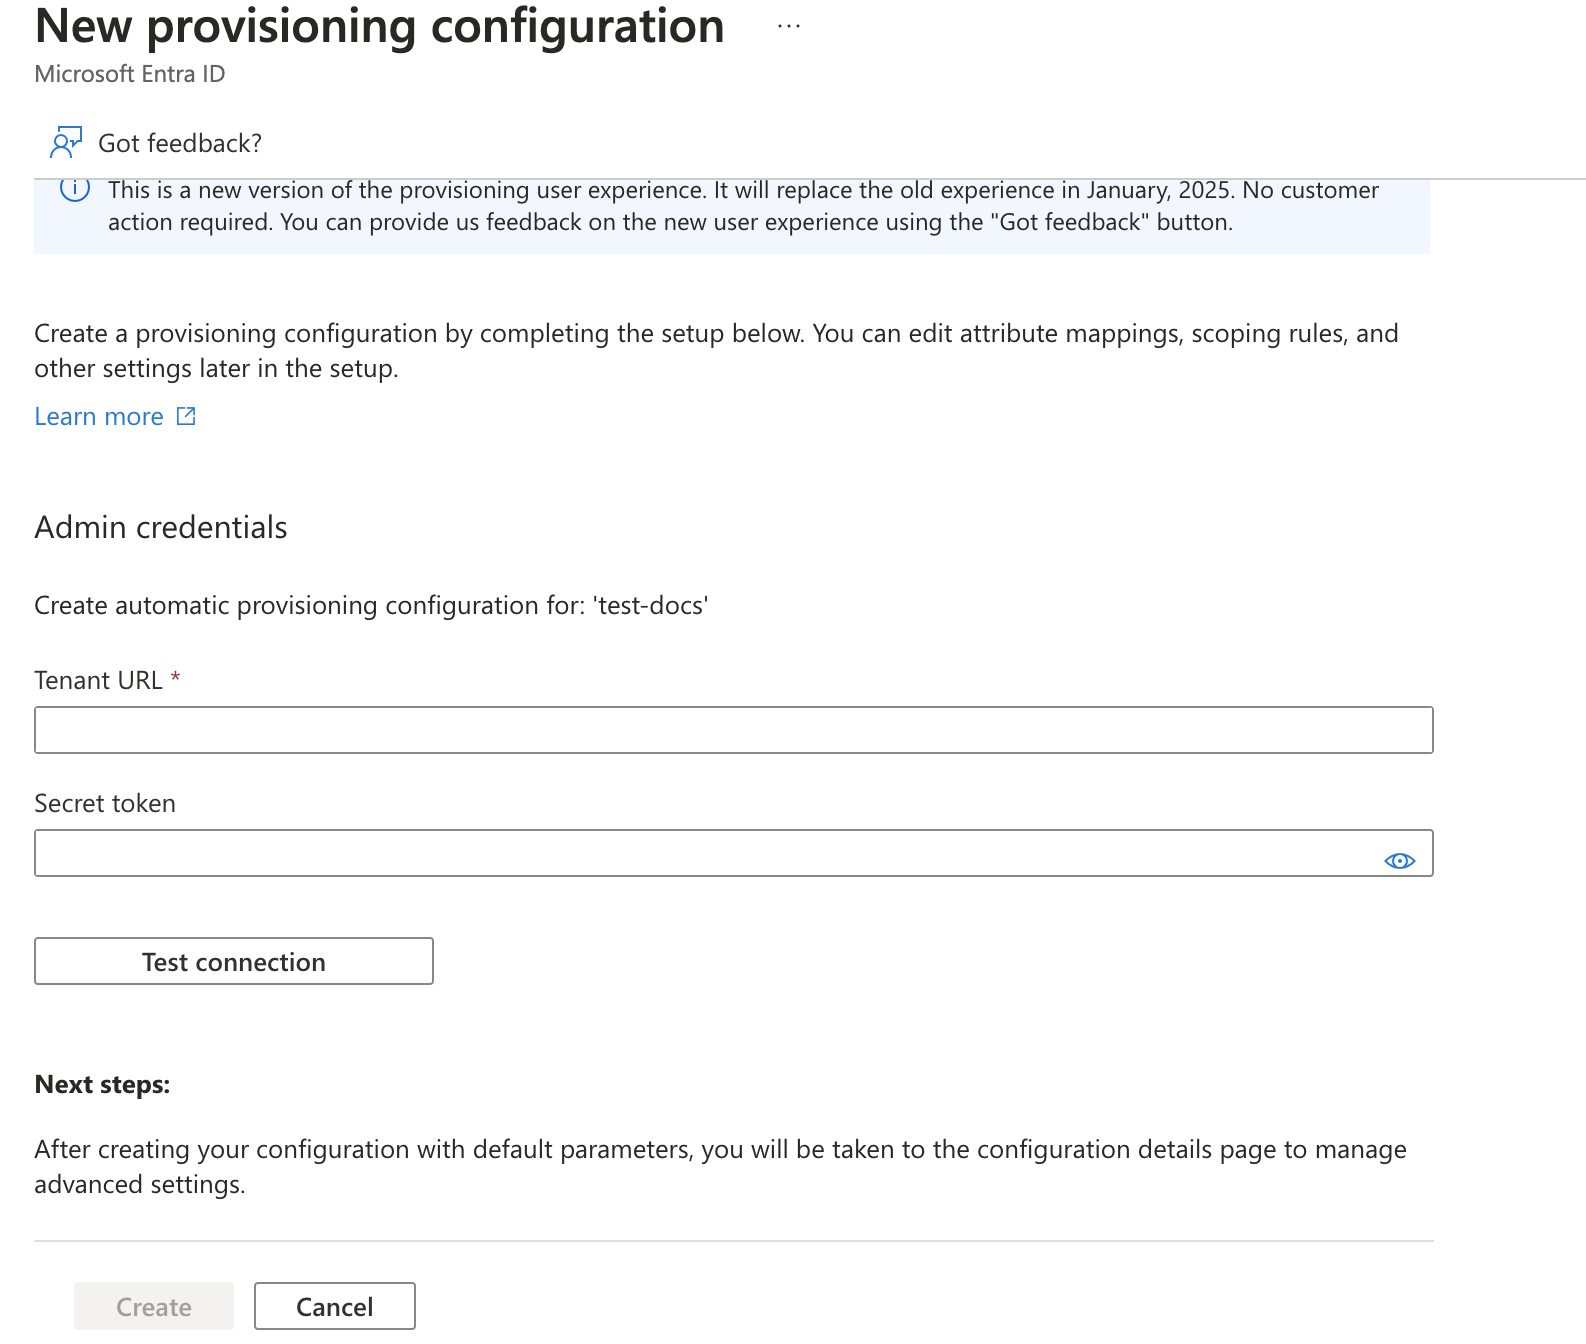
-
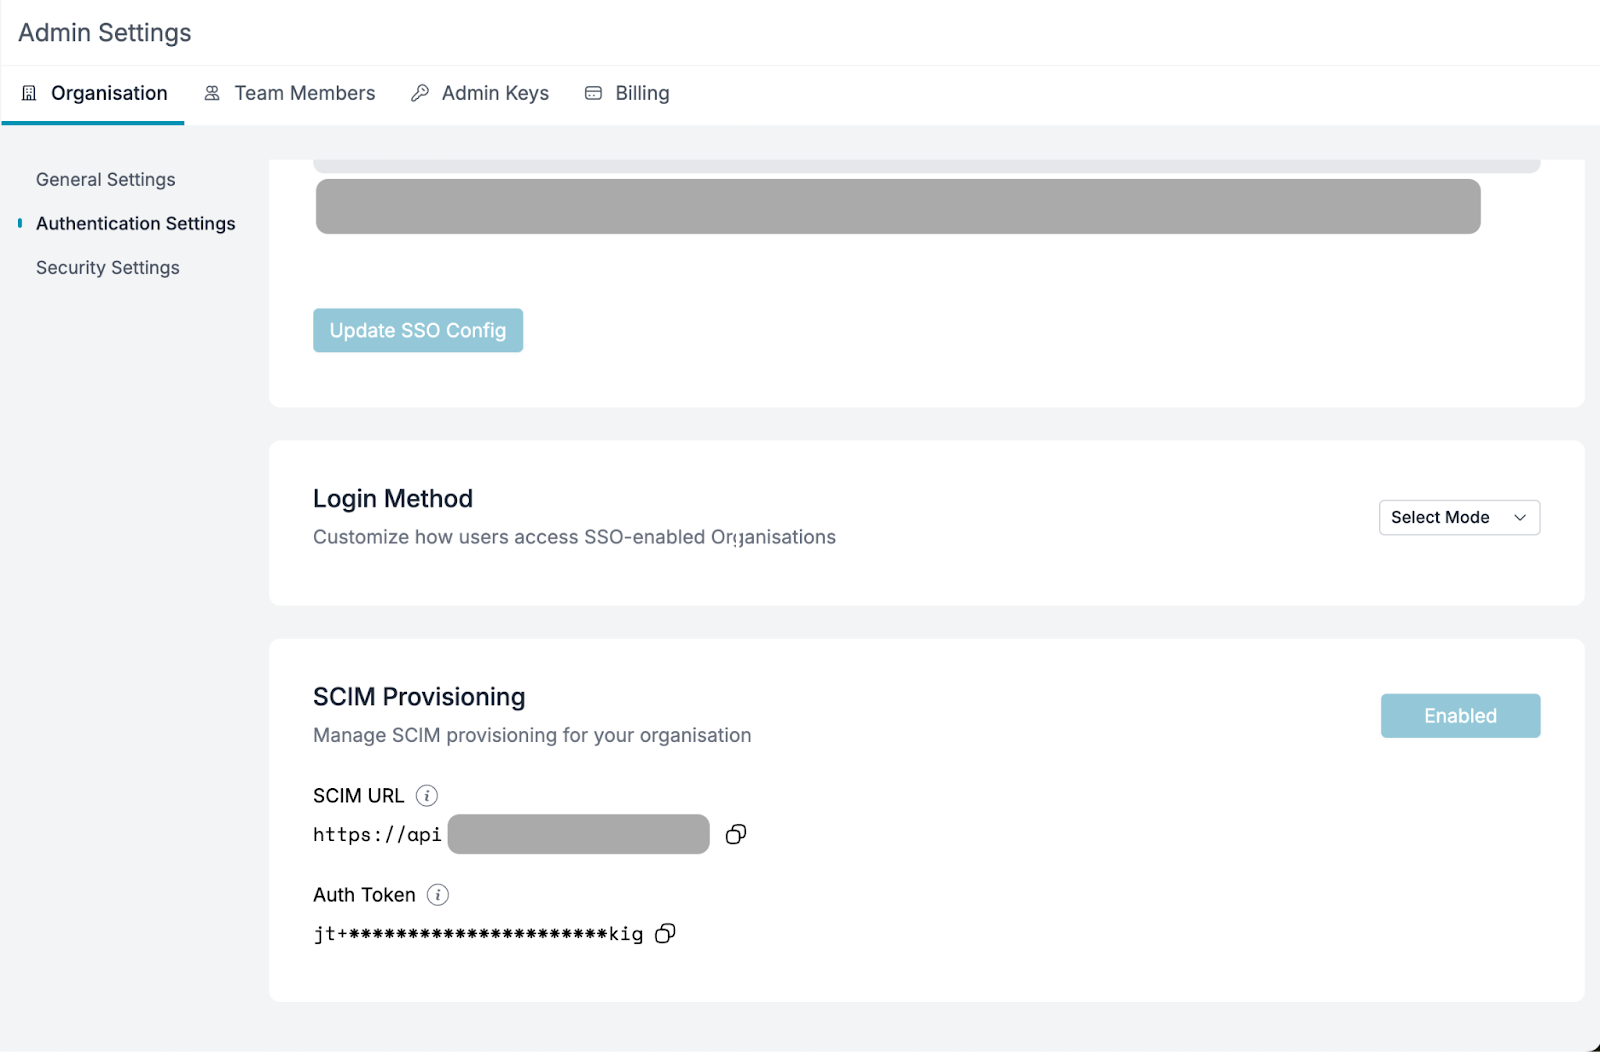
Obtain the Tenant URL and Secret Token from the Portkey Admin Settings page (if SCIM is enabled for your organization).
-
Fill in the values from the Portkey dashboard in Entra’s provisioning settings and click
Test Connection. If successful, clickCreate.
If the test connection returns any errors, please contact us at support@portkey.ai.
Application Roles
Portkey supported roles should match Entra’s application roles.- Navigate to App Registrations under Enterprise Applications, click All Applications, and select the application created earlier.
- Go to the App Roles page and click
Create app role.Portkey supports two application-level roles:
member(Organization Member)admin(Organization Admin)owner(Organization Owner)
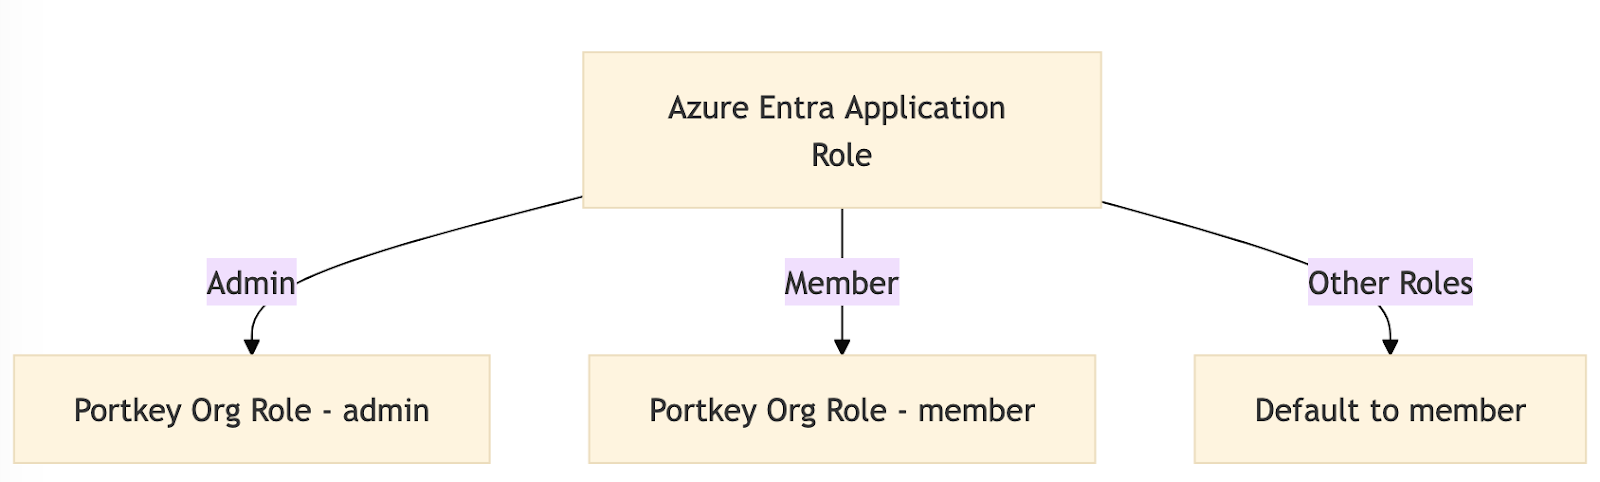
Users assigned any other role will default to the member role.
-
To support group roles, create a role with the value
groupand a name in title-case (e.g.,Groupfor the valuegroup).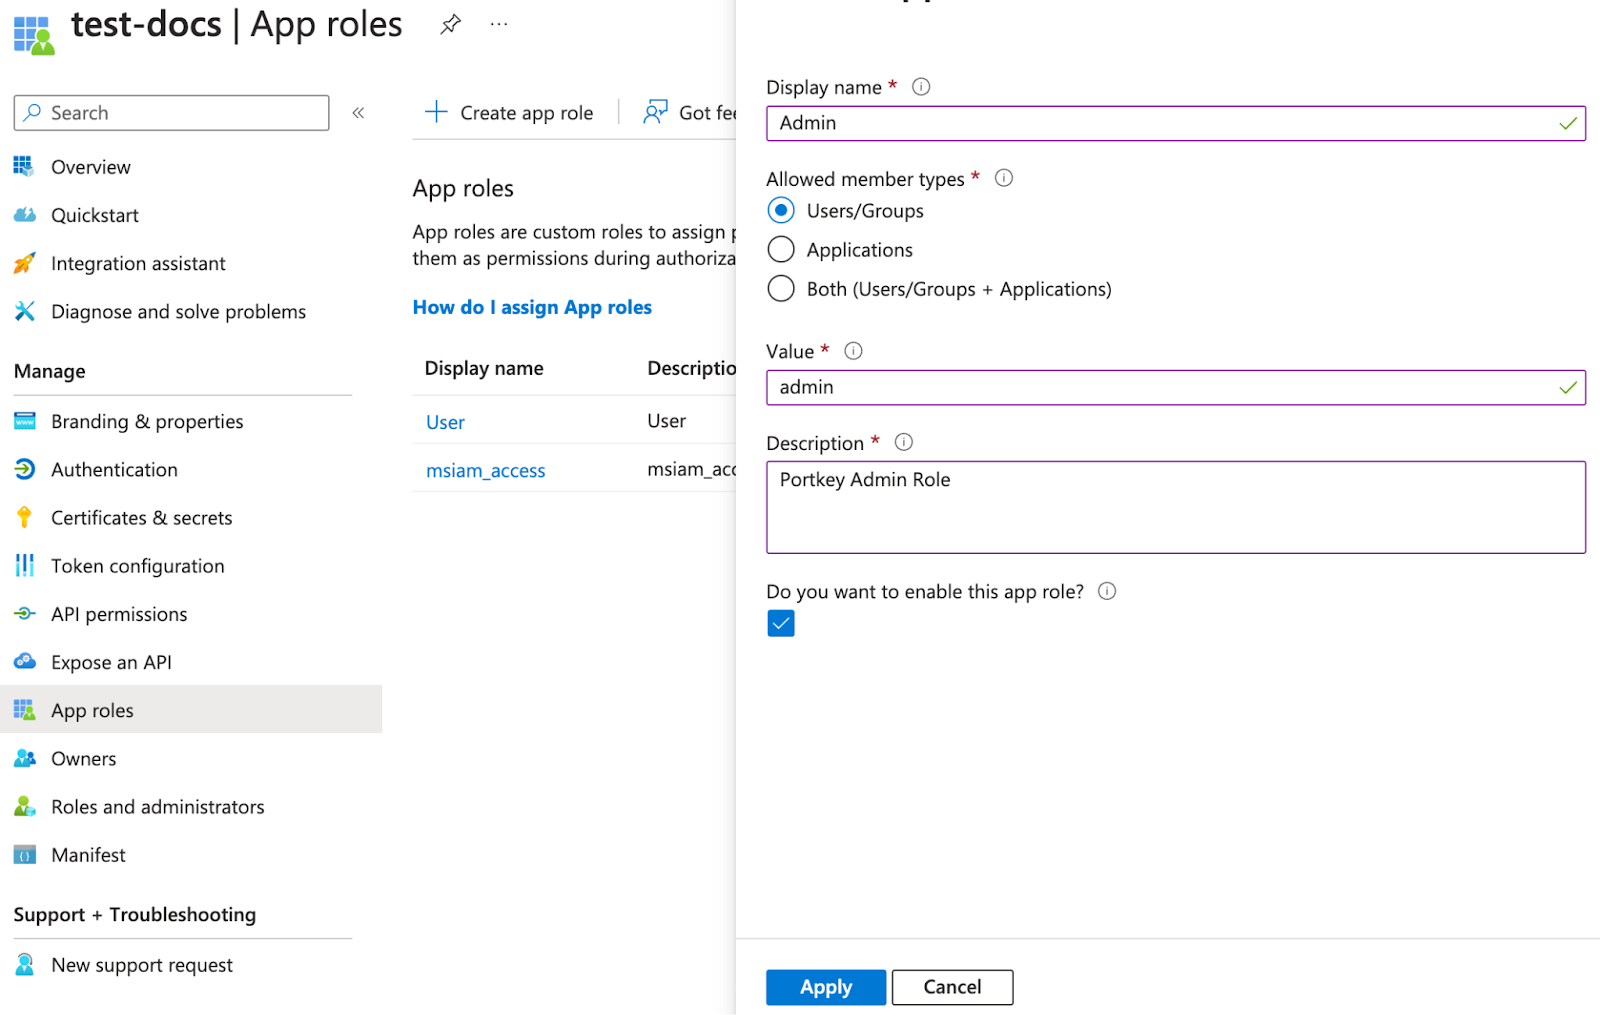
-
Assign users to the application with the desired role (e.g.,
owner,member, oradmin) for the organization.
Attribute Mapping
Adding a New Attribute
- Go to the Provisioning page and click Attribute Mapping (Preview) to access the attributes page.
-
Enable advanced options and click
Edit attribute list for customappsso.
-
Add a new attribute called
roleswith the following properties:- Multi-valued: Enabled
- Type: String

Adding a new mapping
- Click on the
Add new mappinglink to add a new mapping. (refer to the above images). - Follow the values from the below image to add a new mapping.
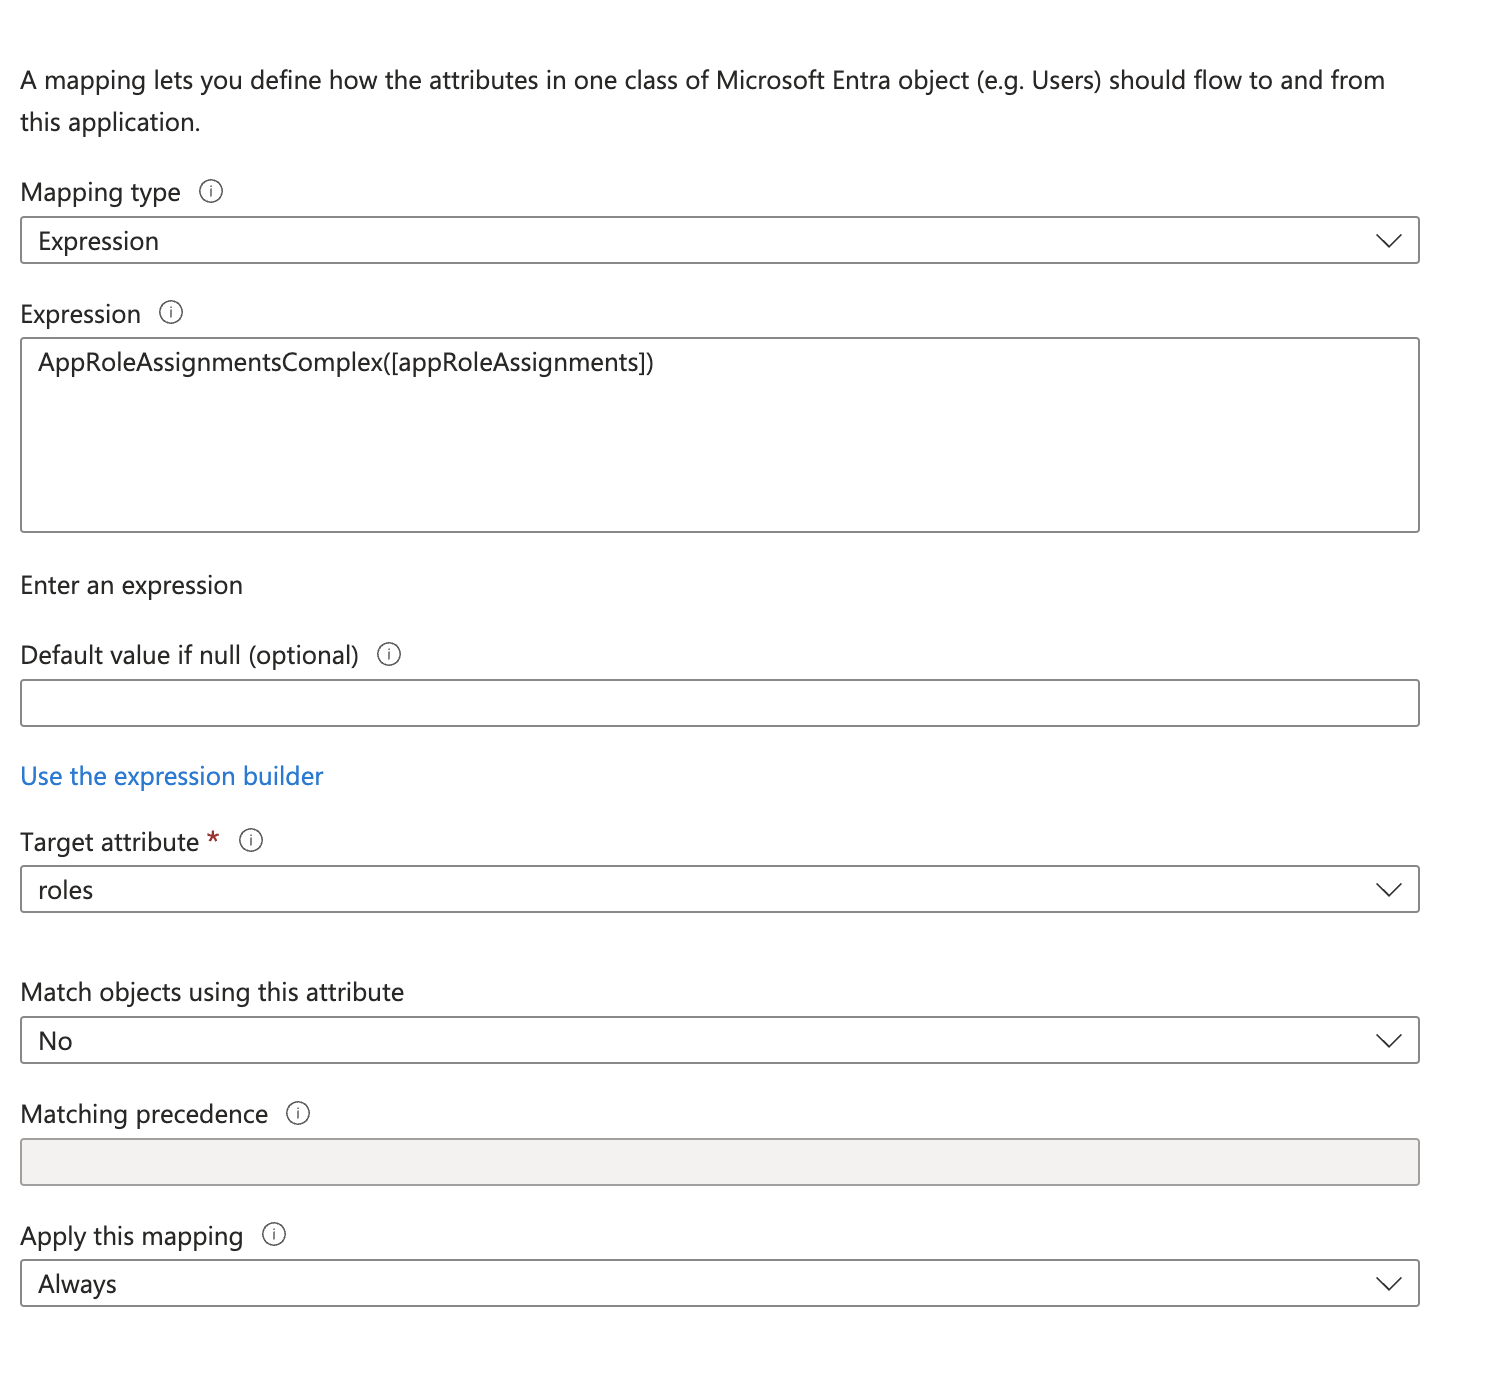
- Once done, save the changes.
Removing Unnecessary Attributes
Delete the following unsupported attributes:- preferredLanguage
- addresses (all fields)
- phoneNumbers
Updating Attributes
UpdatedisplayName
-
Edit the
displayNamefield to concatenatefirstName + lastNameinstead of using the defaultdisplayNamevalue from Entra records.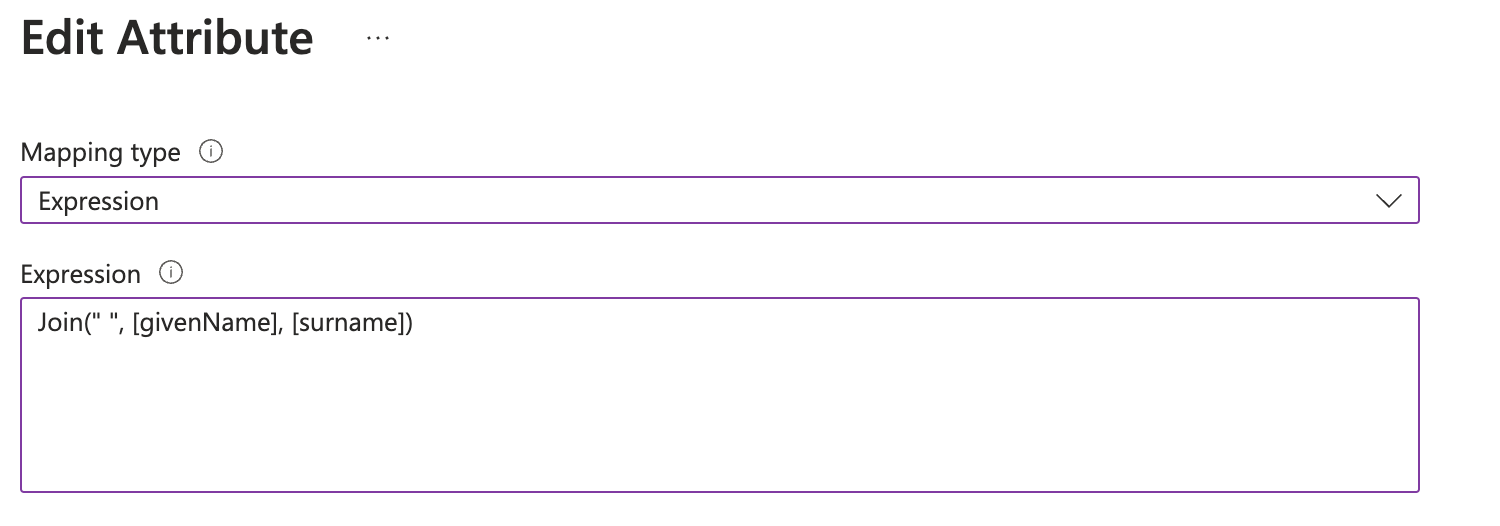
- Save the changes and enable provisioning on the Overview page of the provisioning settings.
Group (Workspace) Provisioning
Portkey supports RBAC (Role-Based Access Control) for workspaces mapped to groups in Entra. You have two options for mapping groups to workspaces: Option 1: Flexible Group Mapping (Recommended) Provision groups with any naming convention from Azure Entra, then map them to workspaces and assign roles directly from Portkey Control Plane. This eliminates the need for specific naming formats.- Provision your groups from Azure Entra (assign groups to the application)
- Navigate to Admin Settings > Authentication Settings > SCIM Provisioning in Portkey
- Use the SCIM Mappings List section to map groups to workspaces and assign roles
This is the recommended approach as it provides flexibility in group naming and easier management of group-to-workspace mappings.
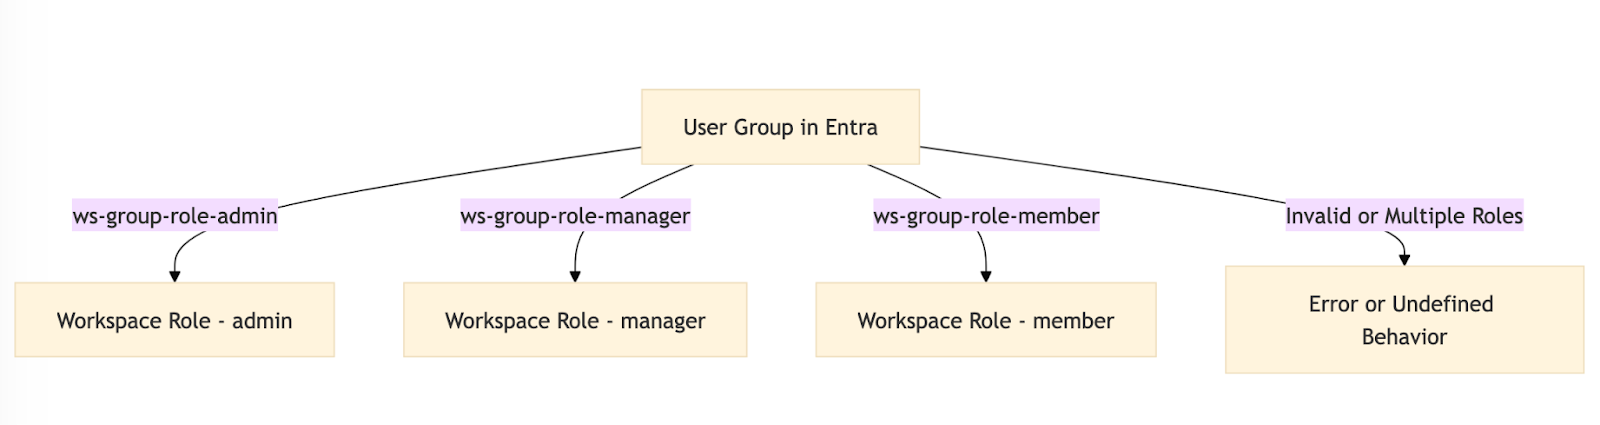
- Format:
ws-{group}-role-{role}- Role: One of
admin,member, ormanager
- Role: One of
- A user should belong to only one group per
{group}.
Sales workspace:
ws-Sales-role-adminws-Sales-role-managerws-Sales-role-member
- Prefix:
ws- - Role Separator:
-role-
ws-{group}{role_separator}{admin,manager,member}
For detailed instructions, see the SCIM Group Management guide.