For Organization Admins: This page is for managing credentials across multiple workspaces. To use AI models in your workspace, see the Model Catalog documentation.
- Save time: Store API keys once, use in many workspaces
- Control access: Decide which workspaces can use which credentials
- Control models: Enable or disable specific models at the Integration level
- Set limits: Different budgets and rate limits per workspace
- Store credentials here (creates an Integration)
- Choose which models are available (enable/disable models)
- Share with workspaces (they see it as a Provider in their Model Catalog)
- Each workspace can use the same credentials with different limits, but only access models you’ve enabled
- Who can use these credentials (which workspaces)
- What models they can access
- How much they can spend (budget limits)
- How fast they can make requests (rate limits)
Why Use Integrations?
Instead of each workspace entering the same API keys separately, store them once and share them:- Save time - No need to re-enter credentials in each workspace
- Control access - Decide which workspaces can use which credentials
- Set limits - Different budgets and rate limits per workspace
- Stay secure - API keys are encrypted and never exposed to end users
- Track everything - See usage and costs across all workspaces
Understanding the Integrations Dashboard
Navigate to the Integrations page in your Portkey organization settings. The page is organized into three tabs, each serving a distinct purpose:All: This is a comprehensive list of all 50+ providers Portkey supports. This is your starting point for connecting a new provider to your organization.Connected: This tab lists all the integrations that you have personally connected at the organization level. It’s your primary view for managing your centrally-governed providers.Workspace-Created: This tab gives you complete visibility and governance over any integrations created by Workspace Admins for their specific workspaces. It ensures that even with delegated control, you maintain a full audit trail and can manage these instances if needed.
Creating an Integration
Let’s walk through creating an Integration for AWS Bedrock as an example:1
Navigate to Integrations
From your admin panel, go to Integrations and click Create New Integration (or click Connect from the
All tab).2
Select Your AI Provider
Choose from 200+ supported providers. Each provider may have different credential requirements.
3
Configure Integration Details
- Name: A descriptive name for this integration (e.g., “Bedrock Production”)
- Slug: A unique identifier used in API calls (e.g., “bedrock-prod”)
- Description: Optional context about this integration’s purpose
- Endpoint Type: Choose between Public or Private endpoints
4
Enter Provider Credentials
Each provider requires different credentials:For OpenAI:
- API Key
- Optional: Organization ID, Project ID
- AWS Access Key
- AWS Secret Access Key
- AWS Access Key ID
- AWS Region
Connect Bedrock with Amazon Assumed Role
How to integrate Bedrock using Amazon Assumed Role Authentication
- Azure OpenAI
- Google Vertex AI
- Anthropic
- Gemini and more…
Configuring Your Integration Access & Limits
After creating your Integration, you’ll need to configure three key aspects that work together to control access and usage:1. Workspace Provisioning
Workspace provisioning determines which teams and projects can access this Integration. This is crucial for maintaining security boundaries and ensuring teams only access approved AI resources.How It Works
When you share credentials with a workspace:- That workspace sees it as an AI Provider in their Model Catalog
- They can use it immediately - no need to enter credentials again
- Set different budgets/rate limits for each workspace
- Revoke access anytime
Setting Up Workspace Provisioning

- In your Integration settings, navigate to Workspace Provisioning
- Select which workspaces should have access:
- All Workspaces: Grants access to every workspace in your organization
- Specific Workspaces: Choose individual workspaces that need access
- For each workspace, click the
Edit Budget & Rate Limitsicon to configure:- Custom budget limits (see Budget Limits section below)
- Custom rate limits (see Rate Limits section below)
- Specific model access
Best Practices
- Principle of Least Privilege: Only provision to workspaces that genuinely need access
- Environment Separation: Create separate Integrations for dev/staging/production
- Regular Audits: Review workspace provisioning quarterly to remove unnecessary access
2. Model Provisioning
Model lists are tied to Integrations. When you create an Integration, you control which models are available. All Providers created from that Integration will only have access to the models you’ve enabled. This is essential for:- Controlling costs: Restrict access to expensive models
- Ensuring compliance: Limit models to approved ones
- Maintaining consistency: Standardize model usage across teams
Setting Up Model Provisioning
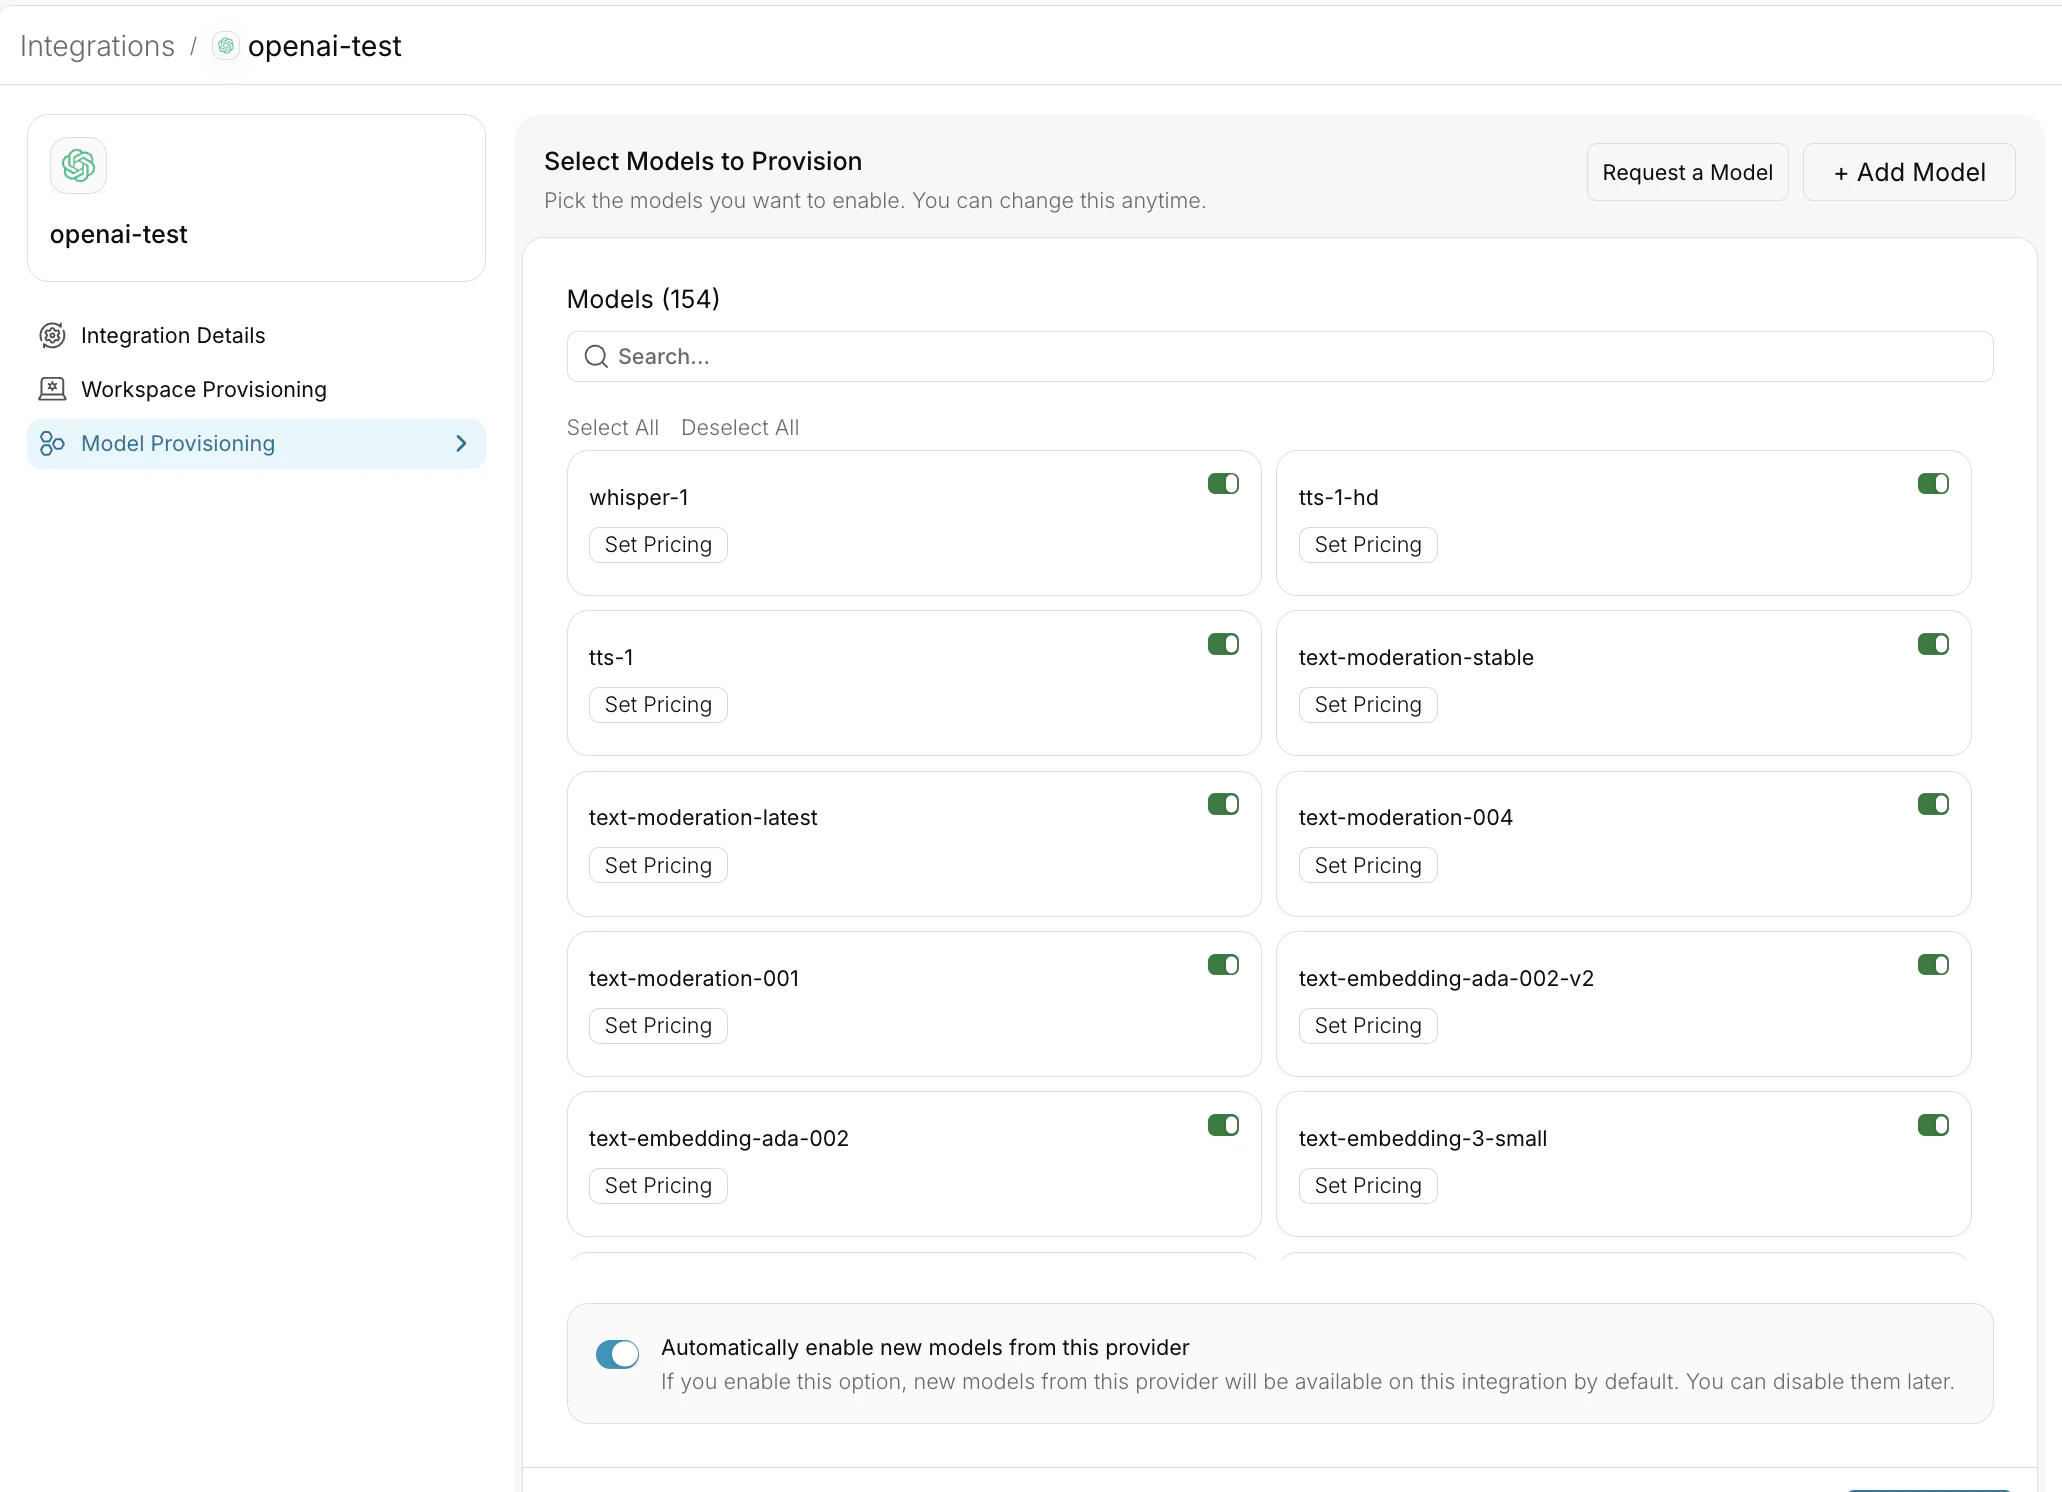
- In your Integration settings, navigate to Model Provisioning
- Select the configuration options:
- Allow All Models: Provides access to all models offered by the provider
- Allow Specific Models: Create an allowlist of approved models
Advanced Model Management
Custom Models
The Model Catalog isn’t limited to standard provider models. You can add:- Fine-tuned models: Your custom OpenAI or Anthropic fine-tunes
- Self-hosted models: Models running on your infrastructure
- Private models: Internal models not publicly available
Custom Models
Add and manage your fine-tuned, self-hosted, or private models
Overriding Model Details (Custom Pricing)
Override default model pricing for:- Negotiated rates: If you have enterprise agreements with providers
- Internal chargebacks: Set custom rates for internal cost allocation
- Free tier models: Mark certain models as free for specific teams
Custom Pricing
Configure custom pricing for models with special rates
3. Budget & Rate Limits
Budget and rate limits are configured within Workspace Provisioning and provide financial and usage guardrails for your AI operations.
Budget Limits
Budget Limits on Integrations provide a simple way to manage your spending on AI providers (and LLMs) - giving you confidence and control over your application’s costs. They act as financial guardrails, preventing unexpected AI costs across your organization. These limits cascade down to all AI Providers created from this Integration.Setting Budget Limits
- In your Integration settings, navigate to Workspace Provisioning
- Select which workspaces should have access:
- All Workspaces: Grants access to every workspace in your organization
- Specific Workspaces: Choose individual workspaces that need access
- Click on the
Edit Budget & Rate Limitsicon to edit the budget limits for the selected workspace - Set your desired budget Limits
- Optionally, Select the
Apply to every workspace where this integration is enabledcheckbox to apply the same budget limits to all workspaces where this integration is enabled
Cost-Based Limits
Set a budget limit in USD that, once reached, will automatically expire the key to prevent further usage and overspending.Token-Based Limits
Set a maximum number of tokens that can be consumed, allowing you to control usage independent of cost fluctuations.Key Considerations for Budget Limits
- Budget limits can be set as either cost-based (USD) or token-based
- The minimum cost limit you can set is $1
- The minimum token limit you can set is 100 tokens
- Budget limits apply until exhausted or reset
- Budget limits are applied only to requests made after the limit is set; they do not apply retroactively
- Once set, budget limits cannot be edited by any organization member
- Budget limits work for all AI provider created on Portkey using the given integration
Alert Thresholds
Set alert thresholds to receive notifications before your budget limit is reached:- For cost-based budgets, set thresholds in USD
- For token-based budgets, set thresholds in tokens
- Receive email notifications when usage reaches the threshold
- Continue using the key until the full budget limit is reached
Periodic Reset Options
Configure budget limits to automatically reset at regular intervals:
- No Periodic Reset: The budget limit applies until exhausted with no automatic renewal
- Reset Weekly: Budget limits automatically reset every week
- Reset Monthly: Budget limits automatically reset every month
- Weekly resets occur at the beginning of each week (Sunday at 12 AM UTC)
- Monthly resets occur on the 1st calendar day of the month, at 12 AM UTC, irrespective of when the budget limit was set prior
Rate Limits
Rate limits control the velocity of API usage, protecting against runaway processes and ensuring fair resource distribution across teams.Setting Rate Limits
- In your Integration settings, navigate to Workspace Provisioning
- Select which workspaces should have access:
- All Workspaces: Grants access to every workspace in your organization
- Specific Workspaces: Choose individual workspaces that need access
- Click on the
Edit Budget & Rate Limitsicon to edit the rate limits for the selected workspace - Set your desired rate Limits
- Optionally, Select the
Apply to every workspace where this integration is enabledcheckbox to apply the same rate limits to all workspaces where this integration is enabled
Configuration Options
Limit Types:- Request-based: Limit number of API calls (e.g., 1000 requests/minute)
- Token-based: Limit token consumption rate (e.g., 1M tokens/hour)
- Per Minute: Limits reset every minute, ideal for fine-grained control
- Per Hour: Limits reset hourly, providing balanced usage control
- Per Day: Limits reset daily, suitable for broader usage patterns
Key Considerations for Rate Limits
- Rate limits can be set as either request-based or token-based
- Time intervals can be configured as per minute, per hour, or per day
- Setting the limit to 0 disables the provider
- Rate limits apply immediately after being set
- Once set, rate limits cannot be edited by any organization member
- Rate limits work for all providers available on Portkey and apply to all organization members who use the provider
- After a rate limit is reached, requests will be rejected until the time period resets
Use Cases for Rate Limits
- Cost Control: Prevent unexpected usage spikes that could lead to high costs
- Performance Management: Ensure your application maintains consistent performance
- Fairness: Distribute API access fairly across teams or users
- Security: Mitigate potential abuse or DoS attacks
- Provider Compliance: Stay within the rate limits imposed by underlying AI providers
Exceeding Rate Limits
When a rate limit is reached:- Subsequent requests are rejected with a specific error code
- Error messages clearly indicate that the rate limit has been exceeded
- The limit automatically resets after the specified time period has elapsed
Monitoring and Analytics
Tracking Spending and Usage
Track spending, usage, and 40+ crucial metrics for any specific AI integration by navigating to the Analytics tab and filtering by the desired key and timeframe.
FAQs
How are provider API keys stored?
How are provider API keys stored?
Your API keys are always encrypted and stored in secure, isolated vaults. They are only decrypted in-memory, within sandboxed workers, at the exact moment a request is made to the provider. This ensures the highest level of security for your credentials.