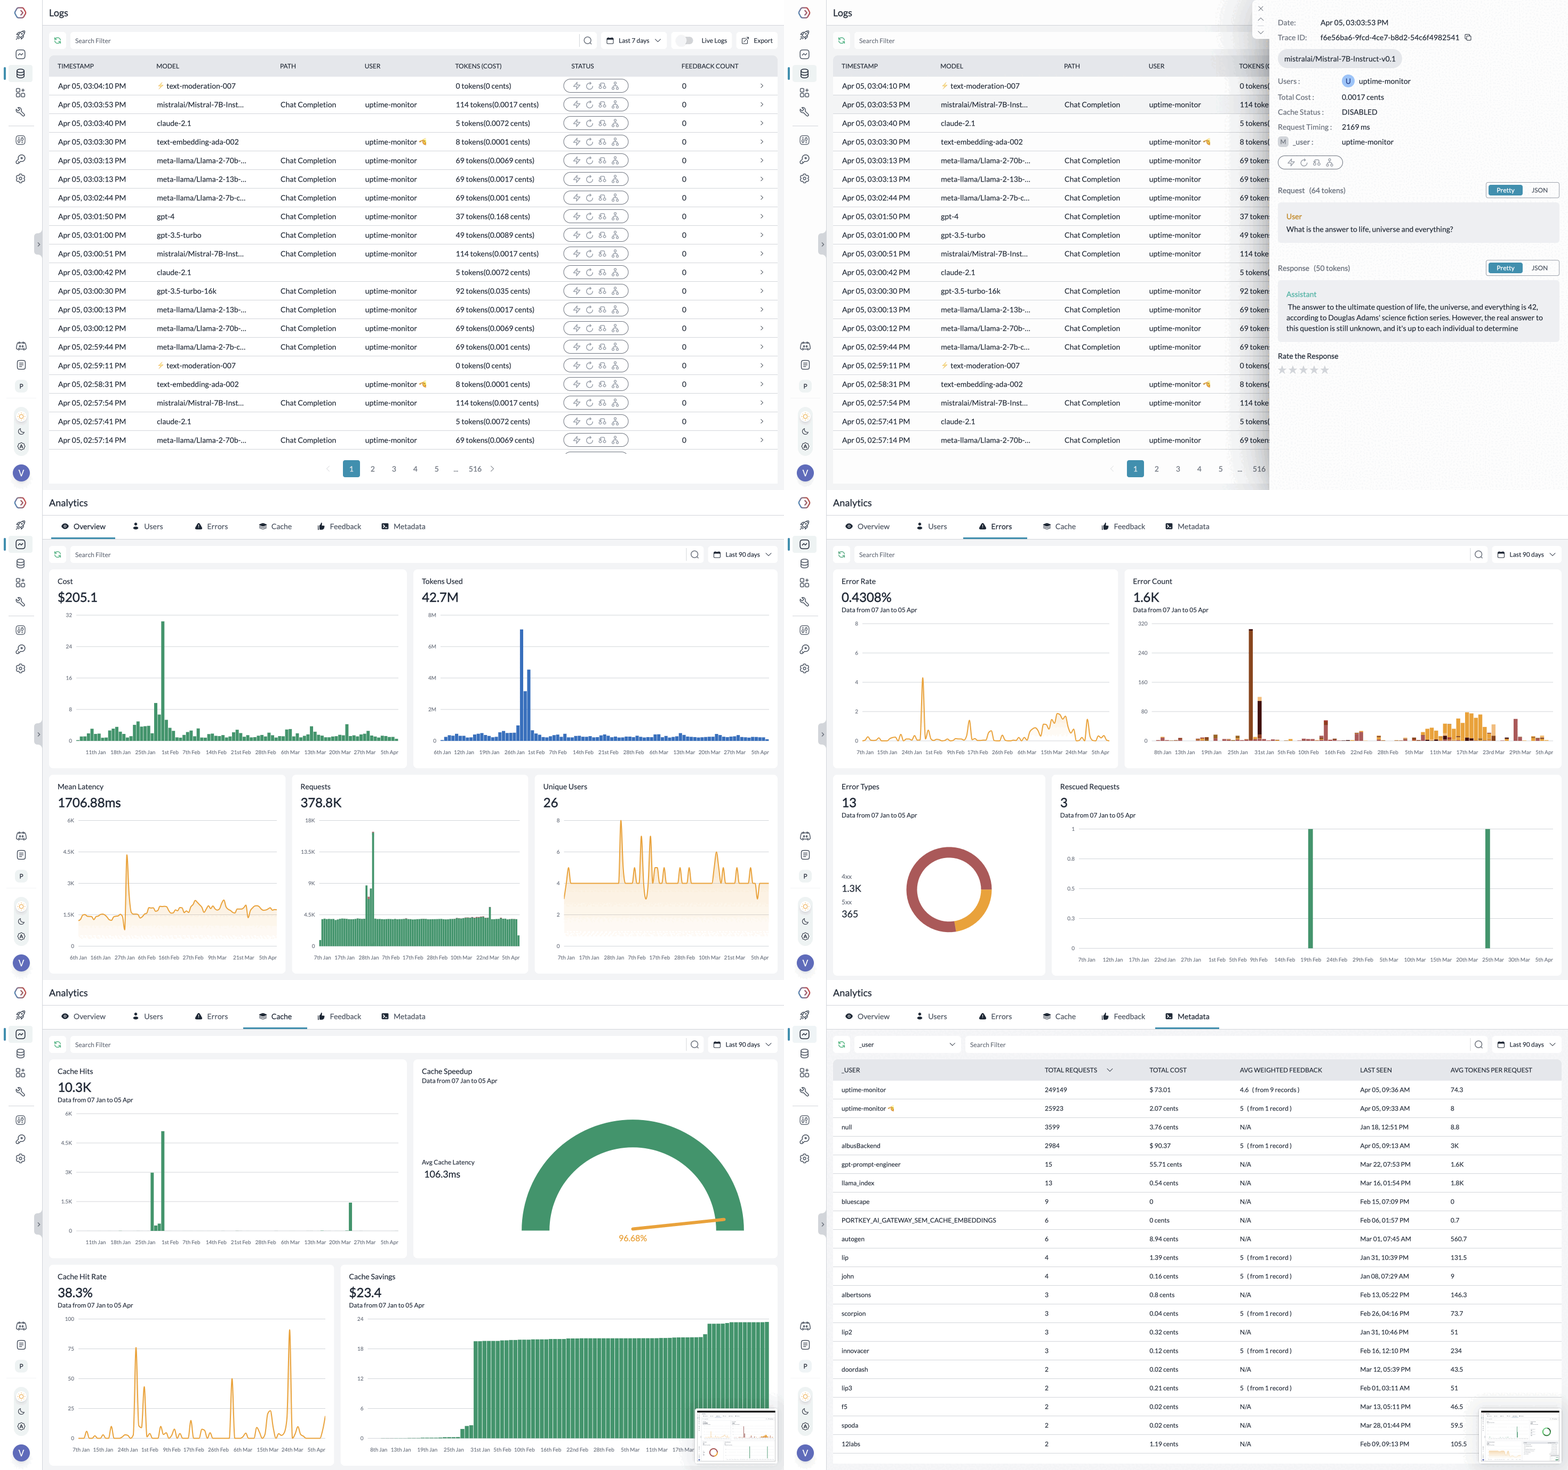
Use Portkey with your Vercel app for:
- Calling 100+ LLMs (open & closed)
- Logging & analysing LLM usage
- Caching responses
- Automating fallbacks, retries, timeouts, and load balancing
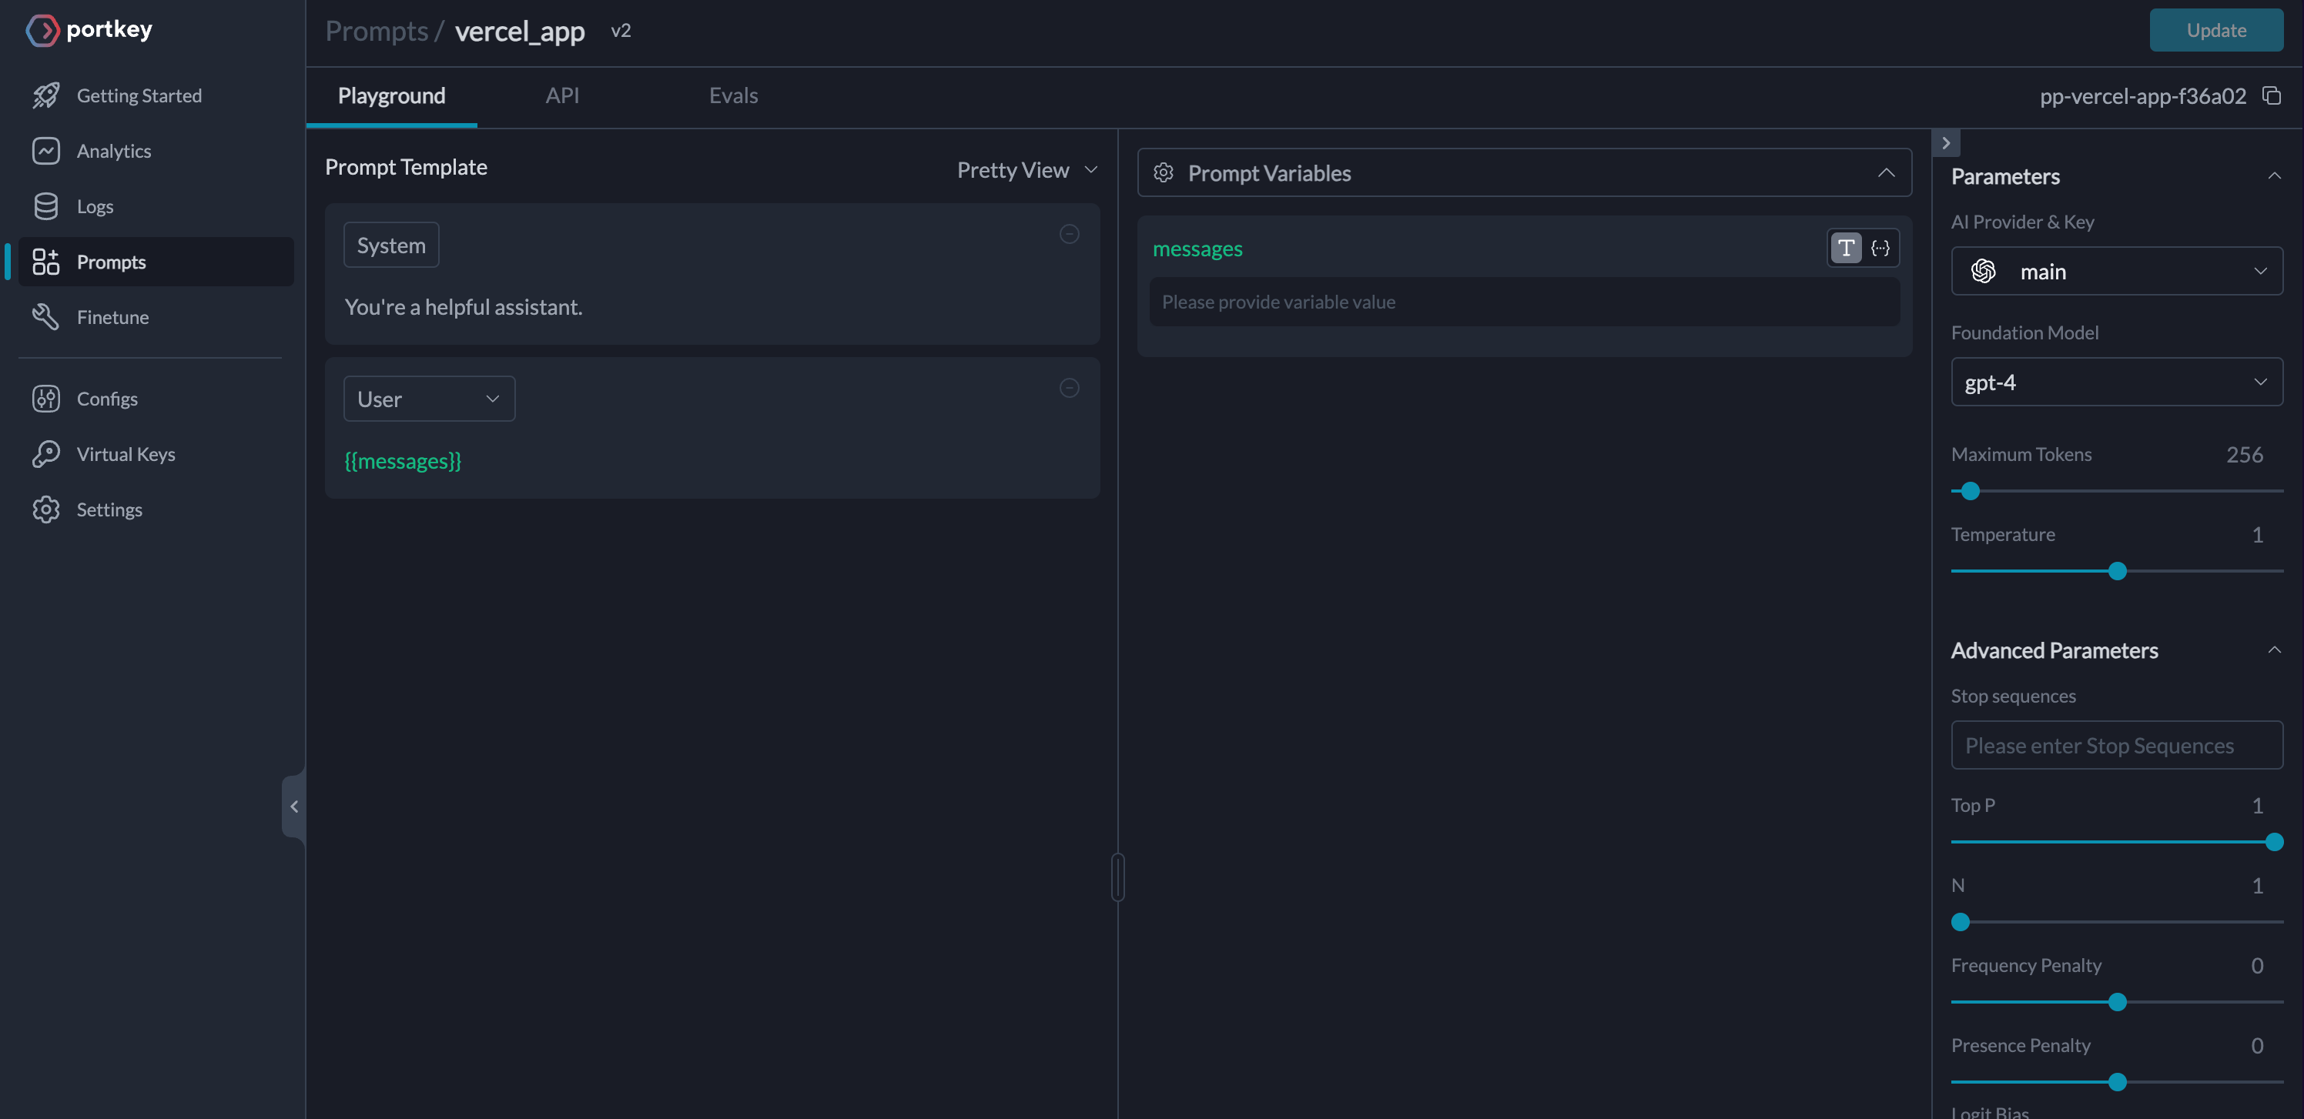
- Managing, versioning, and deploying prompts
- Continuously improving app with user feedback
Guide: Create a Portkey + OpenAI Chatbot
1. Create a NextJS app
Go ahead and create a Next.js application, and install ai and portkey-ai as dependencies.
pnpm dlx create-next-app my-ai-app

cd my-ai-app

pnpm install ai @ai-sdk/openai portkey-ai
2. Add Authentication keys to .env
- Login to Portkey here
- To integrate OpenAI with Portkey, add your OpenAI API key to Portkey’s Virtual Keys
- This will give you a disposable key that you can use and rotate instead of directly using the OpenAI API key
- Grab the Virtual key & your Portkey API key and add them to
.env file:
# ".env"

PORTKEY_API_KEY="xxxxxxxxxx"

OPENAI_VIRTUAL_KEY="xxxxxxxxxx"
3. Create Route Handler
Create a Next.js Route Handler that utilizes the Edge Runtime to generate a chat completion. Stream back to Next.js.
For this example, create a route handler at app/api/chat/route.ts that calls GPT-4 and accepts a POST request with a messages array of strings:
// filename="app/api/chat/route.ts"

import { streamText } from 'ai';

import { createOpenAI } from '@ai-sdk/openai';

import { createHeaders, PORTKEY_GATEWAY_URL } from 'portkey-ai';

// Create a OpenAI client

const client = createOpenAI({

    baseURL: PORTKEY_GATEWAY_URL,

    apiKey: "xx",

    headers: createHeaders({

        apiKey: "PORTKEY_API_KEY",

        virtualKey: "OPENAI_VIRTUAL_KEY"

    }),

})

// Set the runtime to edge for best performance

export const runtime = 'edge';

export async function POST(req: Request) {

  const { messages } = await req.json();

  // Invoke Chat Completion

  const response = await streamText({

    model: client('gpt-3.5-turbo'),

    messages

  })

  // Respond with the stream

  return response.toTextStreamResponse();

}
gpt-3.5-turbo model, and the response will be streamed to your Next.js app.
4. Switch from OpenAI to Anthropic
Portkey is powered by an open-source, universal AI Gateway with which you can route to 100+ LLMs using the same, known OpenAI spec.
Let’s see how you can switch from GPT-4 to Claude-3-Opus by updating 2 lines of code (without breaking anything else).
- Add your Anthropic API key or AWS Bedrock secrets to Portkey’s Virtual Keys
- Update the virtual key while instantiating your Portkey client
- Update the model name while making your
/chat/completions call
- Add maxTokens field inside streamText invocation (Anthropic requires this field)
Let’s see it in action:
const client = createOpenAI({

    baseURL: PORTKEY_GATEWAY_URL,

    apiKey: "xx",

    headers: createHeaders({

        apiKey: "PORTKEY_API_KEY",

        virtualKey: "ANTHROPIC_VIRTUAL_KEY"

    }),

})

// Set the runtime to edge for best performance

export const runtime = 'edge';

export async function POST(req: Request) {

  const { messages } = await req.json();

  // Invoke Chat Completion

  const response = await streamText({

    model: client('claude-3-opus-20240229'),

    messages,

    maxTokens: 200

  })

  // Respond with the stream

  return response.toTextStreamResponse();

}
5. Switch to Gemini 1.5
Similarly, you can just add your Google AI Studio API key to Portkey and call Gemini 1.5:
const client = createOpenAI({

    baseURL: PORTKEY_GATEWAY_URL,

    apiKey: "xx",

    headers: createHeaders({

        apiKey: "PORTKEY_API_KEY",

        virtualKey: "GEMINI_VIRTUAL_KEY"

    }),

})

// Set the runtime to edge for best performance

export const runtime = 'edge';

export async function POST(req: Request) {

  const { messages } = await req.json();

  // Invoke Chat Completion

  const response = await streamText({

    model: client('gemini-1.5-flash'),

    messages

  })

  // Respond with the stream

  return response.toTextStreamResponse();

}
6. Wire up the UI
Let’s create a Client component that will have a form to collect the prompt from the user and stream back the completion. The useChat hook will default use the POST Route Handler we created earlier (/api/chat). However, you can override this default value by passing an api prop to useChat({ api: '...'}).
//"app/page.tsx"

'use client';

import { useChat } from 'ai/react';

export default function Chat() {

  const { messages, input, handleInputChange, handleSubmit } = useChat();

  return (


      {messages.map((m) => (


          {m.role === 'user' ? 'User: ' : 'AI: '}

          {m.content}
      ))}
  );
}
7. Log the Requests
Portkey logs all the requests you’re sending to help you debug errors, and get request-level + aggregate insights on costs, latency, errors, and more.
You can enhance the logging by tracing certain requests, passing custom metadata or user feedback.
Segmenting Requests with Metadata
While Creating the Client, you can pass any {"key":"value"} pairs inside the metadata header. Portkey segments the requests based on the metadata to give you granular insights.
const client = createOpenAI({

    baseURL: PORTKEY_GATEWAY_URL,

    apiKey: "xx",

    headers: createHeaders({

        apiKey: {PORTKEY_API_KEY},

        virtualKey: {GEMINI_VIRTUAL_KEY},

        metadata: {

          _user: 'john doe',

          organization_name: 'acme',

          custom_key: 'custom_value'

        }

    }),

})
Guide: Handle OpenAI Failures
1. Solve 5xx, 4xx Errors
Portkey helps you automatically trigger a call to any other LLM/provider in case of primary failures.Create a fallback logic with Portkey’s Gateway Config.
For example, for setting up a fallback from OpenAI to Anthropic, the Gateway Config would be:
{

  "strategy": { "mode": "fallback" },

  "targets": [{ "virtual_key": "openai-virtual-key" }, { "virtual_key": "anthropic-virtual-key" }]

}
2. Apply Config to the Route Handler
const client = createOpenAI({

    baseURL: PORTKEY_GATEWAY_URL,

    apiKey: "xx",

    headers: createHeaders({

        apiKey: {PORTKEY_API_KEY},

        config: {CONFIG_ID}

    }),

})
3. Handle Rate Limit Errors
You can loadbalance your requests against multiple LLMs or accounts and prevent any one account from hitting rate limit thresholds.
For example, to route your requests between 1 OpenAI and 2 Azure OpenAI accounts:
{

  "strategy": { "mode": "loadbalance" },

  "targets": [

    { "virtual_key": "openai-virtual-key", "weight": 1 },

    { "virtual_key": "azure-virtual-key-1", "weight": 1 },

    { "virtual_key": "azure-virtual-key-2", "weight": 1 }

  ]

}
Guide: Cache Semantically Similar Requests
Portkey can save LLM costs & reduce latencies 20x by storing responses for semantically similar queries and serving them from cache.
For Q&A use cases, cache hit rates go as high as 50%. To enable semantic caching, just set the cache mode to semantic in your Gateway Config:
{

  "cache": { "mode": "semantic" }

}
max-age of the cache and force refresh a cache. See the docs for more information.
Guide: Manage Prompts Separately
Storing prompt templates and instructions in code is messy. Using Portkey, you can create and manage all of your app’s prompts in a single place and directly hit our prompts API to get responses. Here’s more on what Prompts on Portkey can do.
To create a Prompt Template,
- From the Dashboard, Open Prompts
- In the Prompts page, Click Create
- Add your instructions, variables, and You can modify model parameters and click Save
Trigger the Prompt in the Route Handler
import Portkey from 'portkey-ai'

const portkey = new Portkey({

    apiKey: "PORTKEY_API_KEY"

})

export async function POST(req: Request) {

  const { movie } = await req.json();

  const moviePromptRender = await portkey.prompts.render({

        promptID: "PROMPT_ID",

        variables: { "movie": movie }

    })

  const messages = moviePromptRender.data.messages

  const response = await streamText({

    model: client('gemini-1.5-flash'),

    messages

  })

  return response.toTextStreamResponse();

}
Talk to the Developers
If you have any questions or issues, reach out to us on Discord here. On Discord, you will also meet many other practitioners who are putting their Vercel AI + Portkey app to production. Last modified on January 28, 2026


