- Every Claude Desktop conversation routes through one governed gateway
- Spend caps and rate limits enforce automatically per team and environment
- Content guardrails apply on every request
- Developers paste a key plus a header and they’re online
- You see every request, every cost, every policy decision in Portkey
1. Add provider integrations
Providers are the upstream LLM accounts Portkey calls on your behalf. Connect every model source your org uses so you can route between them later. Go to Model Catalog → Add Provider.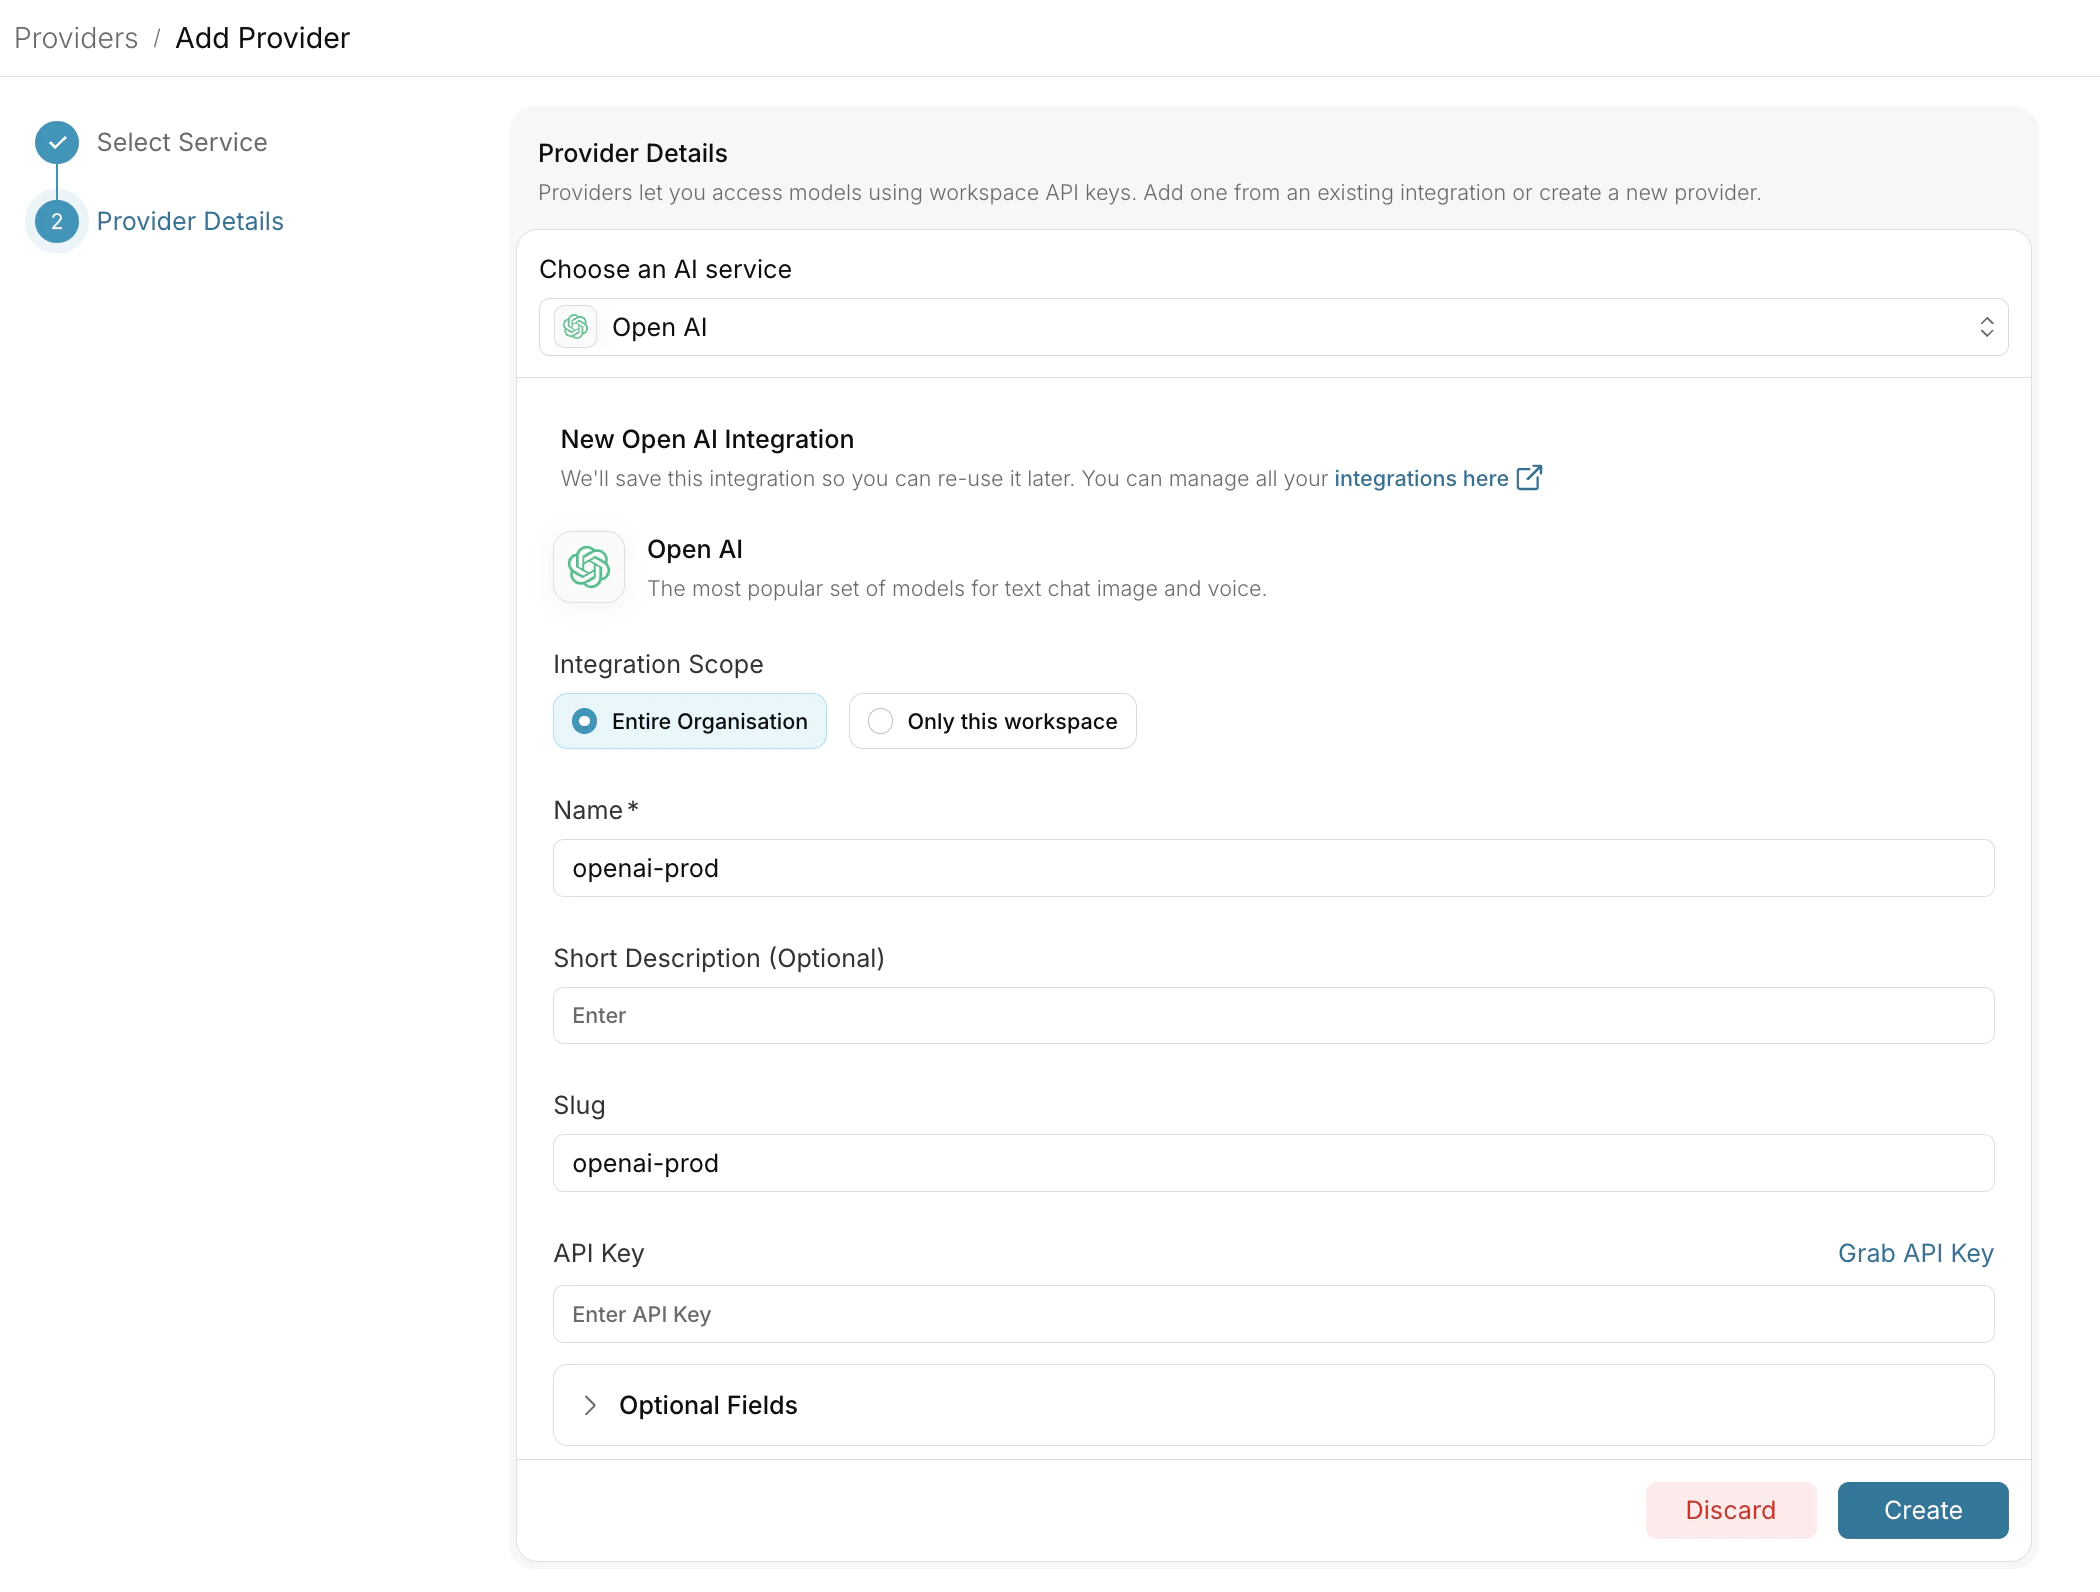
Anthropic
Direct API access
AWS Bedrock
Cross-region inference
Vertex AI
Google Cloud platform
2. Create configs
Configs are how you control which model and provider developers hit, without them changing anything in Claude Desktop. Create one config per team or environment so you can tune routing independently for each.Naming convention:
desktop-{team}-{env}. Examples: desktop-eng-prod, desktop-support-prod, desktop-eng-dev.Add fallbacks for reliability
Add fallbacks for reliability
Add load balancing
Add load balancing
Enable caching
Enable caching
3. Set up governance
Governance is the layer that prevents Claude Desktop from becoming a runaway cost or compliance problem. You apply controls at the config or workspace level, and they enforce automatically on every request.Budget Limits
Cap spend by team, environment, or individual user.
Rate Limits
Protect infrastructure and ensure fair usage across teams.
Guardrails
Content filtering, PII detection, and custom security rules.
4. Create scoped API keys
API keys are what you hand to your developers. Each key inherits a config and a set of governance controls, so you can give different teams different routing and limits without explaining any of it to them. Go to API Keys and create one key per team or environment.Naming convention:
claude-desktop-{team}-{env}. Example: claude-desktop-eng-prod.| Attachment | Purpose |
|---|---|
| Config (from step 2) | Controls model routing and reliability features for requests using this key |
| Budget and rate-limit controls (from step 3) | Enforces spend and usage limits per key |
Workspace scope is automatic. Every API key belongs to the workspace it was created in.
5. Define your metadata standard
Metadata is how Portkey knows who is making each request. Claude Desktop sends it as a JSON header (x-portkey-metadata) on every call. Portkey reads those fields and uses them for attribution, filtering, and routing decisions.
This step has two parts: pick the schema, then hand the template to your developers.
Pick a schema
Decide which fields to track. We recommend these four:| Field | Purpose | Example |
|---|---|---|
tenant | Organization or sub-org | acme |
team | Functional team | engineering, support |
user | Individual user identity | alice@acme.com |
env | Deployment environment | prod, staging, dev |
What Portkey does with these fields
Once your schema is set, every request appears in Portkey tagged with these values. Here’s what they unlock:| Use case | How it works |
|---|---|
| Filter Logs | Search by any field combination (for example, all requests where team=support and env=prod) |
| Attribute spend in Analytics | Group cost, tokens, and latency by team, tenant, user, or env |
| Conditional routing in configs | Route differently based on metadata values (for example, send env=dev traffic to a cheaper model) |
| Audit trail | Every request includes user for compliance and security reviews |
Hand a template to developers
Send each developer this template alongside their team’s API key. They paste it into Claude Desktop once and never think about it again.| Setting | Value |
|---|---|
| Gateway base URL | https://api.portkey.ai (or your self-hosted gateway URL) |
| Gateway API key | (team-scoped key) |
| Gateway auth scheme | bearer |
| Extra header name | x-portkey-metadata |
| Extra header value | {"tenant":"acme","user":"<their-email>","team":"<their-team>","env":"prod"} |
6. Monitor and iterate
The work isn’t done at rollout. Use Portkey to track outcomes and tune the setup based on real usage.Logs
Verify routing decisions and policy triggers per request.
Analytics
Compare spend, tokens, and latency by team, tenant, or environment.
Operations
Tune model routing and limits based on actual usage patterns.
Pre-launch checklist
Before distributing keys to developers, run through each of these checks. Skip any one and you risk learning about the gap from a developer instead of a dashboard.Requests appear in Logs with correct metadata
Send a test request from Claude Desktop. Confirm it shows up in Portkey Logs with all the metadata fields you defined in step 5.
Policies trigger correctly
Test each policy you configured: budget block, rate limit, guardrail. Confirm Portkey enforces them as expected.
Correct model responds
Check the
model field in the log entry. It should match what your config specifies, not whatever Anthropic’s default is.FAQ
Can I roll this out gradually?
Can I roll this out gradually?
Yes. Issue keys to one team first, validate the setup, then expand. The metadata
team field makes it easy to spot which teams are live and which are still on the default Anthropic endpoint.What happens if a developer changes their metadata header?
What happens if a developer changes their metadata header?
They can. Metadata is a hint that Portkey trusts. If you need authoritative attribution, scope each developer’s API key narrowly so the key itself enforces team and environment.
Do I need separate configs per provider, or one config with fallbacks?
Do I need separate configs per provider, or one config with fallbacks?
For most rollouts: one config per team with fallbacks built in. Create separate configs only when teams have genuinely different routing needs (for example, regulated tenants on Bedrock-only).
How do I revoke access for a specific user?
How do I revoke access for a specific user?
Revoke their workspace membership in Portkey. Their API key stops working immediately. If multiple users share a key, rotate the key and re-issue to the remaining users.
Can I see what an individual user is asking Claude?
Can I see what an individual user is asking Claude?
Logs show the prompt content unless you’ve configured request redaction. For privacy-sensitive deployments, enable PII redaction guardrails before rollout.