- Unified access to 1600+ LLMs through a single API
- Real-time cost tracking and per-user attribution
- Enterprise governance with budget limits and access controls
- Reliability features like fallbacks, caching, and retries
Choose Your Integration Path
Individual users: complete the workspace setup and one integration option below.
1. Prepare Your Portkey Workspace
1
Add Provider
Go to Model Catalog → AI Providers and add your provider (OpenAI, Anthropic, etc.) with your API credentials.
2
Get Model Slugs
Go to Model Catalog → Models and copy the slugs for models you want to use.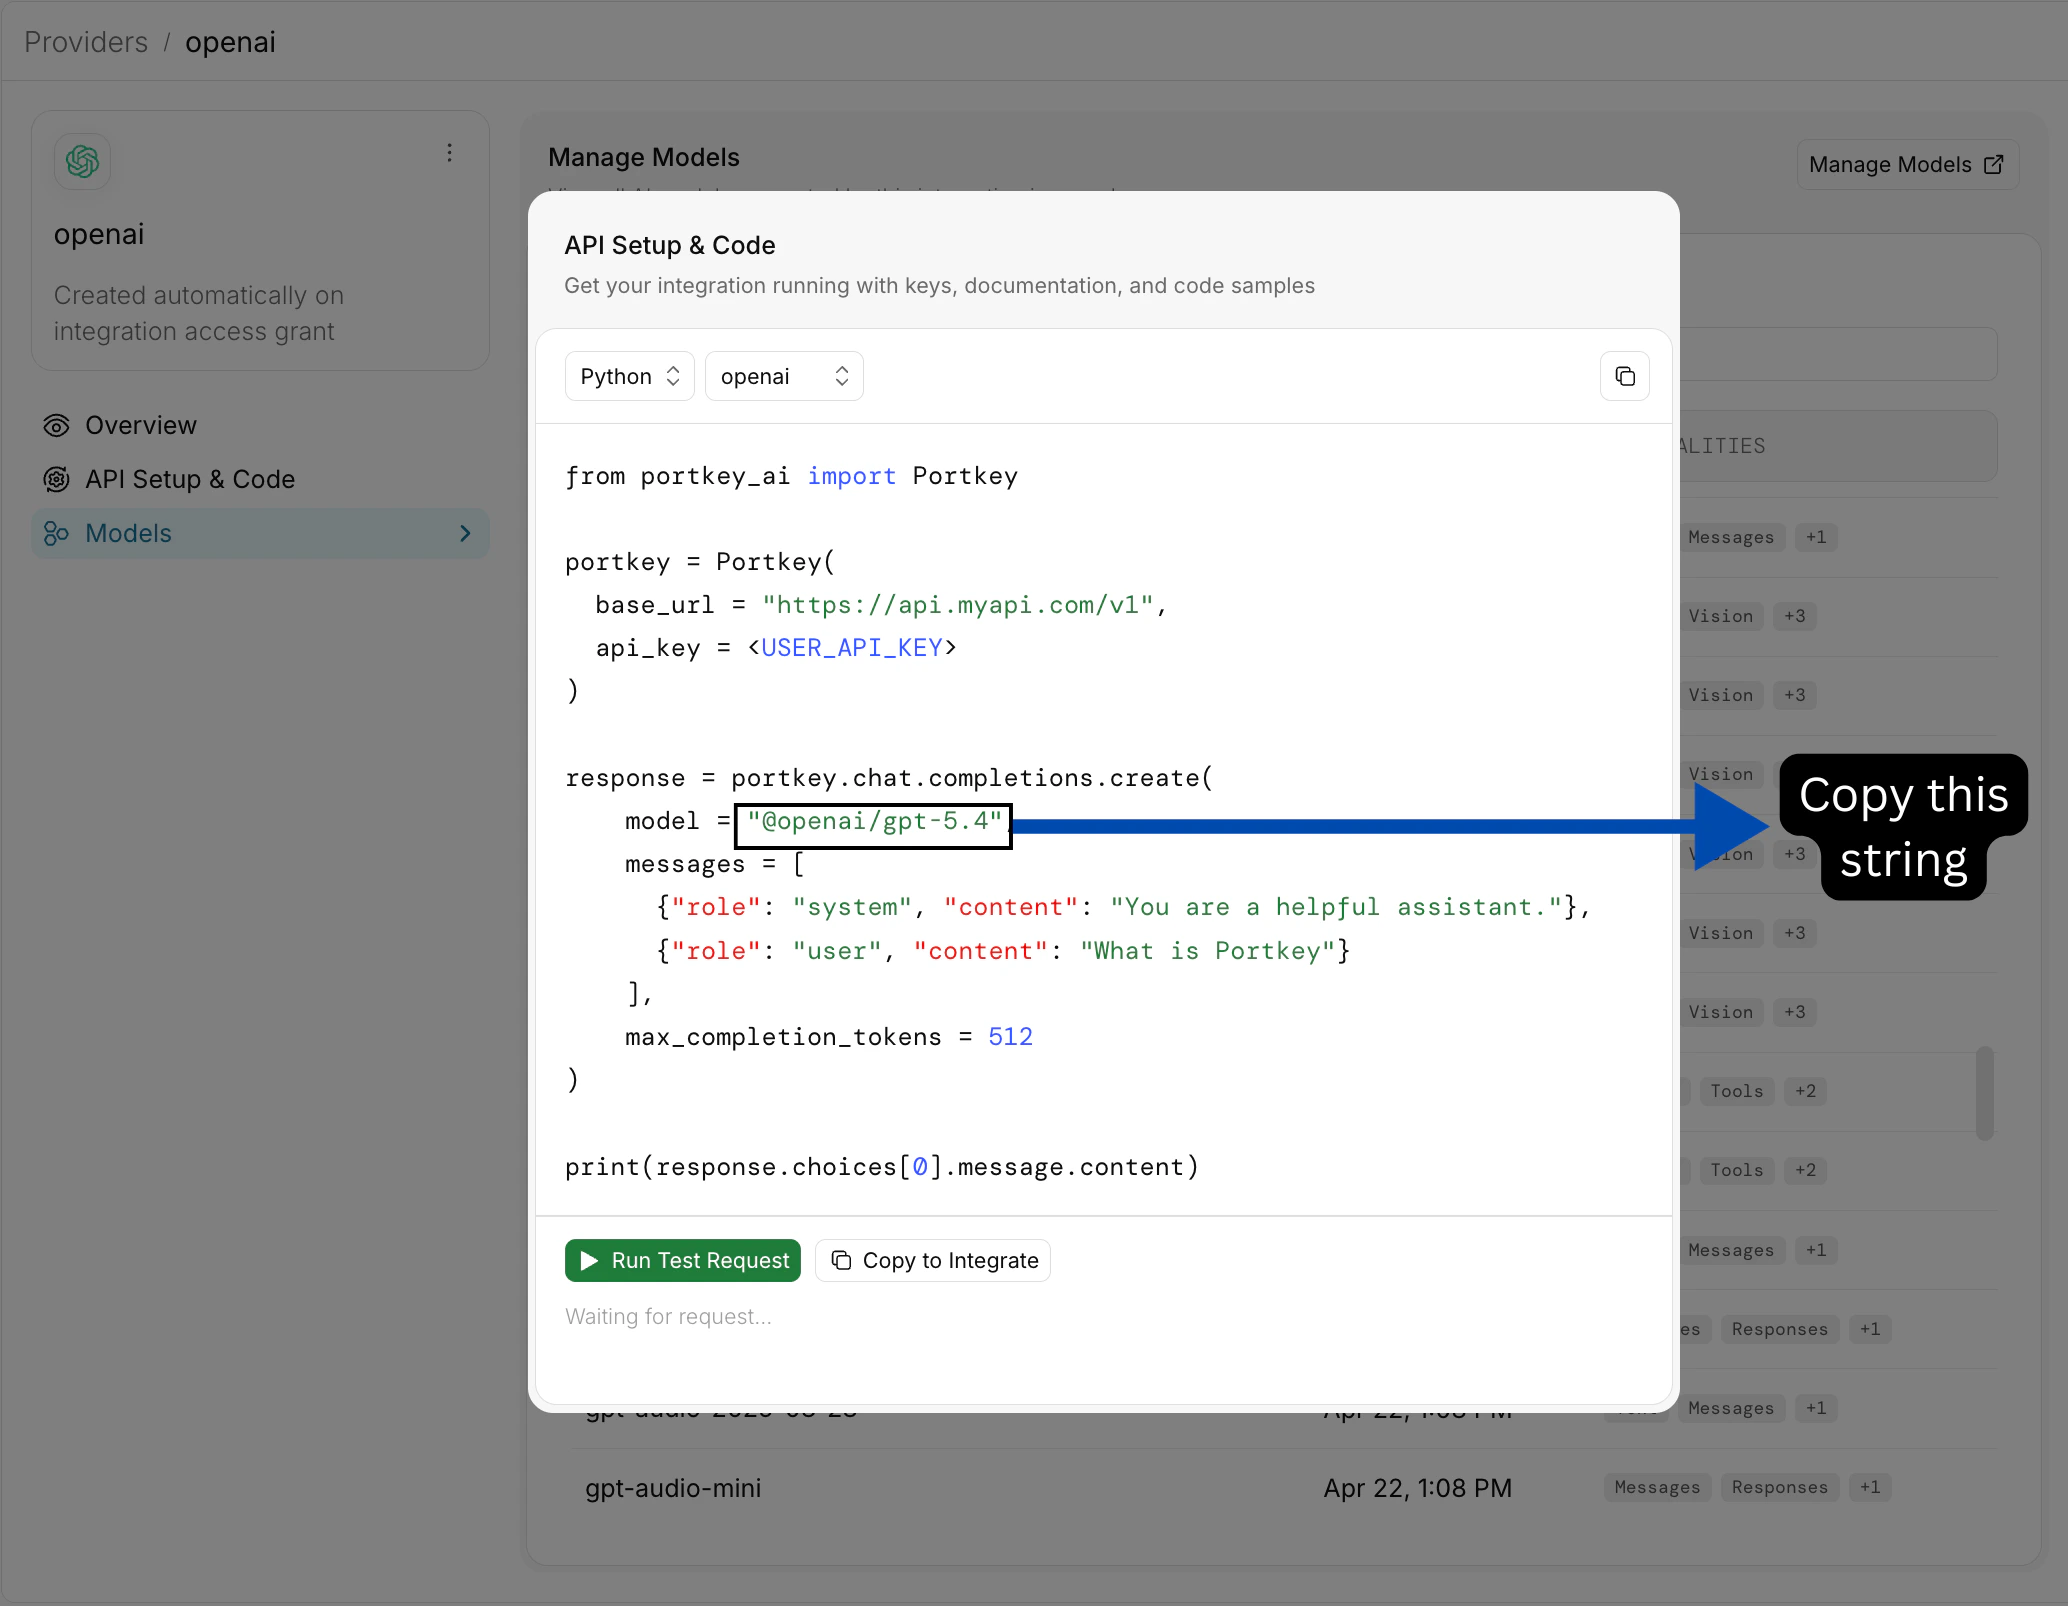
@provider-slug/model-name (e.g., @openai-prod/gpt-4o)3
Create Portkey API Key
Go to API Keys → Create New API Key. Optionally attach a default config for advanced features.
2. Connect Open WebUI to Portkey
Option A: Direct OpenAI-Compatible Connection
1
Access Admin Panel
Open WebUI → Admin Panel → Settings → Connections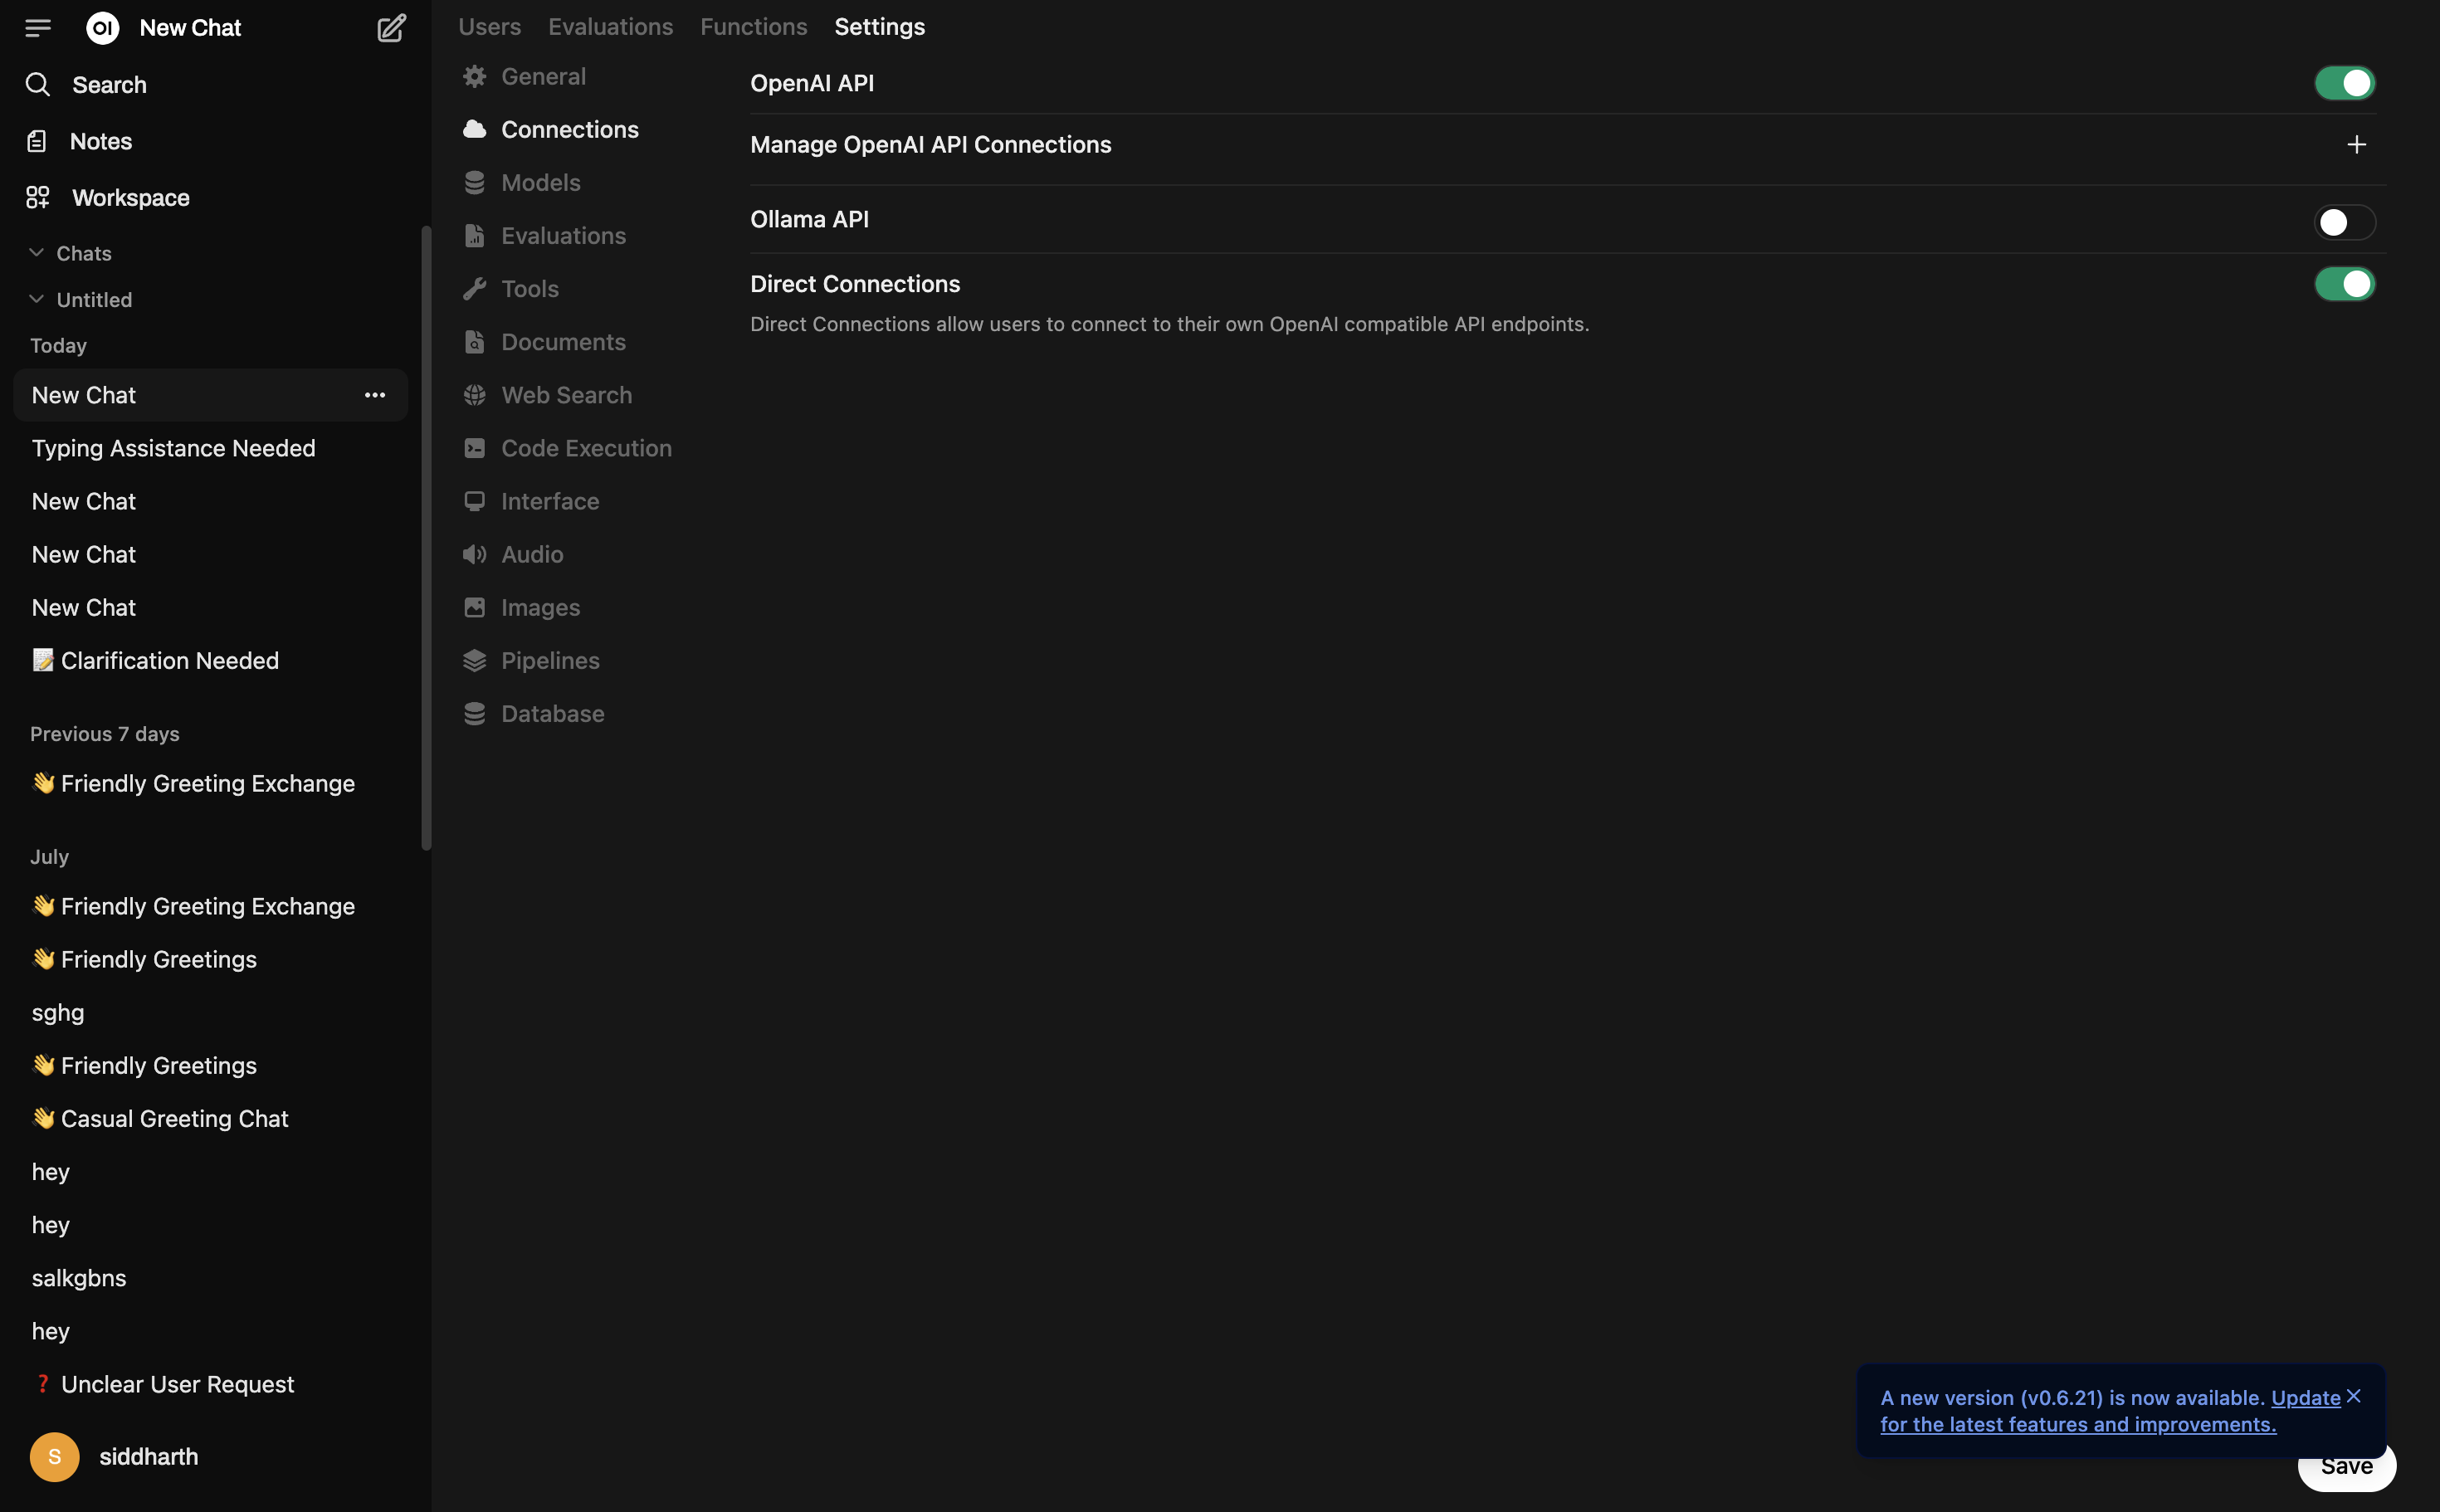
2
Enable Direct Connections
Turn on Direct Connections and OpenAI API toggle, then click + next to Manage OpenAI API Connections.
3
Configure Portkey Connection

Anthropic models require Max Tokens. Set it in the settings icon (top right).
Option B: Portkey Manifold Pipe (Enterprise)
The Manifold Pipe solves a critical enterprise problem: per-user attribution with shared API keys. In typical deployments, a shared API key means all requests appear anonymous in logs. The Manifold Pipe automatically forwards Open WebUI user context (email, name, role) to Portkey, enabling true per-user cost tracking and governance.Per-User Attribution
Track which user made each request—even with shared API keys.
Structured Metadata
Forward user context (email, name, role, chat ID) for filtering and analytics.
Auto Model Discovery
Automatically populate model dropdown from your Model Catalog.
Built-in Retries
Exponential backoff for non-streaming requests.
portkey_manifold_pipe.py
portkey_manifold_pipe.py
portkey_manifold_pipe.py
1
Install the Pipe
- Open WebUI → Admin Panel → Functions tab
- Click + to create a new function
- Paste the code from the accordion above
- Name it Portkey Function and save
2
Configure Valves
Select the
PORTKEY pipe and configure:3
Verify User Attribution
Chat in Open WebUI, then check Portkey Logs. User email, name, and role appear in request metadata—filter by user, track costs per team member.
What You’ll See in Portkey
User emails appear directly in the User column of your logs—no need to click into individual entries.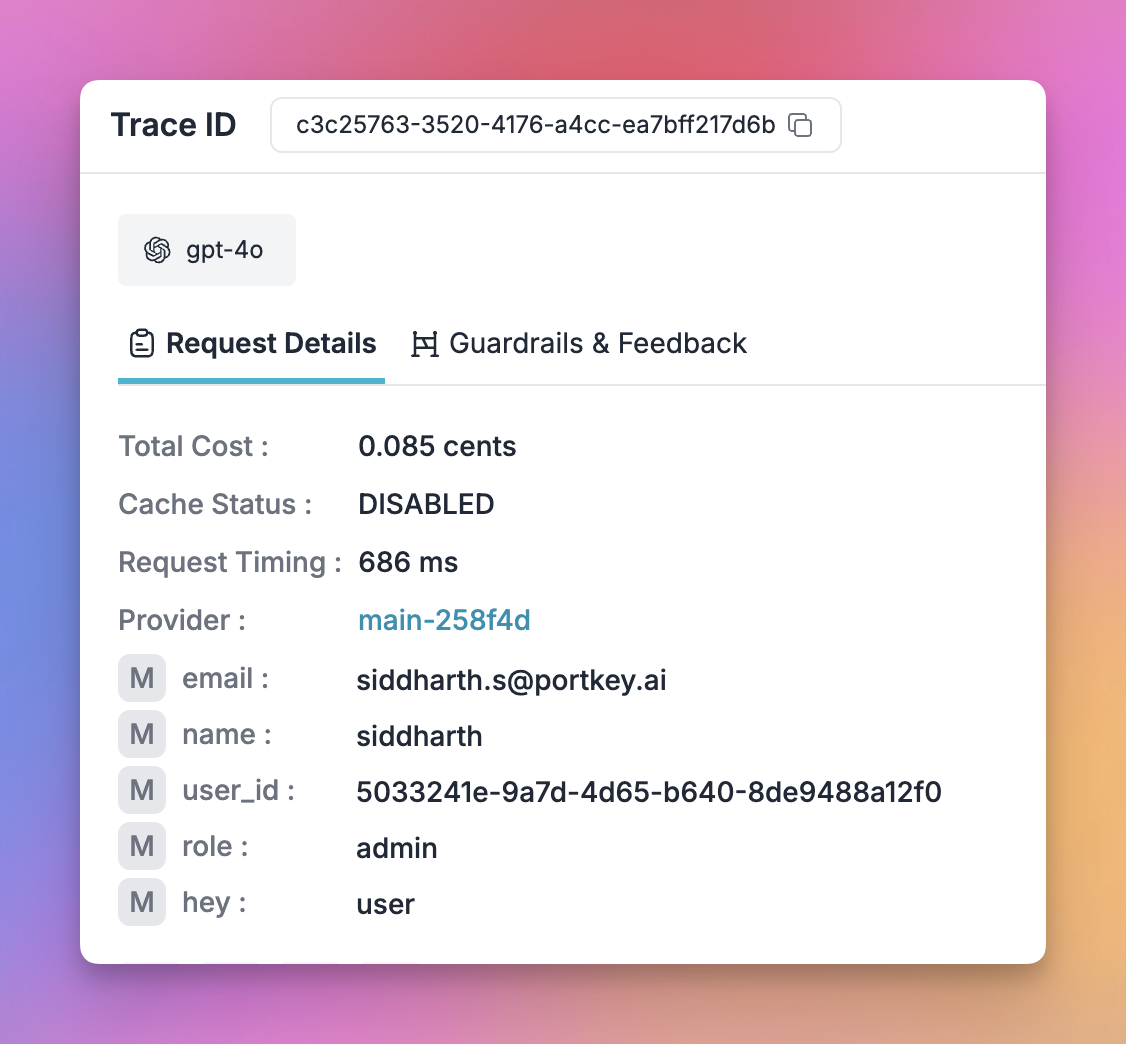
How the Manifold Pipe Works
__user__ context object and formats it as Portkey metadata.
3. Enterprise Governance
Budget Controls & Rate Limits
Budget Controls & Rate Limits
Create providers per team with budget & rate limits in Model Catalog.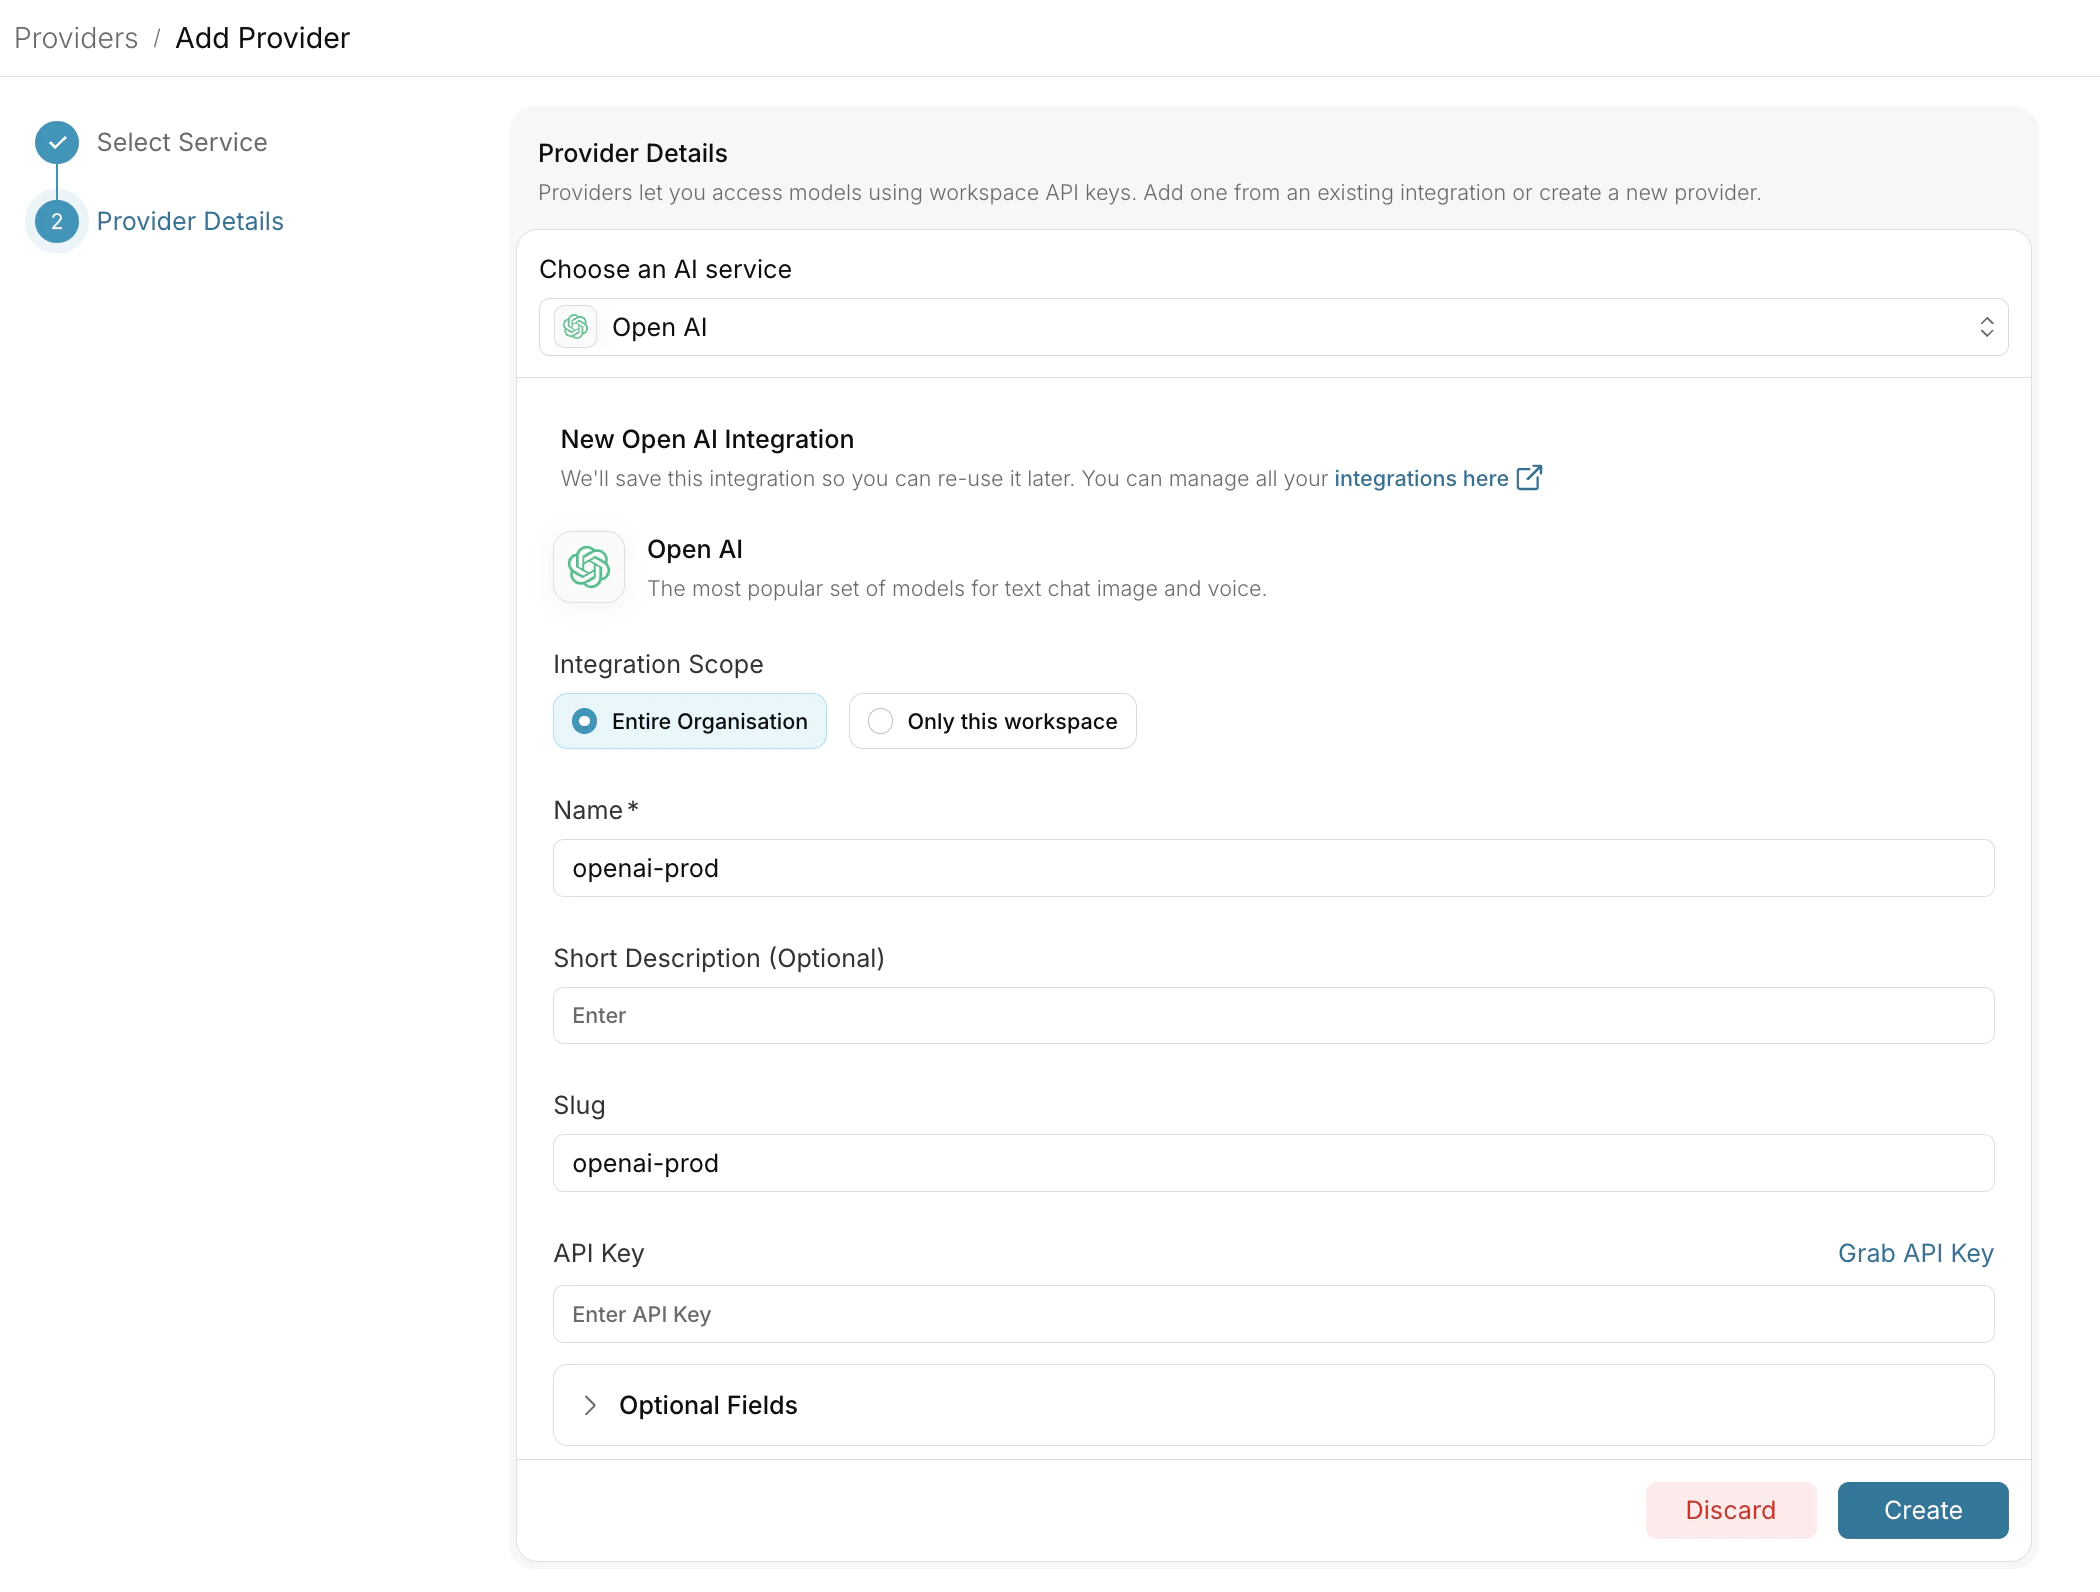
Model Access Rules
Model Access Rules
Use Model Catalog to provision which models are exposed to each workspace.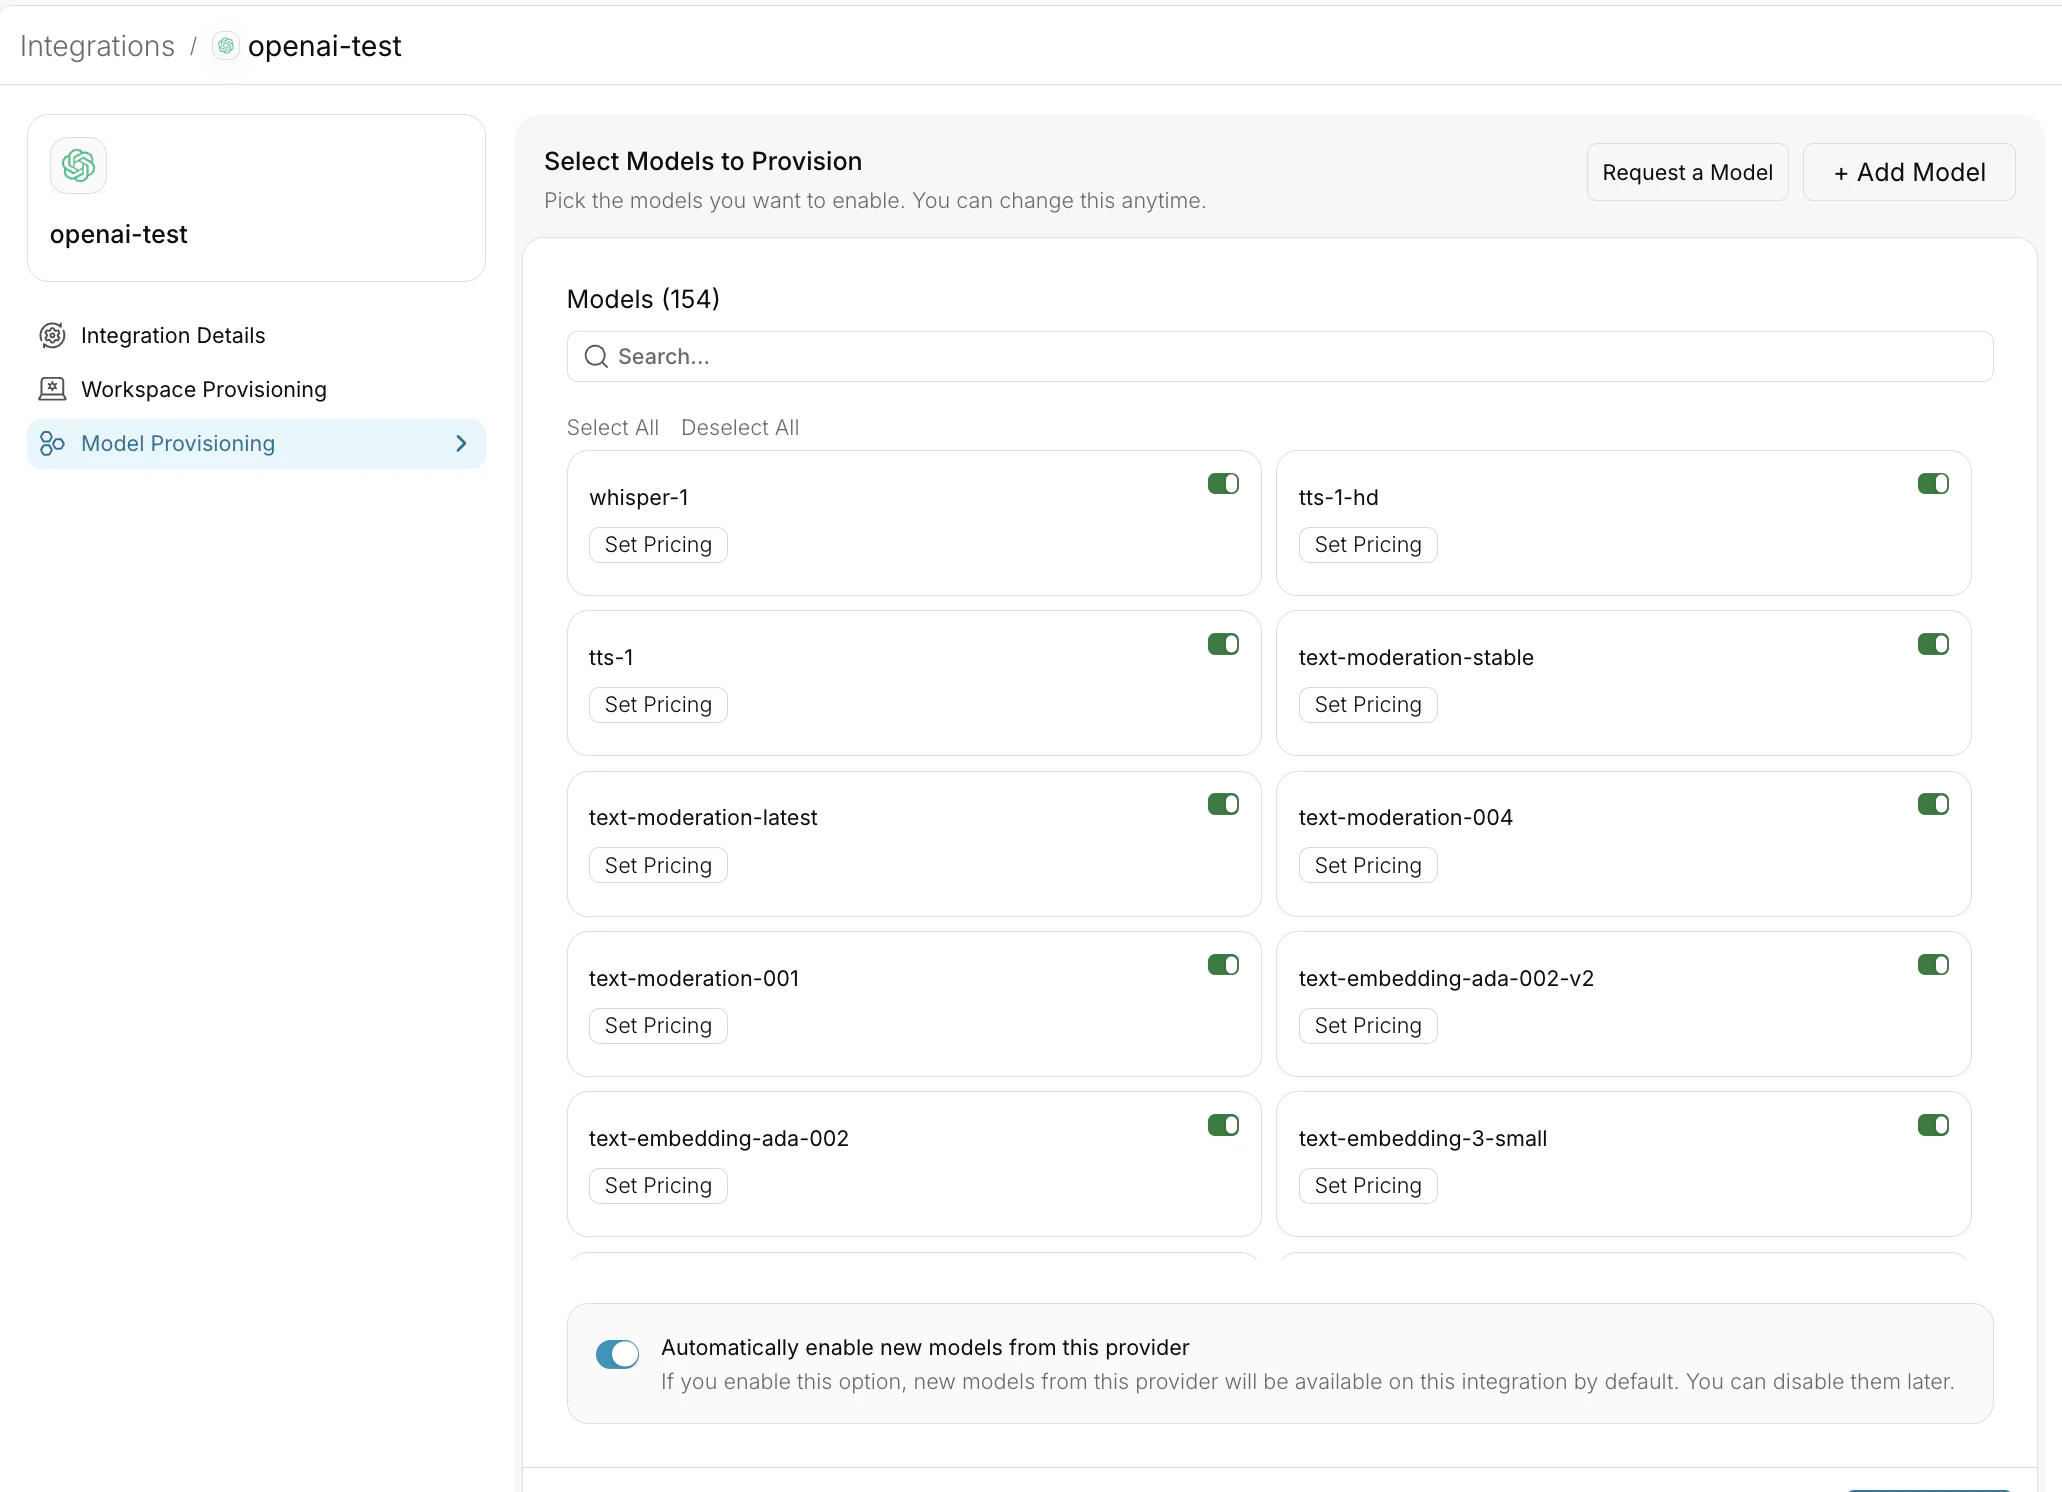
Routing Configuration
Routing Configuration
Create configs for load balancing, fallbacks, and caching:Attach configs to API keys in Configs Library. Update anytime without redeploying Open WebUI.
Team-Specific API Keys
Team-Specific API Keys
Create API keys with metadata for tracking and scoped permissions:
4. Image Generation
1
Configure Image Settings
Open WebUI → Admin Panel → Settings → Images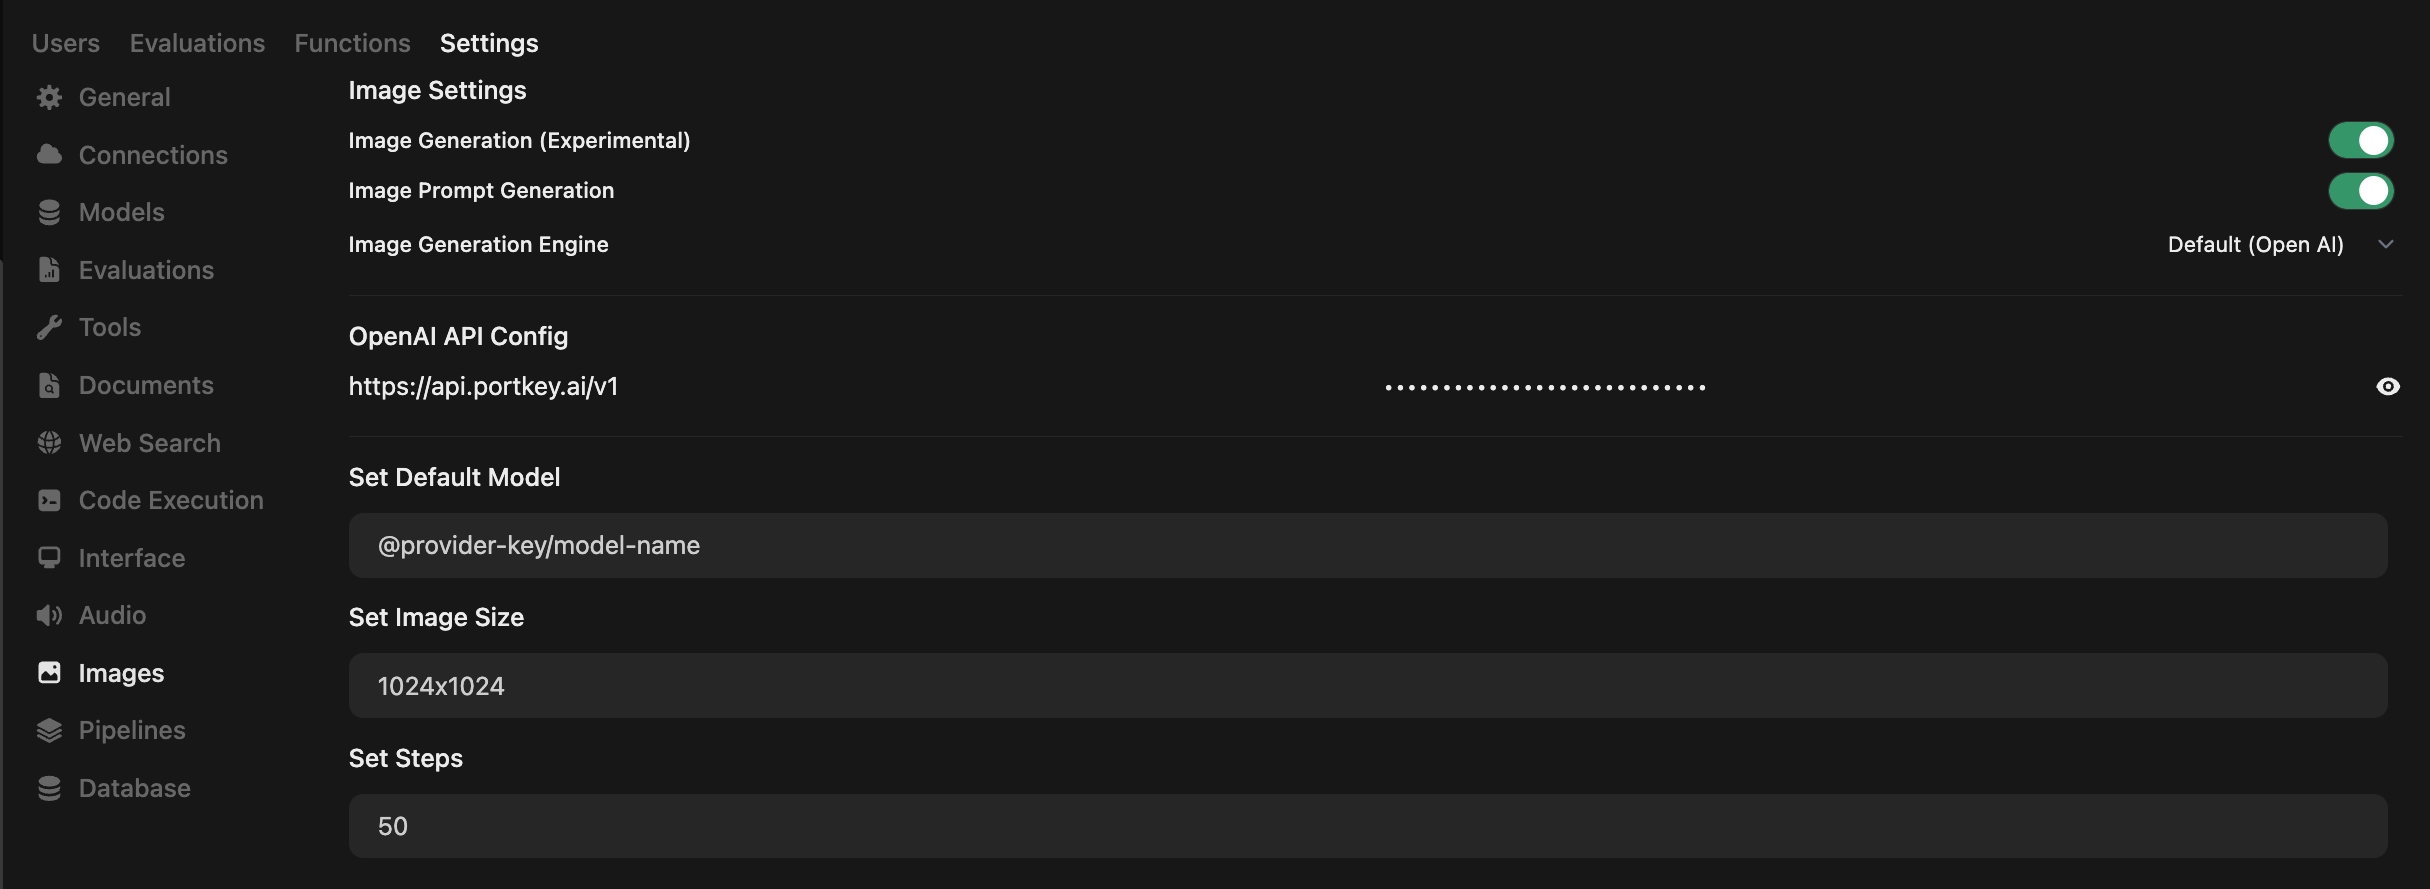
2
Model-Specific Sizes

For other providers (Gemini, Vertex AI), add parameters via
override_params in a default config.Portkey Features
Observability
Track 40+ metrics: cost, tokens, latency. Filter by custom metadata.
1600+ LLMs
Switch providers by changing the model slug in your config.
Guardrails
PII detection, content filtering, compliance controls.
Custom Metadata
Filter logs, track usage, attribute costs by team.
Reliability
Fallbacks
Auto-switch to backup on failure.
Load Balancing
Distribute requests by weight.
Caching
Reduce costs with response caching.
Retries
Exponential backoff on failures.
Conditional Routing
Route by metadata conditions.
Budget Limits
Control spending per team.
Enterprise
SSO
SAML 2.0, Okta, Azure AD support.
Organization Management
Workspaces, teams, RBAC.
Audit Logs
Access control and compliance tracking.
Budget Controls
Granular spending limits.
FAQs
Can I use multiple LLM providers with the same API key?
Can I use multiple LLM providers with the same API key?
Yes. Create multiple providers in Model Catalog, add them to a single config, and attach that config to your API key.
How do I track costs for different teams?
How do I track costs for different teams?
Create separate providers per team, use metadata tags in configs, or set up team-specific API keys. Monitor in the analytics dashboard.
What happens if a team exceeds their budget limit?
What happens if a team exceeds their budget limit?
Requests are blocked, admins notified, usage stats remain visible. Adjust limits as needed.
Next Steps
For enterprise support, contact our enterprise team.